


10
AutoView 1000R/AutoView 2000R Installer/User Guide
Chapter 2: Installation
11
cabinet (if not already installed),
stabilize the rack in a permanent
location.
Install your equipment starting at the bottom of the
rack cabinet, then work to
the top. Avoid
uneven loading or overloading of
rack cabinets.
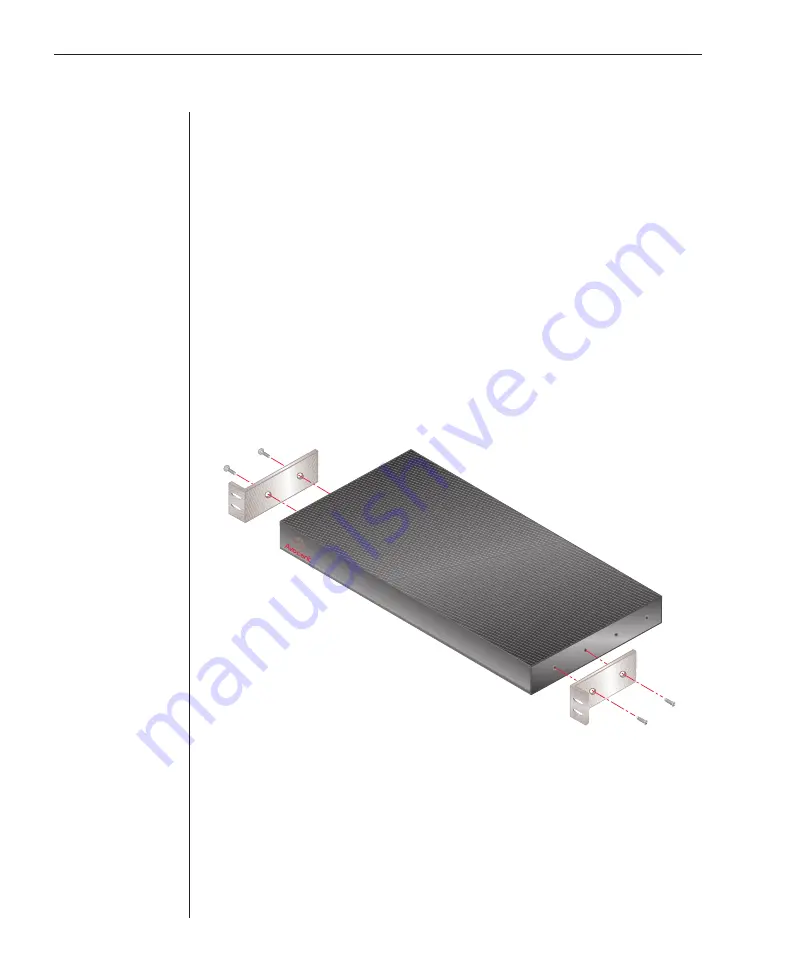
To install the 1U switch mounting bracket:
1. Line up the holes in the “long side” of the kit’s side brackets with the
screw holes in the switch.
2. With a Phillips screwdriver, fasten the mounting brackets to the switch
using two 8/32” x 1/2” pan head screws on each side.
3. Attach the four cage nuts or clip nuts to the rack mounting flange of the
rack cabinet so that the nut is positioned on the inside of the rack.
4. Mount the switch assembly to the rack cabinet by matching the holes in
the “short side” of each bracket to an appropriate set of matching holes on
your rack cabinet. Next, insert the combination hex head screws through
the slots in the bracket and the holes in the mounting rail, then into the
cage nuts or clip nuts.
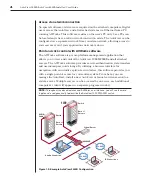
Figure 2.1: AutoView 1000R/2000R Horizontal Installation
Содержание AutoView 1000R
Страница 1: ...Installer User Guide AutoView 1000R AutoView 2000R...
Страница 6: ......
Страница 7: ...Contents Features and Benefits 3 Safety Precautions 5 1 Product Overview...
Страница 8: ......
Страница 12: ...6 AutoView 1000R AutoView 2000R Installer User Guide...
Страница 14: ......
Страница 22: ...16 AutoView 1000R AutoView 2000R Installer User Guide...
Страница 24: ......
Страница 43: ...Contents Configuring the Terminal Menu 39 4 Terminal Operations...
Страница 44: ......
Страница 48: ......