AVE GENIO 10 Скачать руководство пользователя страница 9

          User guide GENIO 10 


         Page 9 


4.    Advanced features 

4.1    Creating a new preset 


This section describes how to program one of the 20 preset slots, for example, give a preset name and select 
the desired master volume and outputs. 
First turn the unit off with the main on/off switch iin the back. 
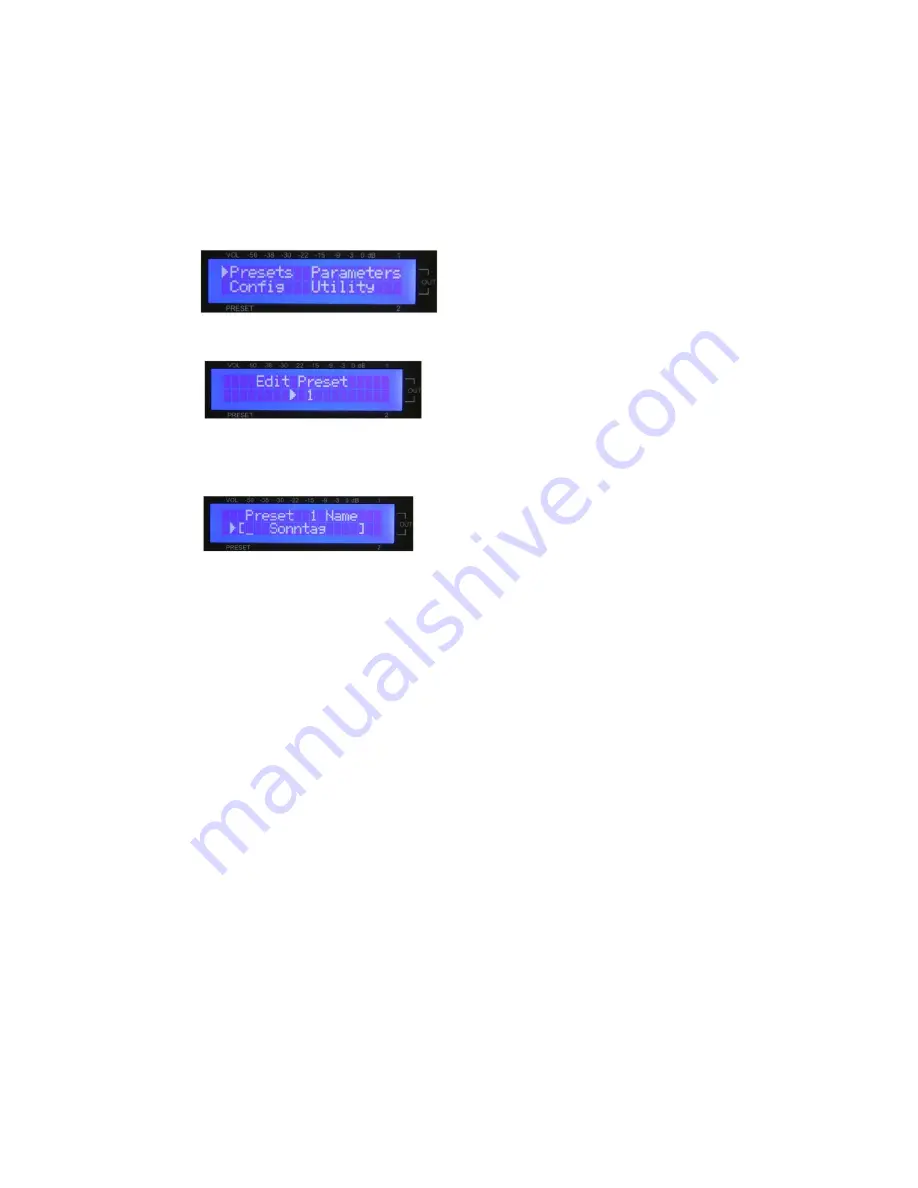
Then, turn the unit back on, while pushing the preset dial. Keep the dial pushed until the main menu appears 
(see below) 


  The four items 

„preset“, „parameters“, „config“ and „utility“ appear.. 

Push the preset dial again and „Edit Prest 1“ appears (see below) 


  In case you wish to choose a different preset  slot, turn the volume dial (1-20). By pushing the preset dial  


  following picture appears. 


A yet unused preset slot can be identified by the fact that it does not yet have given preset name (for example 
“Sonntag”) but merely “preset” and a number (e.g. “preset 12”). Push the preset dial. Now you can determine 
the preset name. The cursor will blink under the first character. 
By turning the volume dial the following letters and special characters will appear in this order: 


  A-Z, Ä, Ö, Ü, a-z, ä, ö, ü, 0-9, space, 

! „ # $ % & ’ ( ) * + , - . / 

Pushing the preset dial will confirm the current character and move the cursor one position to the right. 
Now you can set the next character. 
When  you’ve filled the preset name, turn the  preset  dial  one click to the right to now  determine the master 
volume  for  this  preset.  Set  the  value  by  turning  the  volume  dial.  The  values  range  from  0    to  100%.  The 
corresponding value in dB is given in brackets. Now turn the preset dial again one click to the right in order to 
determine  the  outputs  for  this  preset.  When  pushing  the  preset  dial,  the  2  outputs  will  appear  one  after  the 
other with their respective names “On” as well as a dot in the little square, indicating that this output is active. 
By  turning  the  value  dial  one  click,  the  shown  output  can  be  either  activated  or  deactivated.  Now  the 
programming for this preset is complete. By pushing the value dial, you will exit the programming mode. 
You  will  be  whether  you  would  like  to  “Save  changes?”  Pushing  the  volume  dial  indicates  “yes”  and  your 
changes will be saved. (“Saving … do not interrupt”) Pushing the preset dial indicates ”no” and the display will 
show  “Changes discarded!” To change another preset, press briefly  the “Volume”-dial. You will enter back to 
the preset-menu. Now change the designated preset and proceed like described above. 


Содержание GENIO 10

Страница 1: ...User guide GENIO 10 Issue 10 2016 Vertriebs Entwicklungsgesellschaft mbH Genio 10 Automatic Mix Amplifier User guide...

Страница 2: ...Microprocessor Gate control 7 3 2 Programmable settings Presets 8 3 3 Use of different settings Presets 8 3 4 Change of existing preset settings 8 4 Advanced features 4 1 Creating new presets 9 4 2 Th...

Страница 3: ...sensitivity for Aux Output 1 and Output 2 for controlling an external power amp The speaker outputs are designed for 100 70 50 V and also for 4 ohm Each output has a 31 band graphic equalizer a 6 para...

Страница 4: ...At one end of this cable is a three pronged AC power connector IEC plug and at the other end a CE standard compliant Schuko plug for connecting to a 230V 50 Hz AC voltage source Please ensure that th...

Страница 5: ...lume control channels 1 8 With the volume controls the level of the signal sources can be adjusted which are connected to the microphone line inputs During the installation by the technical staff the...

Страница 6: ...D audio RCA connections for music transfer via CD with selectable sensitivity 7 Playback RCA connections for music transfer Aux with selectable sensitivity and volume control 8 Remote Control Print Op...

Страница 7: ...1 Microprocessor Gate Control Continuous monitoring of 5 input channels by RISC microprocessor Level comparing accuracy better than 2dB Channel activation time less than 10 ms Channel activation hold...

Страница 8: ...how up Below an example is given Here one can see the current preset name in this case Sonntag as well as the value of the master volume in percent total output volume in this case 80 The bar above th...

Страница 9: ...eset dial will confirm the current character and move the cursor one position to the right Now you can set the next character When you ve filled the preset name turn the preset dial one click to the r...

Страница 10: ...lowing applies Turning preset dial one click to he right will always bring you to the next item of a menu i e to the next parameter to be programmed This dial is therefore marked parameter For simplic...

Страница 11: ...level Param EQ 1 Freq Set the 1 st frequency of the full parametric equalizers range 20 Hz to 20 45 kHz Here too the value is set with the volume dial Pushing the preset dial will bring you to the ne...

Страница 12: ...by one click either enable or disables the protection Welcomescreen Line 1 Set the first line 16 characters oft he welcome text that shows up when powering up the unit The cursor will blink under the...

Страница 13: ...adjustable for each output Param EQ 1 Q Q factor of the 1st parametric equalizer adjustable for each output same for the other parametric equalizers Limiter on off Set limiter individually for each ou...

Страница 14: ...ut sensitivity DIP switch ON 14 dBu 2 dBu CD Input sensitivity DIP switch OFF 4 dBu CD Input sensitivity DIP switch ON 6 dBu CD AUX frequency response 20 Hz 20 kHz CD AUX USB Equalizer Low 12 dB 100 H...

Страница 15: ...es of use of such information or for any infringement of patents or other rights of third parties that may result from its use No license is granted by implication or otherwise under any patent or pat...

Отзывы: