AVE GENIO 10 Скачать руководство пользователя страница 8

          User guide GENIO 10 


         Page 8 


3.2    Programmable settings 

(„presets“) 


The  GENIO  10  connects  many  built-in  features  with  easy  to  use  operability.  Even  in  challenging  acoustic 
environments optimal results can be achieved. During installation a series of presets can be programmed.. 20 
presets make it  

possible for all assignments (for example: „Sunday“, „weekday church“ or even for different 

speakers) to individually program 

– and retrieve by one turn oft he dial. 


  The following parameters are for each preset setting 

The 

„Master-Volume“, that ist he total volume of all outgoing signals 

Which one oft he two outputs should be active 

A preset name. So at  one glance the different settings can be distinguished.


  3.3 

Use of different settings („presets“) 


  Turn on the device with the power switch. The welcome message and the parameter set will  


  appear in the display with which the program starts. After a few seconds it will  


  disappear and the settings of the current preset will show up. 

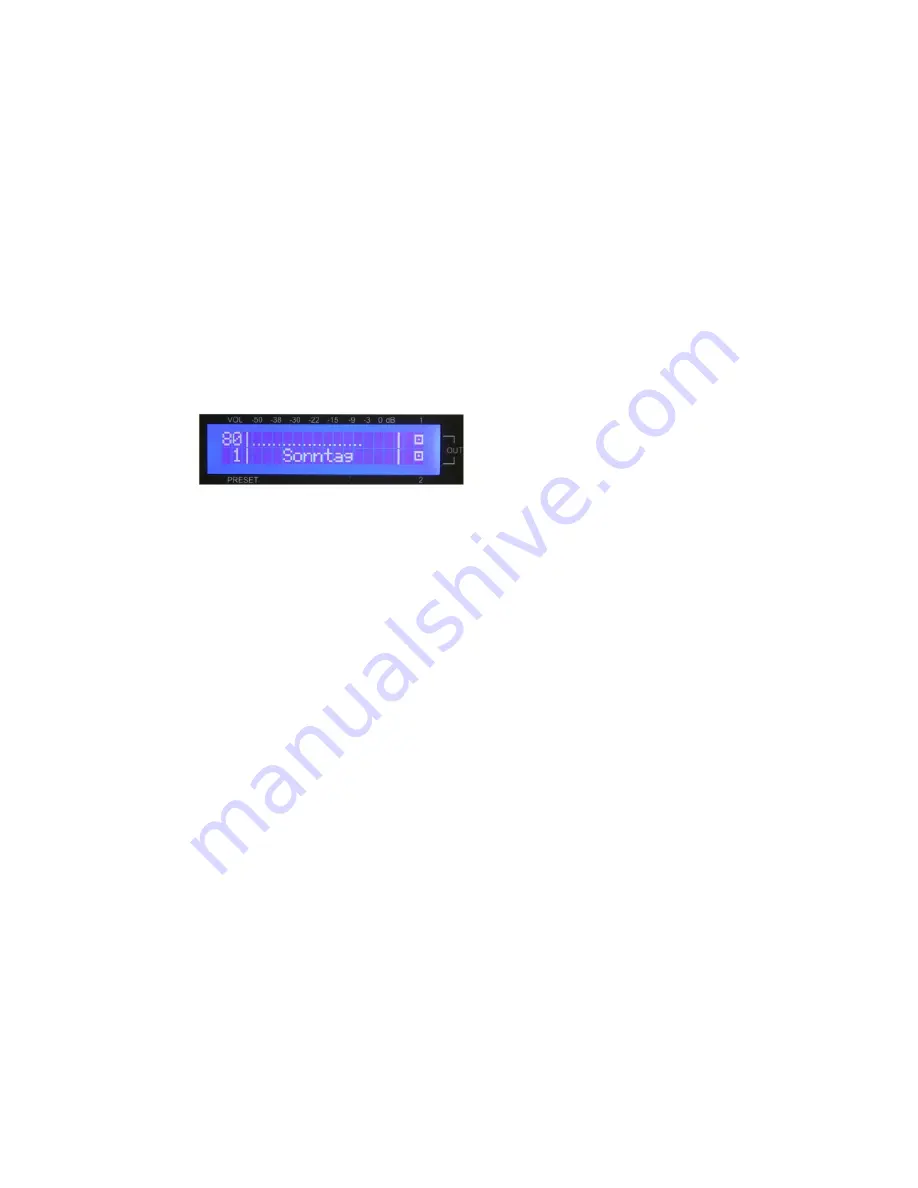
Below an example is given. 


Here one can see the current 

preset name (in this case „Sonntag“ as well as the value of the master  volume 

in percent (total output volume, in this case 80%). 
The bar above the preset name is an analogue representation  of the master volume. 
On the right-hand side of the display  the  two  little squares represent the 2  outputs ((the numbers 1 to 2 are 
written on the side of the display). A dot within a square indicates that  this particular output is active.  
In the example both outputs are active. 
The  preset  settings  can  be  guarded  against  accidental  changes.  In  this 

“preset-protection-  mode”  changes 

can only made by 

pushing

 and 

turning

 the dial at the same time. 

In order to switch from one preset to another, push the preset dial in the display; then let go. Now all is set for 
the next application. 
 

3.4    Change of existing preset settings 


Should it become necessary to change the volume of a given preset, push the volume dial (only necessary in 
the „preset protection mode“) while turning it to set the desired value. 
This change is only temporary, i.e. once the unit is turned off and back on again, the original preset is active 
again. 


Содержание GENIO 10

Страница 1: ...User guide GENIO 10 Issue 10 2016 Vertriebs Entwicklungsgesellschaft mbH Genio 10 Automatic Mix Amplifier User guide...

Страница 2: ...Microprocessor Gate control 7 3 2 Programmable settings Presets 8 3 3 Use of different settings Presets 8 3 4 Change of existing preset settings 8 4 Advanced features 4 1 Creating new presets 9 4 2 Th...

Страница 3: ...sensitivity for Aux Output 1 and Output 2 for controlling an external power amp The speaker outputs are designed for 100 70 50 V and also for 4 ohm Each output has a 31 band graphic equalizer a 6 para...

Страница 4: ...At one end of this cable is a three pronged AC power connector IEC plug and at the other end a CE standard compliant Schuko plug for connecting to a 230V 50 Hz AC voltage source Please ensure that th...

Страница 5: ...lume control channels 1 8 With the volume controls the level of the signal sources can be adjusted which are connected to the microphone line inputs During the installation by the technical staff the...

Страница 6: ...D audio RCA connections for music transfer via CD with selectable sensitivity 7 Playback RCA connections for music transfer Aux with selectable sensitivity and volume control 8 Remote Control Print Op...

Страница 7: ...1 Microprocessor Gate Control Continuous monitoring of 5 input channels by RISC microprocessor Level comparing accuracy better than 2dB Channel activation time less than 10 ms Channel activation hold...

Страница 8: ...how up Below an example is given Here one can see the current preset name in this case Sonntag as well as the value of the master volume in percent total output volume in this case 80 The bar above th...

Страница 9: ...eset dial will confirm the current character and move the cursor one position to the right Now you can set the next character When you ve filled the preset name turn the preset dial one click to the r...

Страница 10: ...lowing applies Turning preset dial one click to he right will always bring you to the next item of a menu i e to the next parameter to be programmed This dial is therefore marked parameter For simplic...

Страница 11: ...level Param EQ 1 Freq Set the 1 st frequency of the full parametric equalizers range 20 Hz to 20 45 kHz Here too the value is set with the volume dial Pushing the preset dial will bring you to the ne...

Страница 12: ...by one click either enable or disables the protection Welcomescreen Line 1 Set the first line 16 characters oft he welcome text that shows up when powering up the unit The cursor will blink under the...

Страница 13: ...adjustable for each output Param EQ 1 Q Q factor of the 1st parametric equalizer adjustable for each output same for the other parametric equalizers Limiter on off Set limiter individually for each ou...

Страница 14: ...ut sensitivity DIP switch ON 14 dBu 2 dBu CD Input sensitivity DIP switch OFF 4 dBu CD Input sensitivity DIP switch ON 6 dBu CD AUX frequency response 20 Hz 20 kHz CD AUX USB Equalizer Low 12 dB 100 H...

Страница 15: ...es of use of such information or for any infringement of patents or other rights of third parties that may result from its use No license is granted by implication or otherwise under any patent or pat...

Отзывы: