background image


User Guide 

P. 13


Level 2 

(requires pressing the 

FUNCTION 

button 2X) 

Æ


Multi car operation 


Level 3 

(requires pressing the 

FUNCTION 

button 3X) 

Æ


Basic features  

Option 4: 

Level 1 

(requires pressing the 

FUNCTION 

button 1X) 

Æ


Basic features  

Level 2 

(requires pressing the 

FUNCTION 

button 2X) 

Æ

 Customized 

features 


Level 3 (

requires pressing the 

FUNCTION 

button 3X) 

Æ


Multi car operation 


Example: 

If the multi-level features were set to option 3, the set-up would be as follows: 

x


Level 1  

Æ

  Customized feature  

x


Level 2  

Æ

   Multi car operation  

x


Level 3  

Æ

 Basic 

features 

The 

Basic features” are now programmed as level 3 and therefore: 

x


To access the aux. 2 feature, the user needs to press on the 

FUNCTION

 button three (3) times 

followed by the 

LOCK

 button. 

x


To access cold weather mode, the user needs to press on the 

FUNCTION

 button three (3) times 

followed by the 

START/STOP


button

Note:

 When using the companion remote, Shift button must be pressed twice quickly the first time. 

For instance, to access 

customized feature 1

,

 press 

SHIFT

 twice quickly, 

SHIFT

 and 

SHIFT

 again 

followed by Lock. 

Note:

 If the multi-level features have been modified from their default state by your installer, the 

SHIFT

 button may have to be pressed once, twice or three times, according to the option you chose 

Intrusion Codes through the LED Light 

If there has been an intrusion in the vehicle while it was locked and armed, the LED will provide an 
intrusion code matching the type of the intrusion that took place. Disarm the alarm (

UNLOCK

) to 

identify the intrusion. The LED intrusion codes are flashed in continuous loops: 
 
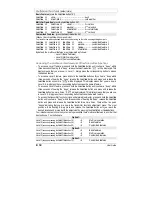
2 x = Doors intrusion 
3 x = Shock Sense  
4 x = Hood  
 

5 x = Panic  
6 x = Ignition 
7 x = Trunk 

The alarm diagnostic by LED projects a LED flash sequence immediately after disarming and will 
remain in that state of alarm memory until the ignition is turned ON. 

Troubleshooting Poor Transmitting Range 

Many factors may affect the operating range of the transmitter.  Some of these are: 


The condition of the battery in the transmitter. 


The operating environment (for example: downtown radio-frequency noise, airports, cellular 

phone towers…) 


Metal: any type of metal will affect operating range. This includes the metal in the car. 


The shape of the vehicle can affect range as well; vans in general have an especially poor 

range. 


The shape of the roof and A-pillars brings about considerable radio-frequency deflection (in 

this case the signal from the remote control). As a result, the direction in which the vehicle is 

facing in relation to the remote control can affect the range. Straight on – standing in front of 

the vehicle – generally gives you the greatest range; the second best performance is from the 

back. Using the remote control from either side of the vehicle will usually give the lowest 

range. 


The range will be significantly lower in a crowded parking lot than in open space. 


Always hold the transmitter high, approximately at shoulder height. Holding the transmitter 

against your chin will also increase your range: your head acts as an antenna.  

Содержание AS-6650TW-FM

Страница 1: ...er is disabled or put into valet mode before servicing A note concerning the battery inside the transmitter Depending on your usage of the transmitter the battery can last anywhere between 3 to 6 mont...

Страница 2: ...h the LED Light 13 Troubleshooting Poor Transmitting Range 13 Using the Remote Control 14 LCD Transmitter Operation First Car Control 14 Basic Vehicle Operation 14 Transmitter Mode Selection 15 Time o...

Страница 3: ...is set to Ready Mode the vehicle can be remote started and stopped at any time The system will exit Ready Mode if a door the hood or the trunk is opened if the brake pedal is pressed if the parking br...

Страница 4: ...er kill if installed and lock the doors if installed 1 Press and hold the LOCK button for approximately 1 second You will hear one chirp if the siren or horn is so configured 2 The icon will appear th...

Страница 5: ...r 60 seconds of Turbo Mode If your vehicle has a manual transmission follow all steps of the Ready Mode routine to activate Turbo Mode 1 Ensure that all the doors are closed and that the shifter is in...

Страница 6: ...remote starter and alarm functions will be disabled Start Attempts Indicator Valet Mode This reveals start attempts made while the vehicle was in valet mode The parking lights will Come ON go OUT then...

Страница 7: ...lights flash If the panic mode is triggered while the system is armed in Passive mode the alarm will sound for 30 seconds If the system is armed in Active mode the alarm will sound for 1 minute Note T...

Страница 8: ...Separate Start and Stop buttons Multi car Operation Remote Door Locks If your system was installed with the remote door locks option you will have the convenience of remote keyless entry See section a...

Страница 9: ...rs are being unlocked the siren will give four chirps The system can alternatively be set to Warning Mode no chirp during lock unlock unless a zone is active when locking in which case there will be 3...

Страница 10: ...an open your trunk by pressing the TRUNK button for 3 seconds on the remote transmitter or by pressing the TRUNK button twice within 3 seconds Note When pressing the TRUNK button the TRUNK will open a...

Страница 11: ...esh the display and will confirm if the vehicle was started or stopped The Start Confirmation Was Not Received If after remote starting the vehicle no confirmation was received simply press the LOCK b...

Страница 12: ...once more will be displayed This display means that you are now in Level 2 Simply press the corresponding button to access the desired feature x To access a Level 3 feature press and hold the FUNCTION...

Страница 13: ...usion code matching the type of the intrusion that took place Disarm the alarm UNLOCK to identify the intrusion The LED intrusion codes are flashed in continuous loops 2 x Doors intrusion 3 x Shock Se...

Страница 14: ...LOCK 1 Beep Locks the doors and arms the Starter Kill if installed and the alarm UNLOCK 2 Beeps Unlocks the doors and disarms the Starter Kill if installed and the alarm TRUNK or AUX 3 1 Beep Trunk ou...

Страница 15: ...yed 5 Press and hold the FUNCTION button once more until a beep is heard 6 Release the FUNCTION button is displayed 7 At that point press and hold the FUNCTION button until 2 beeps are heard The hour...

Страница 16: ...ter pressing the LOCK or ULOCK button Safe Start Mode FUNCTION BY PRESSING ICON BUZZER INSTRUCTIONS DESCRIPTION START ON SAFE START MODE X 2 BEEP Press the button twice within 3 seconds Or Press for 1...

Страница 17: ...y will be heard again STOP ON SAFE START MODE None Melody Diagnostics Chirps Table Chirps Description 1 Doors locked alarm and starter kill armed LOCK confirmation Entering mode 1 in the programming c...

Страница 18: ...med New transmitter programmed 6 A remote start was attempted while a tach before crank signal was detected before cranking 8 Unit reset 10 A ground signal was detected on the hood pin input wire When...

Отзывы: