62
|
Chapter 5
Draw Objects
Notice that the Properties panel in the ribbon displays the HIDDENX2 linetype as current rather
than BYLAYER. All subsequently created objects will be displayed using this linetype. This setting
overrides the linetype assigned to the current layer.
7
Click the Model tab.
8
Click Menu Browser
➤
Draw
➤
Line, and click several locations in the drawing area to draw line
segments. Press ENTER to end the command.
9
Use the Linetype Manager or the Properties panel to return the current linetype to BYLAYER.
All subsequently created objects will be displayed using the linetype assigned to the current layer.
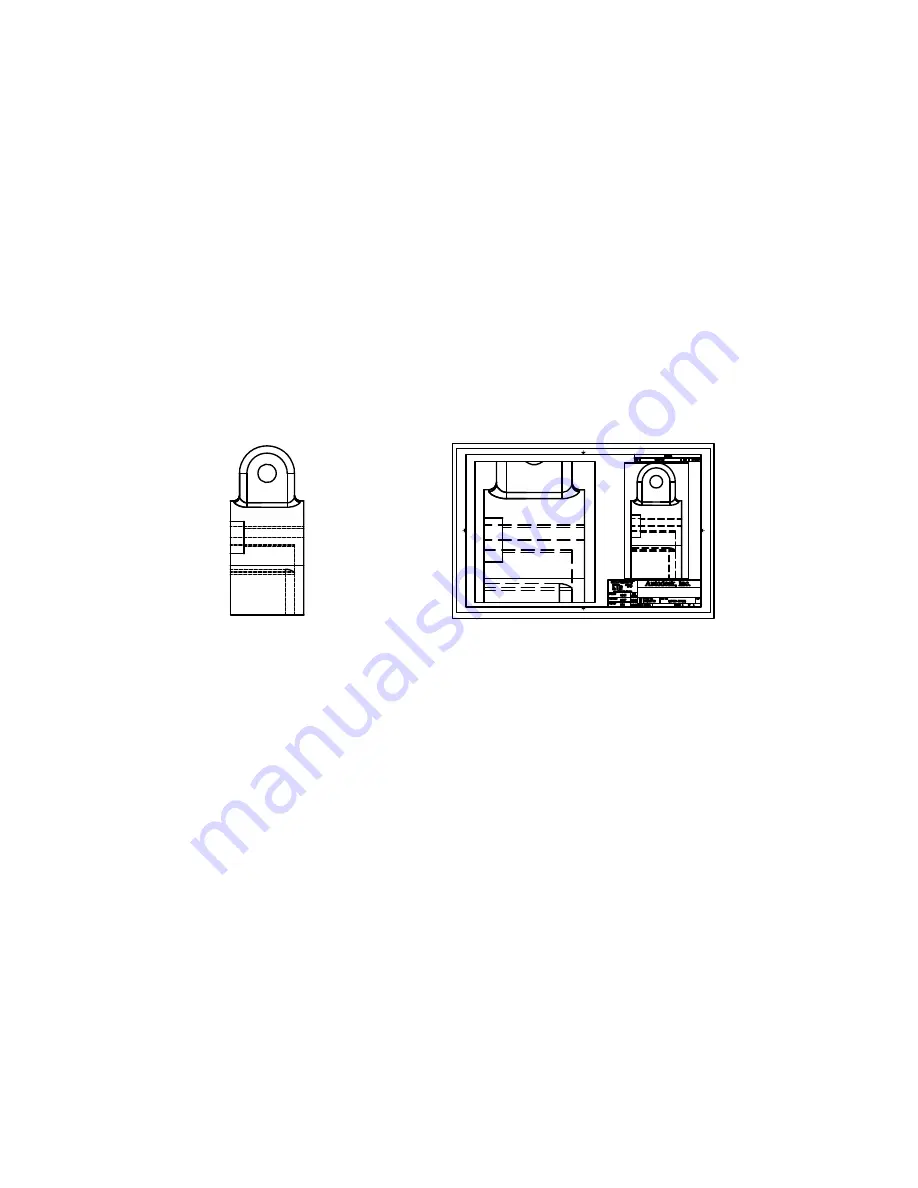
Scale Linetypes
When you scale views in layout viewports, you can create inconsistencies in the appearance of
linetypes. In noncontinuous linetypes, the length of dashes and dots, and the space between them,
may increase or decrease. You can set the scaling to correspond to the model or layout scale or to
remain the same at any zoom scale.
Use the Details area of the Linetype Manager to control the linetype scale in layout viewports.
■
Global Scale Factor.
Sets the global scale factor for all linetypes.
■
Current Object Scale.
Sets the linetype scale for newly created objects.
■
Use Paper Space Units for Scaling.
Scales the linetypes in paper space and model space identically.
To update a linetype scale, you need to regenerate the model space display within a layout viewport
on the layout tab. The steps required are
1
Click a layout tab.
2
Double-click within a layout viewport to enter model space.
3
Click Menu Browser
➤
View
➤
Regen.
The linetypes within the layout viewport are scaled according to the viewport display scale setting.
Dashed linetype
scaled to the model
the Dashed linetype
scaled to the layout
Содержание 057A1-05A111-1001 - AutoCAD LT 2009
Страница 1: ...January 2008 Getting Started ...
Страница 6: ...vi ...
Страница 7: ...Make the Transition from Paper to CAD ...
Страница 8: ... 127 6 7 127 6 7 7 127 5 3 6 127 5 5 5 5 5 5 5 5 5 6 276 ...
Страница 10: ...352326 5281 225 3 1 352326 9 7 21 6287 ...
Страница 12: ......
Страница 14: ......
Страница 16: ......
Страница 18: ......
Страница 20: ......
Страница 22: ... ...
Страница 24: ......
Страница 26: ...20 ...
Страница 27: ...Introduction Why You Should Use this Guide 22 Tutorials and Command Access 22 Get Additional Information 23 ...
Страница 34: ...28 ...
Страница 35: ...Work with Commands Use the Mouse 30 Cancel a Command 30 Start a Command 30 Undo or Redo Commands 34 ...
Страница 41: ......
Страница 43: ...Change Views Zoom to Magnify a View 38 Pan to Reposition a View 39 ...
Страница 47: ......
Страница 61: ...Draw Objects Object Properties Overview 56 Draw Lines 64 Draw Circles and Arcs 67 ...
Страница 75: ......
Страница 89: ......
Страница 119: ......
Страница 129: ......
Страница 130: ......
Страница 131: ...Add Text to a Drawing Create and Modify Text 126 Work with Text Styles 128 Set Text Size for the Viewport Scaling 129 ...
Страница 137: ......
Страница 138: ...Continued Linear Vertical Linear Horizontal Aligned Baseline Center Mark Ordinate Diameter Angular Quick Leader Radius ...
Страница 151: ......
Страница 153: ...Create Layouts and Plots Work with Layouts 148 Choose and Configure Plotters 151 Plot from a Layout 153 ...
Страница 174: ...168 ...
Страница 184: ...178 Index ...


