


SW5501 – SW5502
Wireless Serial Server
User Manual
Configuration and
setup
4.2.2
Overview
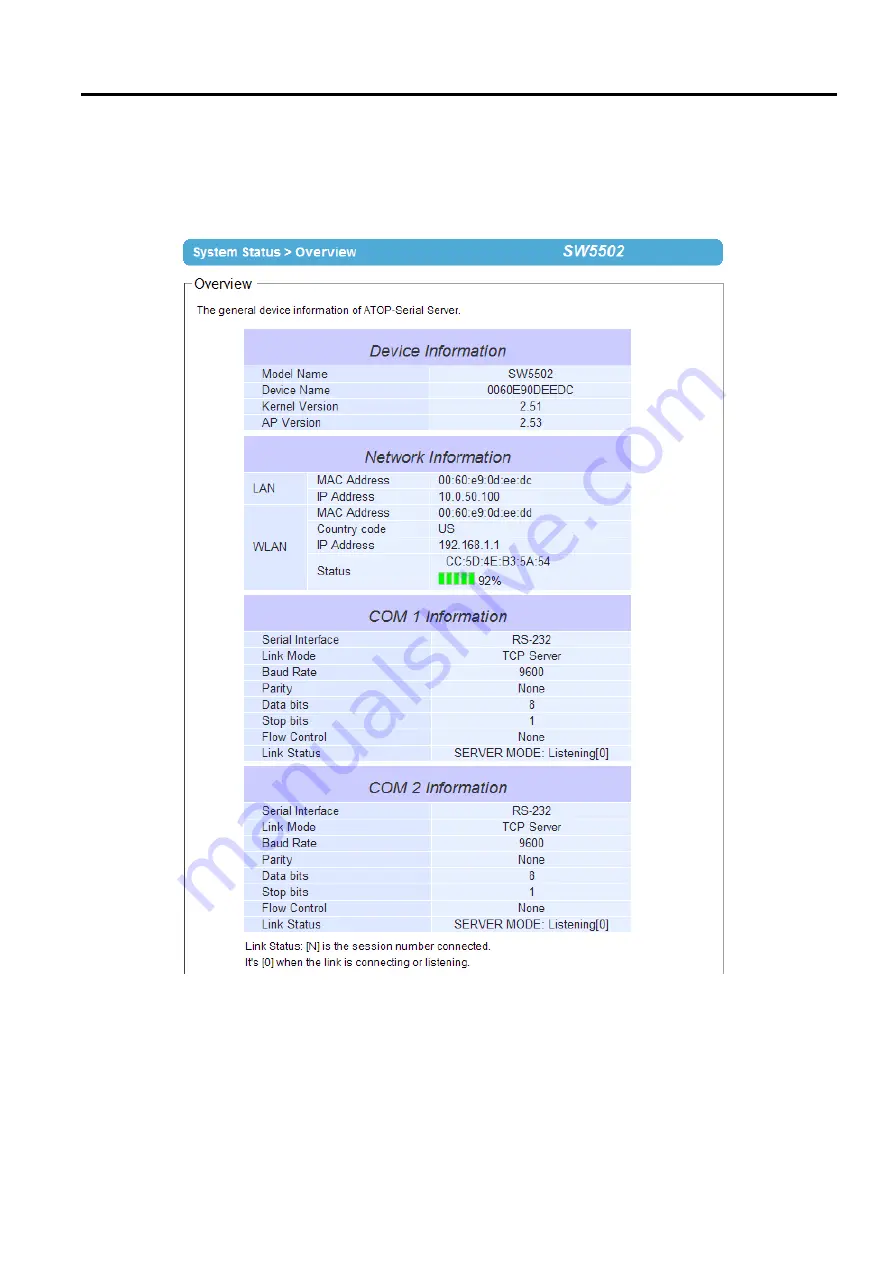
The
“
Overview
”
submenu under the
“
System Status
”
menu, displays overall and current general information on the
SW550X device
’
s status and settings
.
An example of SW5502
’
s Overview page is shown below
.
Figure 4.18
Overview Information Page of an SW550X Device
Information under the Device Information box displays the Model Name, the Device Name, Kernel Version and
AP Version of the SW550X device
.
Note that the default Device Name is the MAC address of your device
.
The
firmware version of your SW550X consists of the
Kernel Version and the AP Version
.
Information under the Network Information box shows the summary of both LAN and WLAN interfaces
.
For
LAN interface, there are its
MAC address and current
IP address
.
For WLAN interface, there are its MAC


