Manual, Control Module, PROFINET, DL12
Document #9620-20-C-DL12-06
Pinnacle Park • 1031 Goodworth Drive • Apex, NC 27539 • Tel: 919.772.0115 • Fax: 919.772.8259 •
C-30
4.4 Recommended Sequence of Operation
Before programing can take place, the following condition must be met:
•
Input and Output Auxiliary 24 VDC power is available and within acceptable range (20.4 -
28.8 VDC).
•
Air is supplied to the integrated valve and within acceptable range (60 - 100 psi).
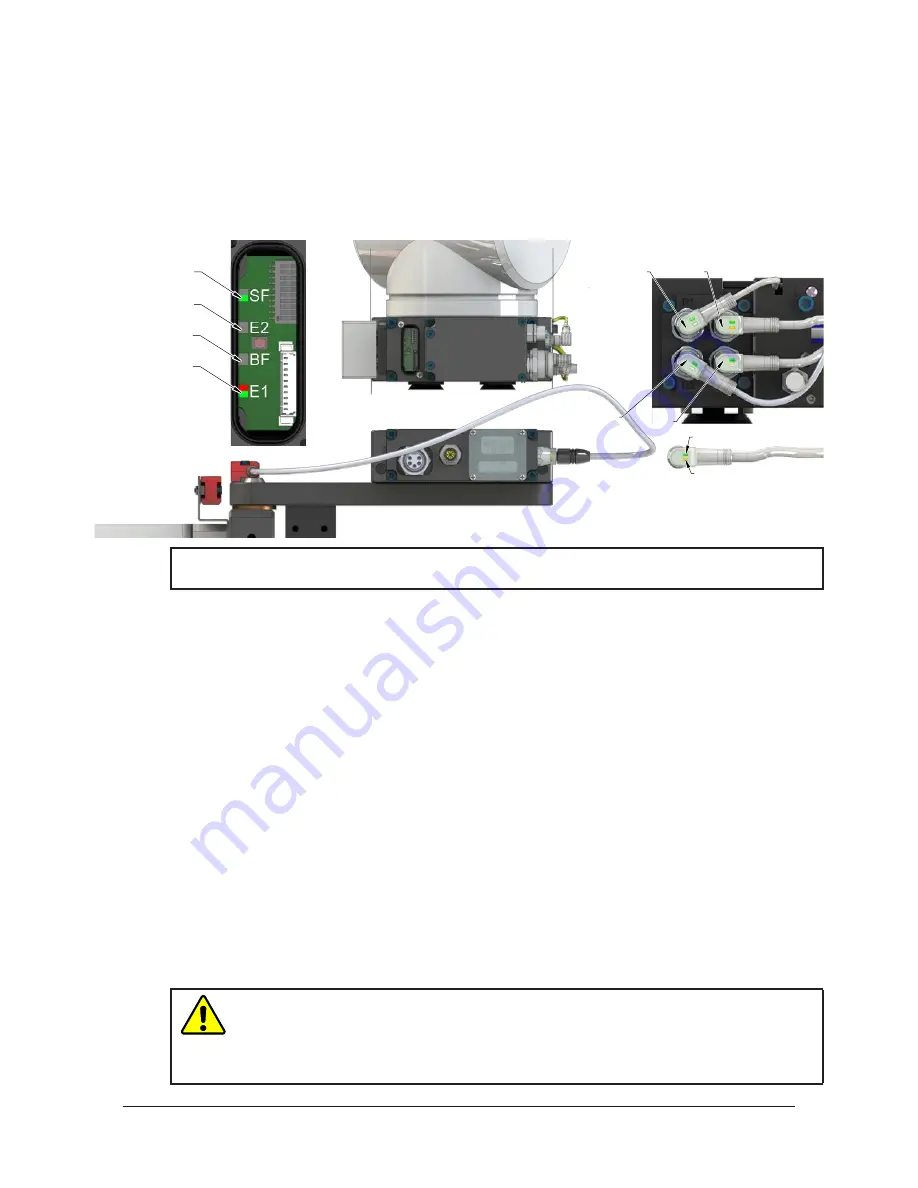
Figure 4.2—Master Free with Tool In the Tool Stand
RTL (R1)
Unlock (U)
RTL (R2)
Lock (L)
Green LED (Power)
Yellow LED
(Switch Made)
SF LED is Green
E2 LED is Off
BF LED is Off
E1 LED is Red/Green
NOTICE:
If the LEDs don’t match what is shown, refer to
Section 2.1.3—System Failure and
Section 2.1.4—Ethernet 1 and Ethernet 2 LEDs
for possible issues.
1. The robot and Tool Changer Master are free of the stand or storage location, the Tool Changer
is uncoupled and the Tool Changer locking mechanism is fully retracted (unlocked condition).
The Tool is by itself in the Tool stand. No error or fault conditions exist.
a. The following inputs are ON:
i. Unlocked
ii. US1 Power
Input Power and
US2 Power
Output Power (Must remain on at all times).
iii.
Tool‑ID invalid (all 1→ 0xFFFF)
iv. Everything is OK
b. The following inputs are OFF:
i. Unlatch Enabled
ii. Locked
iii. RTL1 and RTL2
iv. Tool Present
v. SSO_1 and SSO_2
vi.
V1RELAY
and
V2RELAY
vii. Tool Power is On
c. The following outputs are OFF:
i. Unlatch
ii. Latch
d.
The ATI Tool and any downstream PROFINET device(s) are offline.
CAUTION:
The Master locking mechanism must be fully retracted prior to the Master
entering the Tool. Failure to do so will cause ball bearings to damage the Tool Bearing
Race. If the Tool Changer is locked or in a missed Tool condition, use the solenoid
valve manual override procedure (refer to the valve adapter manual) to unlock the Tool
Changer before attempting to latch Master with Tool.


