Chapter 8. Configuring DDNS
RX3041H User’s Manual
48
8.3 Configuring HTTP DDNS Client
Follow these instructions to configure the HTTP DDNS:
1. First, you should have already registered a domain name to the DDNS
service provider. If you have not done so, please visit
www.dns-tokyo.jp
or
www.dyndns.org
for more details.
2. Make sure that you have a host name configured for the RX3041H;
otherwise, open the
System Identity
configuration page to configure one.
Please refer to the section 11.3 “
Configure System Identity
” for more details.
3. Open the DDNS configuration page by clicking on the
DDNS
menu.
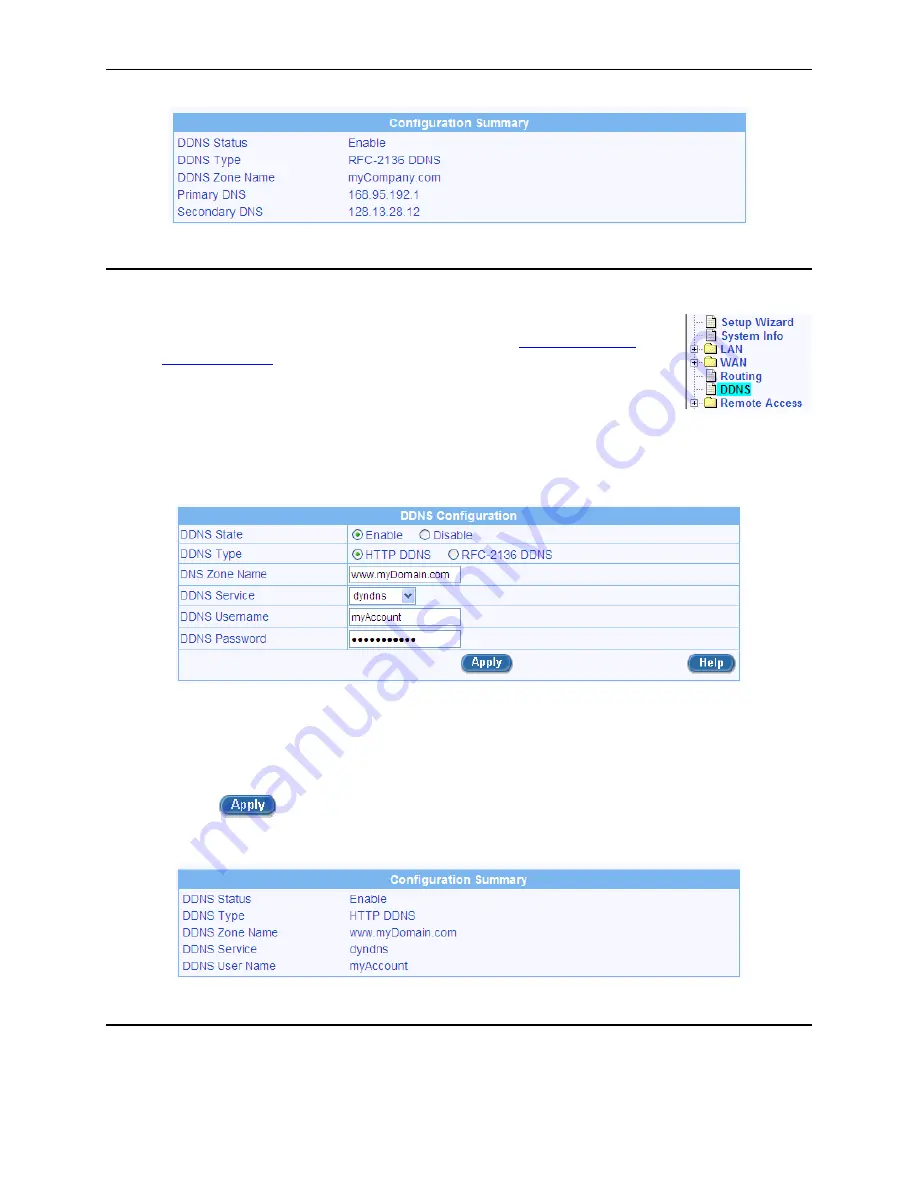
4. In the DDNS configuration page, select “Enable” for the DDNS State and “HTTP DDNS” for the
DDNS Type.
Figure 8.4. HTTP DDNS Configuration
5. Enter the domain name in the DNS Zone Name field.
6. Select a DDNS service from the DDNS Service drop-down list.
7. Enter the username and password provided by your DDNS service providers.
8. Click
on
button to send a DNS update request to your DDNS service provider. Note that
DNS update request will also be sent to your DDNS Service provider automatically whenever the
WAN port status is changed.
8.4 Configuring
Local
Host
Table
This is the local host table used by the router to map the host name to its IP address. This table may be used
for the servers deployed inside your LAN. For example, you may create a host entry in this table for your
Содержание RX3041H
Страница 1: ...RX3041H User s Manual Revision 1 3 Aug 19 2004 ...
Страница 2: ...ii ...
Страница 22: ......
Страница 38: ......
Страница 46: ......
Страница 54: ......
Страница 64: ......
Страница 98: ...Chapter 9 Configuring Firewall NAT Settings RX3041H User s Manual 84 Figure 9 37 Firewall Statistics ...
Страница 118: ......
Страница 122: ......
Страница 126: ......
Страница 130: ......
Страница 140: ......


