


22
| Installation
Aruba 9004-LTE Gateway
| Installation Guide
Rack Mounting Installation Instructions
This mounting option allows mounting the Aruba 9004-LTE gateway in a two-post 19-inch Telco rack
with either the front panel facing outward or the rear panel facing outward using the Aruba 9004-
LTE-MNT-19 Rack Mount Kit (additional accessory).
Required Tools and Equipment
The following tools and equipment are required for installing a 9004-LTE gateway:
Rack mount tray (x1) for rack mounting installation
Rubber clamps (x2) for securing the power adapter on the rack mount tray (included in the kit)
Wire saddle (x4) to route the antenna wires on the rack mount tray (included in the kit)
M3 x 5 mm flat head screws (x4) for securing the gateway on the rack mount tray (included in the
kit)
M6 x 15 mm Phillips pan head screws (x4) for rack mount (included in the kit)
Suitable screwdrivers for all screw types provided in the box (not included in the kit)
Installation Steps
To install a 9004-LTE gateway into a two-post 19-inch Telco rack, perform the following steps:
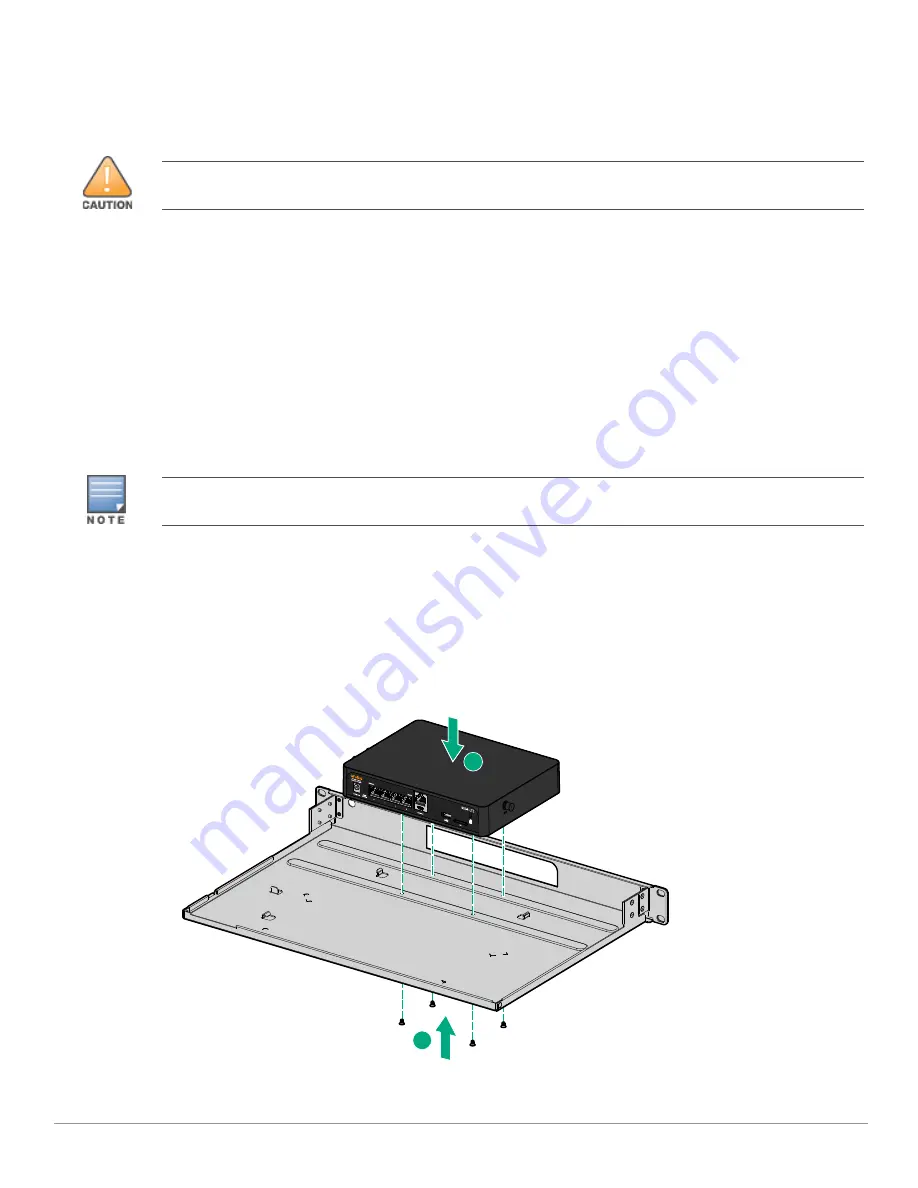
1. Align the 9004-LTE gateway to the screw hole provided on the rack mount tray. See
Figure 18
.
2. Align the screws under the rack mount tray and tighten the screws to secure the 9004-LTE
gateway on the rack mount tray. See
Figure 18
.
Figure 18
Aligning the 9004-LTE Gateway with the Rack Mount Tray
3. Use the rubber clamps provided with the kit to secure the power cable with the power adapter.
Each 9004-LTE gateway should have it’s own mounting equipment. Do not place other networking equipment
directly on top of a mounted gateway. Failure to do so can damage the device.
Some racks require screws that differ from those included with the 9004-LTE gateway kit. Ensure that you have the
correct screws before installing the device.
2
1
1


