13
Loading Ribbon
Note:
Thermal Transfer printing requires media to print with
appropriate ribbon. This section can be referred to, for X-Series
to use transfer thermal printing. The sample steps below are
based on ribbon wound ink-side in as an example. (X series
printers use ribbon wound ink-side in as default. To change setting
to ribbon would ink-side out, refer to Section - Switching Ribbon
Wound Ink-side out or Ink-side in)
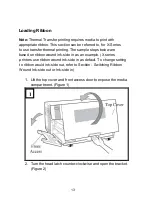
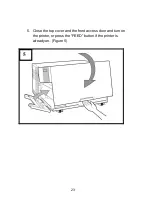
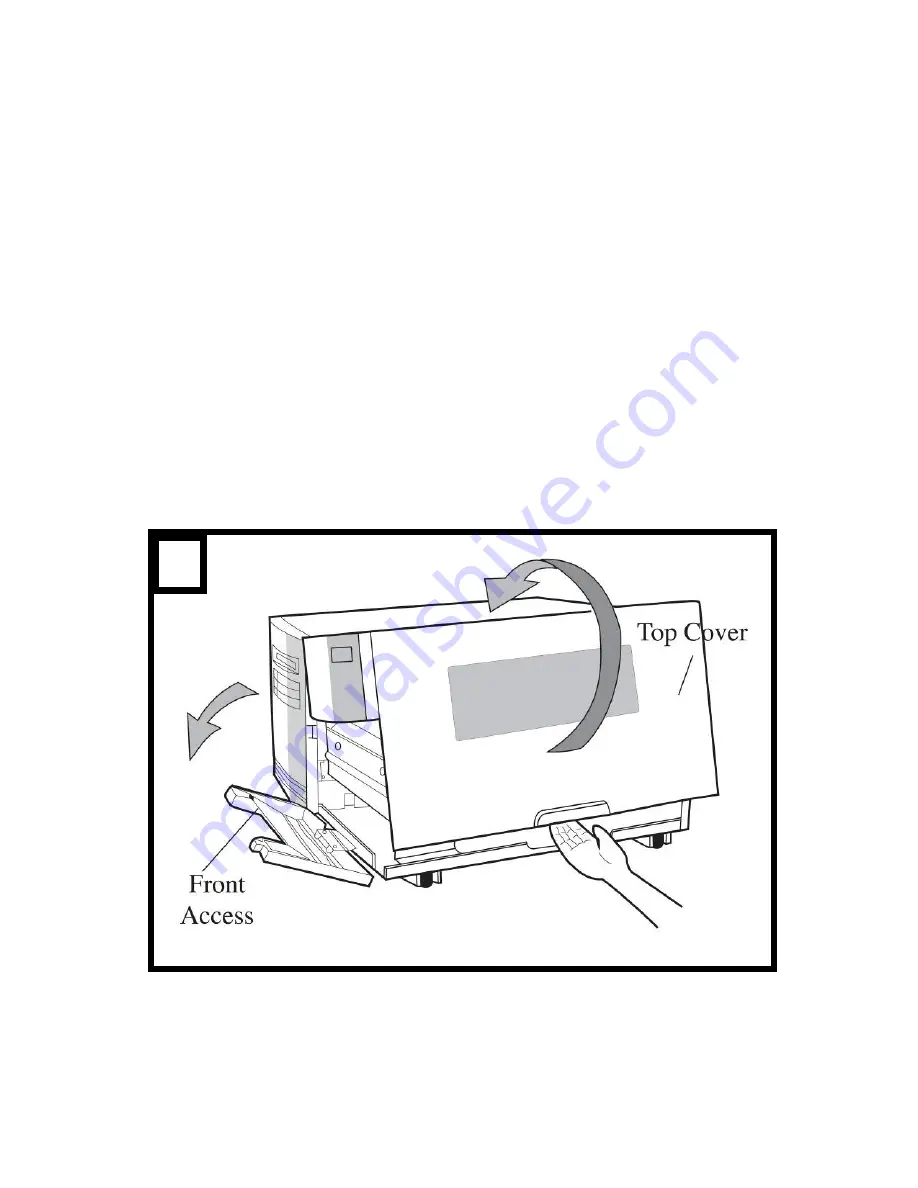
1. Lift the top cover and front access door to expose the media
compartment. (Figure 1)
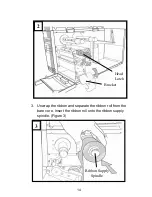
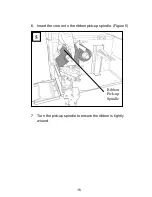
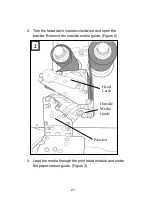
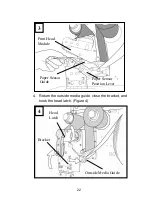
2. Turn the head latch counter-clockwise and open the bracket.
(Figure 2)
1
Содержание X-2300
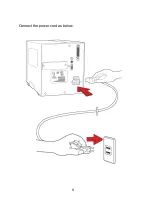
Страница 9: ...9 Connect the power cord as below ...
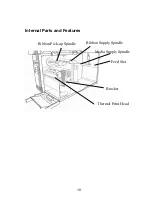
Страница 11: ...11 Standard Mode Head Latch Paper Sensor Guide Paper Roller Thermal Print Head ...
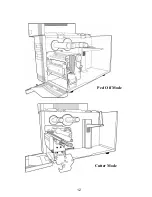
Страница 12: ...12 Peel Off Mode Cutter Mode ...
Страница 47: ...47 accuracy especially for small labels less than 1 5 high ...
Страница 49: ...49 1 Firmware Version Information 2 Standard RAM Size ...
Страница 64: ...64 The driver should now be installed ...
Страница 66: ...66 3 Assign the directory to keep Seagull driver for example C Seagull and click Next 4 Click Finish ...
Страница 82: ...82 Figure 1 ...
Страница 83: ...83 Figure 2 Figure 3 ...
Страница 85: ...85 Figure 1 Figure 2 ...
Страница 98: ...98 5 Insert the left side of dispenser bracket and secure the three screws to the print module ...
Страница 106: ...106 ...
Страница 119: ...119 Types Data Matrix ECC 200 only QR code Composite Codes Aztec Barcode Micro PDF417 Graphics GRF Hex and GDI ...

