SMART CUT 2™ Chapter 5 : OPERATING MODE
PAGE 13
5-1. THE SEAMLESS MODE (continued)
•
DISPLAY DEVICE ADJUSTMENTS
c
Pre-select the referenced COMPUTER and display it onto the output.
d
Adjust directly the display device itself, using its position and size control parameters.
NOTE:
If the 2 COMPUTER inputs are used you must adjust your display device for both COMPUTER.
•
IMAGE ADJUSTMENTS
For each input source connected to the SMART CUT 2
™
, do the following adjustments:
c
Adjust the position and size with the LCD menus (#3-1, #3-2, #3-3, #3-4).
d
Do any other adjustments, if necessary, available with the LCD menu # 3 (color, brightness, image process…).
NOTE
: For the RGB/YUV input, select the video type of the signal connected to this input (LCD menu # 1-3).
NOTE
: The image adjustments are only active for the selected video input.
NOTE
: To preset your image adjustments to the factory values, select the video input and then use the LCD menu # 3-
12 (Preset).
•
AUDIO ADJUSTMENT
c
Adjust the master volume (LCD menu # 4-1).
d
Set the Auto (follow) or "breakaway" audio mode (LCD menu # 4-3):
- AUTO = the audio switching follows automatically the video switching,
- If not AUTO, then you can lock the audio output on one video or computer audio input (LCD menu # 4-3).
e
Adjust for each audio input the audio level (LCD menu # 4-2).
5-2.
THE SCALER MODE (NOT SEAMLESS)
•
SETTINGS
c
We recommend to reset the SMART CUT 2
™
to all of its default values, with the LCD menu # 5-6, before
proceeding.
d
Select the output Sync. type which corresponds to your display device (LCD menu # 2-1).
e
Set
reference sync = no comput
with the LCD menu # 2-2.
f
Set
output rate = internal rate
with the LCD menu # 2-4.
g
Select an output format with the LCD menu # 2-3.
NOTE
: For fixed pixels display devices (DMD, LCD, PLASMA…), always select the output format
corresponding to the native resolution of your display device. Thus, the display device will not have to
scale the image and the result will be better.
•
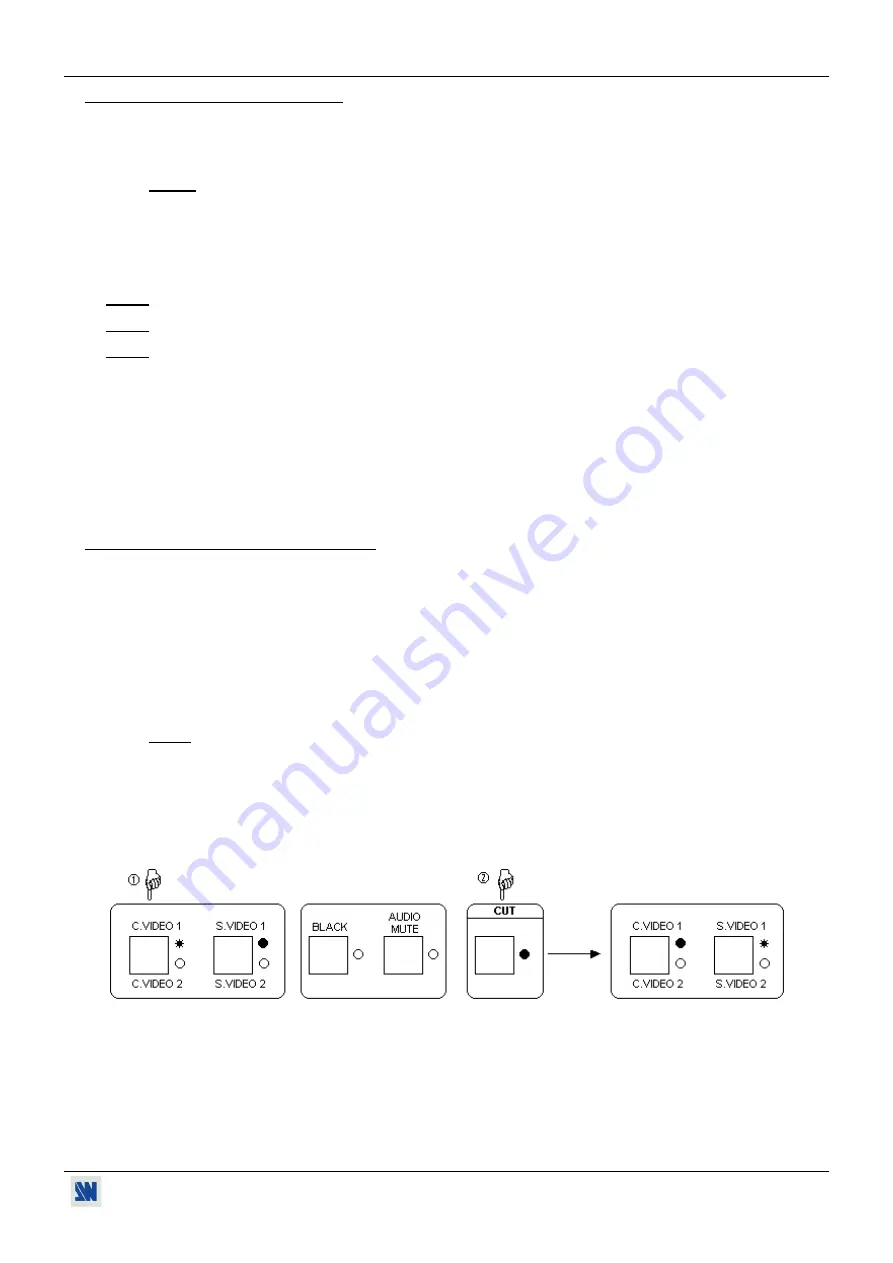
SWITCHING OPERATION (NOT SEAMLESS)
c
Pre-select a video input (for example C.VIDEO 1).
d
Press the CUT key to display it onto the output. The switching operates with a black transition.
•
DISPLAY DEVICE ADJUSTMENTS
c
Pre-select a video input and display it onto the output.
d
Adjust directly the display device itself, using its position and size control parameters.
•
IMAGE ADJUSTMENTS:
Identical as the SEAMLESS MODE, see chapter 5-1.
•
AUDIO ADJUSTMENT:
Identical as the SEAMLESS MODE, see chapter 5-1.


