


Configuring Communication
75
7" Modero Widescreen Touch Panels
3.
Press the
Mode
field (to set the connection Mode) until the choice cycles to the word
Listen
.
The System Number and Master IP/URL fields are then greyed-out.
4.
Enter a username and password (
into their respective fields
) if the target Master has been previously
secured.
5.
Select the
OnLine Tree
tab from the Workspace window.
6.
Select
Diagnostics
>
URL Listing
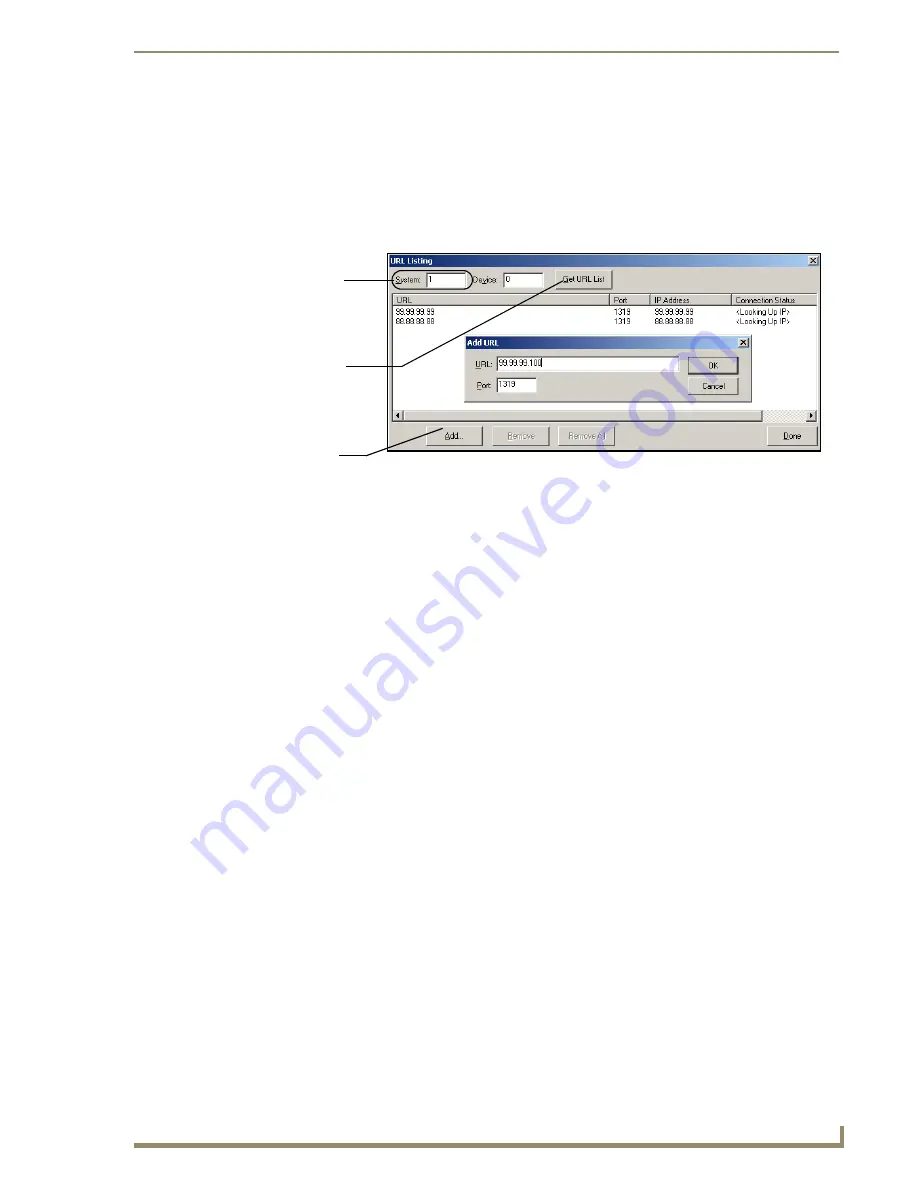
from the Main menu (FIG. 71).
7.
Enter the
System
and
Device
number for the specific Master associated with your panel (
as seen in
the OnLine Tree tab
).
8.
Click
Add
and enter the IP Address of the Modero touch panel into the
Add URL
dialog.
9.
Click
OK
to enter your IP Address and add it to the list.
10.
Click
Done
once you are finished adding your panel information to the list.
11.
Press the on-screen
Reboot
button to save any changes and restart the panel.
Master Connection section - NetLinx Master Ethernet IP Address - Auto Mode
In this mode, enter the System Number of the NetLinx Master. This mode instructs the Modero to search
for a Master that uses the same System Number (assigned within the Master Connection section) and
resides on the same Subnet as itself.
1.
Toggle the blue
Type
field until
Ethernet
is selected (
from the Master Connection section of the
System Settings page
).
2.
Press the
Mode
field until the choice cycles to the word
Auto
.
3.
Press the
System Number
field to launch a Keypad and enter the value for the system number of the
NetLinx Master.
This value can be obtained from the NetLinx Studio program > OnLine Tree of the
Workspace window.
4.
Do not alter the IP Settings section, of the System Settings page, as these fields are not applicable to
this connection mode.
5.
Enter a username and password (
into their respective fields
) if the target Master has been previously
secured.
6.
Press the on-screen
Reboot
button to both save any changes and restart the panel.
7.
After the panel powers-up, press the grey Front Setup Access button for
3 seconds
to open the Setup
page and confirm there is an active connection.
FIG. 71
URL List dialog
System Address
reflects the value
set in the Device
Addressing tab
Used to obtain an
existing URL
Used to set the
URL List
List from Master
on Master
Содержание Modero NXD-CV7
Страница 4: ......
Страница 10: ...vi 7 Modero Widescreen Touch Panels Table of Contents...
Страница 58: ...Installation 48 7 Modero Widescreen Touch Panels...
Страница 200: ...Troubleshooting 190 7 Modero Widescreen Touch Panels...
Страница 206: ...Appendix A 196 7 Modero Widescreen Touch Panels...
Страница 217: ...Appendix B Wireless Technology 207 Modero Touch Panels...
Страница 218: ...Appendix B Wireless Technology 208 Modero Touch Panels...
Страница 219: ...Appendix 209 7 Modero Widescreen Touch Panels...


