Network Configuration
67
Instruction Manual – DXLink™ Twisted Pair Transmitters/Receiver
To toggle between DHCP and Static IP Modes:
1.
Once the module has booted up, press and hold the ID Pushbutton until the Control/NetLinx LEDs
toggle back and forth in unison approximately 10 times.
2.
Release when it starts to blink faster.
When the Pushbutton is released, the module toggles either from static to dynamic (DHCP)
IP addressing or vice versa and remains in that mode until the ID Pushbutton is used to set it
again or a factory reset is performed.
The module automatically reboots to complete the process.
Assign a Device Address (ID Mode)
The ID Pushbutton can be used in conjunction with the ID (Identify) Mode feature in NetLinx Studio. A
momentary press of the ID Pushbutton assigns a device address to the Transmitter or Receiver (which
must be bound to the Master). The device
must
first be placed in ID Mode in NetLinx Studio or the
momentary press will be ignored.
Note:
The latest version of NetLinx Studio is available to download and install from
www.amx.com
.
Refer to the NetLinx Studio online help for instructions on using the application.
To set the device address on a Transmitter or Receiver:
1.
Check to be sure #3 Toggle on the bottom of the Transmitter or Receiver is set to ON.
2.
In NetLinx Studio’s OnLine Tree, select the Master to which the Transmitter or Receiver is bound.
3.
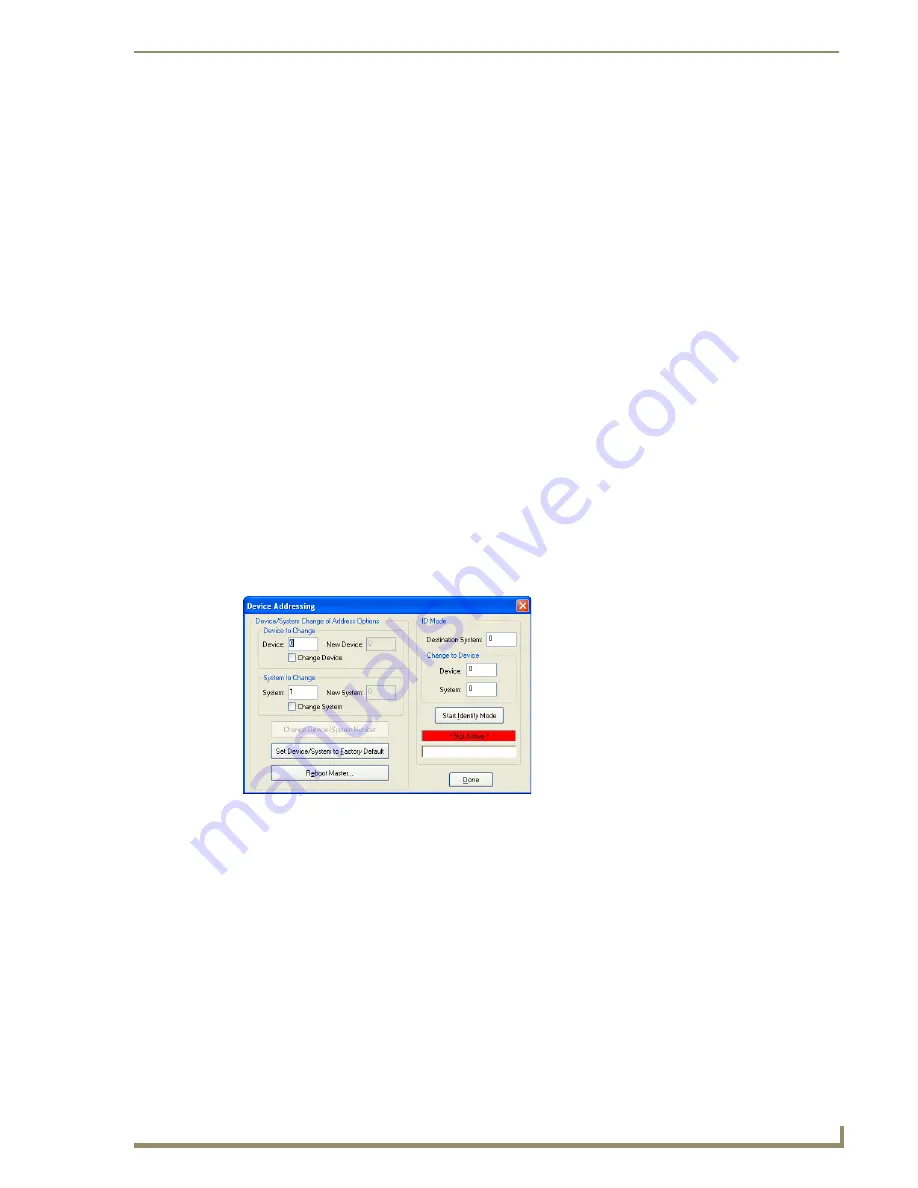
From the Diagnostic menu, select Device Addressing.
The Device Addressing dialog box opens.
4.
In the ID Mode section, enter the Device and System numbers that you want assigned to the device
in the appropriate text boxes.
5.
Click Start Identify Mode to place the named system in ID Mode.
The button changes to “Cancel Identify Mode” (click to cancel ID Mode).
The text box below the button displays a “Waiting...Press Cancel to Quit” message.
Note:
When in ID Mode, the entire system is put on hold while it waits for an event from any NetLinx
device in the named system (e.g., pressing the ID Pushbutton on the Receiver). The device that
generates the first event is the device that will be “identified.”
Содержание AVB-DWP-TX-MULTI-DXLINK
Страница 6: ...Contents iv Instruction Manual DXLink Twisted Pair Transmitters Receiver ...
Страница 12: ...Notices 6 Instruction Manual DXLink Twisted Pair Transmitters Receiver ...
Страница 38: ...Product Overview and Specifications 32 Instruction Manual DXLink Twisted Pair Transmitters Receiver ...
Страница 78: ...Network Configuration 72 Instruction Manual DXLink Twisted Pair Transmitters Receiver ...
Страница 116: ...Appendix A Upgrading the Firmware 110 Instruction Manual DXLink Twisted Pair Transmitters Receiver ...
Страница 136: ...Appendix D Cable Details and Pinout Info 130 Instruction Manual DXLink Twisted Pair Transmitters Receiver ...
Страница 140: ...Appendix E Supported Input Resolutions 134 Instruction Manual DXLink Twisted Pair Transmitters Receiver ...
Страница 146: ...Appendix F Supported Output Resolutions 140 Instruction Manual DXLink Twisted Pair Transmitters Receiver ...


