Physical Installation
13
ACR-5100 Acendo Core Administrators Guide
Acendo Core Power Up
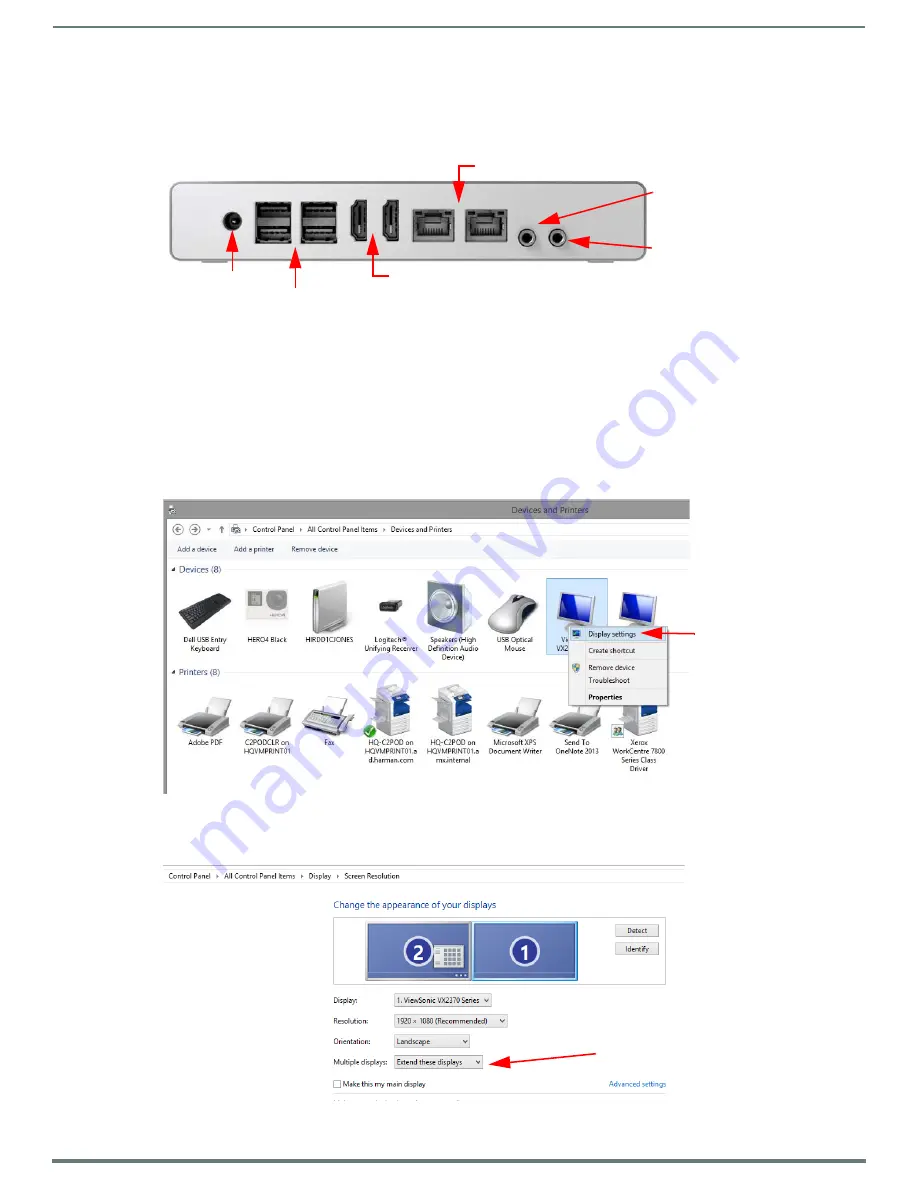
This section describes the required steps to successfully power up the Acendo Core ACR-5100. FIG. 17 provides references to the
Acendo Core rear access ports that will have connections made to peripheral devices, monitors, and power.
Connecting to a Video Output
The ACR-5100 uses standard HDMI cabling to connect to a monitor/projector.
1.
Use an HDMI cable to connect the HDMI Port1 on the Acendo Core rear panel to the display monitor.
2.
To use Dual displays, use an HDMI cable to connect a second monitor to the additional HDMI Port on the rear panel. Some
configuration will be required in Windows to set up the dual displays. Go to the Windows Control Panel as shown in FIG. 18.
NOTE:
Does not support dual displays with different resolutions. Both displays much use only one of these listed resolutions:
– 720p @ 60Hz
– 1080p @ 60Hz
– 4K @ 60Hz
3.
Right click on the display to select Display Settings. FIG. 18 appears. Select the Extend these displays options to combine two
displays to create a larger desktop.
FIG. 17
ACR-5100 Acendo Core (Rear Panel)
FIG. 18
Windows Control Panel - Devices and Printers
FIG. 19
Windows Control Panel - Display Settings
Connect Power
Connect to Alero
Connect to AV Input
Connect Cat5 Network Interface Cable
Connect Peripheral Devices
HDMI Cable Out to video display, use second Port for extended or duplicate
display, configured in Windows Advanced Settings
Right Click on display and
select Display Settings
Select the Multiple displays drop down.


