background image

3

CMS-I-00007038

10 | Repairing the implement

Lubricating the implement 

MG7508-EN-GB | B.1 | 31.08.2022 | © AMAZONE

141

Содержание Centaya 3000 Special

Страница 1: ...Original operating manual Pneumatic pack top seed drill Centaya 3000 Special SmartLearning www amazone de...

Страница 2: ...Please enter the identification data of the implement The identification data can be found on the rating plate...

Страница 3: ...e warning symbols 24 4 5 2 Layout of the warning symbols 27 4 5 3 Description of the warning symbols 27 4 6 Rating plate on the implement 31 4 7 Threaded cartridge 31 4 8 Universal operating tool 32 4...

Страница 4: ...sensor 77 6 4 15 Operating the one sided switching 78 6 4 16 Using the loading board steps 79 6 4 17 Preparing the metering unit for operation 79 6 5 Preparing the machine for road travel 91 6 5 1 Mov...

Страница 5: ...11 Cleaning the cyclone separator 128 10 2 12 Cleaning the segment distributor head 129 10 2 13 Cleaning the conveyor section 129 10 2 14 Cleaning the metering unit 133 10 2 15 Checking the top link...

Страница 6: ......

Страница 7: ...cates a direct threat with high risk for severe physical injury such as loss of limbs or death WARNING Indicates a possible threat with moderate risk for severe physical injury or death CAUTION Indica...

Страница 8: ...cified sequence of the actions must be observed Example 1 Instruction 1 2 Instruction 2 1 1 3 1 Instructions and responses Reactions to instructions are marked with an arrow Example 1 Instruction 1 Re...

Страница 9: ...uire a specific sequence are shown as a list with arrows Example Instruction Instruction Instruction 1 1 4 Lists Lists without an essential order are shown as a list with bullets Example Point 1 Point...

Страница 10: ...stions for improvement help us to create ever more user friendly operating manuals Please send us your suggestions by post fax or email Fax 49 0 5405 501 234 Postfach 51 AMAZONEN WERKE H Dreyer SE Co...

Страница 11: ...l operation of the implement Before starting work also read and observe each section of the operating manual Keep the operating manual in a safe place Keep the operating manual available Hand over the...

Страница 12: ...prescribed driving permit 2 1 2 1 2 Qualification levels For working with the machine the following qualification levels are provided Farmer Agricultural helper As a matter of principle the activitie...

Страница 13: ...work assignment from the farmer Agricultural helpers can be e g Seasonal workers and labourers Prospective farmers in training Employees of the farmer e g tractor driver Family members of the farmer...

Страница 14: ...e to the machine can impede the operational safety of the machine and cause accidents This can result in serious injury or death If you suspect or observe damage secure the tractor and implement Immed...

Страница 15: ...erials seed fertiliser crop protection products and cleaning agents Wear suitable clothing Loosely worn clothing increases the risk of getting caught or entangled on rotating parts and getting stuck o...

Страница 16: ...njuries Before you uncouple hydraulic hoses or check them for damage depressurise the hydraulic system If you suspect damage on a pressure system have the pressure system checked by a qualified specia...

Страница 17: ...mplement This also applies for quick checking work CMS I 00007027 2 1 4 Safe operation and handling of the machine 2 1 4 1 Coupling implements Coupling the implement on the tractor Incorrectly couplin...

Страница 18: ...ng points Calculate and observe the payload of the mounted or towed implement Observe the permissible axle loads and drawbar loads of the tractor Observe the permissible drawbar load of the hitch devi...

Страница 19: ...tor and the implement Secure the tractor and machine 2 1 5 Safe maintenance and modification 2 1 5 1 Changes on the implement Only authorised design changes Design changes and extensions can impede th...

Страница 20: ...down to the ground Relieve the pressure in the hydraulic hose lines If you have to work on or under raised loads lower the loads or secure raised machine parts with a hydraulic or mechanical locking...

Страница 21: ...ould only be performed by a qualified specialist workshop Maintenance work on safety related components should be performed only by a qualified specialist workshop Never perform welding drilling sawin...

Страница 22: ...s If you have doubts as to whether a component can be welded ask a qualified specialist workshop Before welding on the implement uncouple the implement from the tractor 2 1 5 3 Operating materials Uns...

Страница 23: ...personal injury due to crushing and cutting Only park the implement on stable and level ground Before you depressurise the hydraulic hose lines and disconnect them from the tractor move the implement...

Страница 24: ...o that safe stepping and standing is ensured Never climb onto the machine when it is in motion Climb up and down facing the machine When climbing up and down maintain 3 point contact with the access s...

Страница 25: ...escribed in the section Personnel qualification The operating manual is part of the machine The machine is solely intended for use in compliance with this operating manual Uses of the machine that are...

Страница 26: ...I 00006840 1 Work floodlights 2 Segment distributor head 3 Tramline marker 4 Exact following harrow 5 Seeding coulter 6 QuickLink catching sockets 7 Metering unit CMS T 00009762 A 1 CMS T 00009764 A...

Страница 27: ...CMS I 00006841 1 Threaded cartridge 2 Fan 3 Rating plate 4 Seed line hoses 1 CMS I 00006842 1 Cabinet for hydraulic hose lines 4 Product description Implement overview MG7508 EN GB B 1 31 08 2022 AMA...

Страница 28: ...les seedbed preparation and seeding in one field pass 4 3 Special equipment Special equipment is equipment that is not fitted on the implement or is only available in certain markets The sales documen...

Страница 29: ...protects the user against injuries caused by rotating parts and the metering unit against foreign objects 1 CMS I 00005315 4 4 2 Fan guard screen The fan guard screen 1 protects against injuries cause...

Страница 30: ...llowing harrow to protect against injury and damage 1 CMS I 00005527 4 5 Warning symbols 4 5 1 Positions of the warning symbols CMS I 00006972 CMS T 00007937 B 1 CMS T 00009770 A 1 CMS T 00009857 A 1...

Страница 31: ...CMS I 00006976 CMS I 00006977 4 Product description Warning symbols MG7508 EN GB B 1 31 08 2022 AMAZONE 25...

Страница 32: ...CMS I 00006978 CMS I 00006984 4 Product description Warning symbols MG7508 EN GB B 1 31 08 2022 AMAZONE 26...

Страница 33: ...0416 4 5 3 Description of the warning symbols MD 078 Risk of crushing fingers or hands As long as the tractor engine or implement motor is running stay away from the danger area If you have to move ma...

Страница 34: ...t Before you actuate the tractor hydraulic system instruct persons away from the area between the tractor and the implement Actuate the tractor hydraulic system only from the designated work station C...

Страница 35: ...Before your work on or with the implement read and understand the operating manual CMS I 000138 MD 096 Risk of infection from escaping hydraulic fluid under high pressure Never look for leaks in hydr...

Страница 36: ...MD 199 Risk of accident if the hydraulic system pressure is too high Only couple the implement to tractors with a maximum tractor hydraulic pressure of 210 bar CMS I 00000486 MD 100 Risk of accidents...

Страница 37: ...plate on the implement 1 Implement number 2 Vehicle ID number 3 Product 4 Permissible technical implement weight 5 Model year 6 Year of manufacture 1 4 5 2 3 6 CMS I 00004294 4 7 Threaded cartridge T...

Страница 38: ...end device via Bluetooth and exchange data with the mySeeder app Moreover the mySeeder app can be used to calibrate the implement or empty the hopper through the metering unit CMS I 00004418 The mySee...

Страница 39: ...nveyor fan produces an air current that carries the spreading material to the seed drill through the conveyor section The conveyor fan is driven by a hydraulic motor The fan guard screen protects the...

Страница 40: ...4 Metering unit housing 3 2 4 1 CMS I 00005085 A metering unit is installed under each hopper tip The metering roller is electrically driven and can be exchanged The metered material falls into the s...

Страница 41: ...e CMS I 00002549 4 13 3 Conveyor section Single shoot 1 chamber hopper 1 Fan 2 Metering unit 3 Calibration flap 4 Conveyor section 3 4 2 1 CMS I 00006472 4 14 Mounting frame The pack top seed drill is...

Страница 42: ...Rear lighting and identification for road travel 1 Warning signs 2 Reflector red 3 Rear lights brake lights and turn indicators 4 Reflector yellow CMS I 00004545 NOTE The lighting and identification f...

Страница 43: ...on and off via the control terminal or control computer 1 CMS I 00006845 The coulter array lighting 1 enables better visibility of the seeding coulters in the dark The coulter array lighting is switc...

Страница 44: ...ibutor head is equipped with tramline segments The tramline segments close off the distributor head outlet with a setting motor 3 The seed line tubes on the tramline segments are marked with a red cab...

Страница 45: ...TwinTeC Special coulter is a double disc coulter that deposits seed and fertiliser on ploughed or mulched soil The cutting discs 1 form the seed furrow The metered material is guided between the conc...

Страница 46: ...The coulter pressure and the placement depth can be adjusted For soil tillage without seeding the coulters can be lifted 3 2 1 CMS I 00005194 The Control 25 depth control wheel 1 has a 25 mm wide cont...

Страница 47: ...fted independently of the position of the coulters There is a bracket 1 that is secured with a linch pin on each side of the exact following harrow The bracket prevents the harrow tines from folding o...

Страница 48: ...tch of the track discs can be adjusted 1 CMS I 00005978 4 24 Track marker The track markers 1 dig into the ground alternately beside the implement The next bout is automatically connected when the tra...

Страница 49: ...QuickLink quick coupling system Working width of the implement Distance of the QuickLink catching sockets 3 m 2 029 mm 3 mm 5 4 Optimal working speed Seeding coulter Working speed depending on the so...

Страница 50: ...s Type Mounting frame for the seed drill 3 point mounting frame of the carrying implement Centaya 3000 Special QuickLink Category 3 5 8 Drivable slope inclination Across the slope On left in direction...

Страница 51: ...put At least 10 l min at 150 bar Implement hydraulic oil HLP68 DIN51524 The hydraulic oil is suitable for the combined hydraulic oil circuits of all standard tractor manufacturers Control units Depend...

Страница 52: ...ballast weights TH kg Rear axle load of the operational tractor without mounted implement or ballast weights GV kg Total weight of front mounted implement or front ballast GH kg Permissible total weig...

Страница 53: ...centre of the rear axle and the centre of the lower link connection d m Centre of gravity distance Distance between the centre of the lower link coupling point and centre of gravity of the rear mount...

Страница 54: ...in the following table IMPORTANT Danger of accident due to implement damage caused by excessive loads Make sure that the calculated loads are smaller or equal to the permissible loads Actual value ac...

Страница 55: ...ermissible technical implement weight from the rating plate 2 To determine the tare weight Weigh the implement when the hopper is empty 3 Calculate the payload 6 3 Coupling the implement 6 3 1 Couplin...

Страница 56: ...are assigned to the respective hydraulic functions of the pressure line of a tractor control unit Stickers are applied on the implement for the markings which illustrate the respective hydraulic func...

Страница 57: ...faulty When coupling the hydraulic hose lines observe the coloured markings on the hydraulic plugs IMPORTANT Implement damage due to insufficient hydraulic oil return flow Only use DN16 lines for the...

Страница 58: ...links 1 from the tractor seat 3 Couple the top link 2 4 Check whether the top link catch hooks 3 and lower link catch hooks 4 are correctly locked 3 4 2 1 CMS I 00001225 6 3 5 Coupling the Centaya pa...

Страница 59: ...k is adjusted to a length of 840 mm On the KE KX KG rotary cultivator with 1 tube roller frame the top link is adjusted to a length of 445 mm On the KE KX KG rotary cultivator with 2 tube roller frame...

Страница 60: ...connect the supply line of the seed drill to the soil tillage implement 1 1 CMS I 00003485 14 Connect the supply line 2 for the rear lighting and identification for road travel to the soil tillage im...

Страница 61: ...studs 2 3 1 CMS I 00006780 6 4 2 Adjusting the working position sensor The working position sensor monitors the implement position in the three point hydraulic system and switches the metering drives...

Страница 62: ...evel in the hopper At lower spread rates the fill level sensor must be attached in the lower area of the hopper At higher spread rates the fill level sensor must be attached in the upper area of the h...

Страница 63: ...nut and nuts NOTE As soon as the fill level sensor is no longer covered a warning message appears on the control terminal or control computer When the fill level sensor is installed in the lower area...

Страница 64: ...ically NOTE The adjustment of the coulter pressure must be adapted to the respective operating conditions The optimum adjustment can only be determined during field operation 1 Lift the implement The...

Страница 65: ...ment can only be determined during field operation WARNING Unexpected movement of the coulter and exact following harrow The hydraulic cylinders for the coulter pressure adjustment and the exact follo...

Страница 66: ...g tool counter clockwise or To increase the coulter pressure turn the universal operating tool clockwise 3 To check the setting seed for approx 30 m at working speed and then check the work pattern 1...

Страница 67: ...osition 3 To increase the coulter pressure actuate the green 1 tractor control unit or To reduce the coulter pressure put the green tractor control unit into float position CMS I 00005586 The mechanic...

Страница 68: ...ighten the wing nut 4 To set the desired seed rate increase see ISOBUS software operating manual or see control computer operating manual 6 4 8 Adjusting the placement depth on the TwinTeC Special cou...

Страница 69: ...1 Put the universal operating tool 1 on the adjustment shaft 2 1 2 CMS I 00006883 The scale 1 serves as orientation 1 CMS I 00006884 2 To reduce the coulter pressure turn the universal operating tool...

Страница 70: ...gumes the press roller must be installed at different positions 6 Remove the nut 1 7 Remove the washer 2 8 Remove the bolt 5 9 To spread fine seeds or cereals install the press rollers in the lower po...

Страница 71: ...r down and engage it in the desired position or To completely remove the depth control disc or depth control wheel move the lever all the way down and push it to the rear in the elongated slot 3 until...

Страница 72: ...pin NOTE The adjustment of the harrow angle must be adapted to the respective operating conditions The optimum adjustment can only be determined during field operation 1 2 CMS I 00003184 1 Lift the im...

Страница 73: ...2 To move the harrow tine 1 to the medium working position Install the pin 2 in the hole shown The harrow tine is resting on the pin 3 To check the setting seed for approx 30 m at working speed and th...

Страница 74: ...hown The harrow tine is resting on the pin 3 To check the setting seed for approx 30 m at working speed and then check the work pattern 2 1 CMS I 00003185 6 4 10 2 Deactivating the harrow tines 1 Lift...

Страница 75: ...e exact following harrow 6 4 11 1 Adjusting the position of the exact following harrow tines When the exact following harrow is properly adjusted the harrow tines rest horizontally on the ground and h...

Страница 76: ...gher move the holding arm 1 up or To set the exact following harrow deeper move the holding arm 1 down 1 CMS I 00006022 5 Install the bushes 3 6 Install the washers 2 7 Install the bolts 1 8 Tighten t...

Страница 77: ...ng harrow deeper turn the universal operating tool counter clockwise or To set the exact following harrow higher turn the universal operating tool clockwise 2 1 3 CMS I 00006062 13 To lock the holding...

Страница 78: ...echanical pegging The exact following harrow pressure is then hydraulically adjusted together with the coulter pressure With higher coulter pressure higher exact following harrow pressure is also set...

Страница 79: ...the lower exact following harrow pressure put the green tractor control unit into float position 6 To check the setting seed for approx 30 m at working speed and then check the work pattern 6 4 11 2...

Страница 80: ...following harrow pressure remove the linch pin 2 and insert it in a higher hole under the stop 1 or To reduce the exact following harrow pressure remove the linch pin 2 and insert it in a lower hole...

Страница 81: ...ten the bolts 6 To check the setting seed for approx 30 m at working speed and then check the work pattern 2 1 3 CMS I 00005172 6 4 12 2 Adjusting the track disc pitch 1 loosen the nut 4 2 To increase...

Страница 82: ...ver 2 1 2 CMS I 00003190 NOTE A maximum of 50 percent of the seed outlets may be closed off otherwise the seed is not deposited in the furrow 3 To increase the row spacing use the tool 2 to install th...

Страница 83: ...g manual 6 To permanently deactivate the desired tramline segments see section Disconnecting tramline segments 7 To open the remaining active tramline segments again advance the tramline counter 8 Dea...

Страница 84: ...ctuate the desired sliding shutter manually swivel up the corresponding control lever or To operate the electrically actuated sliding shutter see ISOBUS software operating manual or see control comput...

Страница 85: ...p and put them in the parking position The transport lock locks automatically 6 Check whether the transport lock is properly locked CMS I 00004942 6 4 17 Preparing the metering unit for operation 6 4...

Страница 86: ...X X Grass seeds X Oats X X X X Millet X X Carawa y X X X Lupines X X X Lucerne X X X Maize X Poppy X X X Oilseed moist dressed X X X Fodder radish X X X Phaceli a X X X Rapese ed X X X X Rye X X X X R...

Страница 87: ...g to the spreading material see table 2 To install the desired metering roller see section Changing the metering roller 3 To perform the calibration see Calibrating the metering unit 6 4 17 3 Enlargin...

Страница 88: ...r volume that is not too large or too small but that is sufficient to spread the required quantity of spreading material 1 Remove the locking ring 4 2 Remove the end plate 3 3 Remove the metering whee...

Страница 89: ...06873 3 Take the calibration bucket 1 out of the holder 1 CMS I 00006874 4 Slide the calibration bucket 2 into the guide rails 1 so that the calibration bucket is positioned underneath the metering un...

Страница 90: ...ts parking position 1 3 2 CMS I 00005255 9 Push the sliding shutter 2 into the metering unit housing 10 Park the socket wrench in the holder 1 11 To empty the metering unit and the metering roller ref...

Страница 91: ...ign the catch 4 on the bearing cover 1 with the drive shaft 19 Install the bearing cover 20 Tighten the bolts with the socket wrench 3 21 Park the socket wrench in the holder 2 3 2 1 4 CMS I 00005254...

Страница 92: ...ration bucket 2 from the guide rails 1 27 Empty the calibration bucket 2 1 CMS I 00006792 28 Put the calibration bucket 1 in the parking position 1 CMS I 00006875 6 Preparing the implement Preparing t...

Страница 93: ...e hopper is at least one quarter filled with spreading material 1 To unlock the calibration bucket remove the linch pin 1 from the holder 1 CMS I 00006873 2 Take the calibration bucket 1 out of the ho...

Страница 94: ...the TwinTerminal 1 or the calibration button refer to the ISOBUS software operating manual Calibration menu or see control computer operating manual 6 To start the calibration via the control termina...

Страница 95: ...0006783 8 Fold down the bracket 1 on the ascent 1 CMS I 00005700 9 Hang the scale 2 on the bracket 1 on the ascent 10 Hang the collapsible bucket 3 on the scale 1 2 3 CMS I 00005716 6 Preparing the im...

Страница 96: ...the guide rails 1 13 Pour the seed from the calibration bucket into the collapsible bucket 2 1 CMS I 00006792 14 Put the calibration bucket 1 in the parking position 1 CMS I 00006875 6 Preparing the...

Страница 97: ...Loosen the bolt 2 with the universal operating tool 2 Push the sliding element 1 into the carrier tube 3 up to the stop 3 Tighten the bolt 2 with the universal operating tool 4 Make the same setting f...

Страница 98: ...ck disc carrier in the transport bracket 1 with a pin 2 1 2 3 CMS I 00005176 6 5 3 Putting the road safety bars on the exact following harrow 1 Remove coarse dirt from the tines 2 Push the road safety...

Страница 99: ...ing harrow into working position The roller and the coulters force the soil outwards to different extents depending on the forward speed and the soil properties The outer harrow elements must be adjus...

Страница 100: ...74 7 3 Unfolding the tramline marker 1 Set the implement down on the field 2 Take hold of the track disc carrier 1 3 Pull out the pin 2 4 Swivel the track disc carriers into working position 1 2 CMS I...

Страница 101: ...pth 3 3 Cover the seed with fine soil again 4 Check the placement depth in several places in a longitudinal and transverse direction relative to the implement 1 3 2 CMS I 00003257 7 6 Turning on the h...

Страница 102: ...lement matches that of the direction of travel lower the implement 7 7 Performing maintenance work during operation Clean the suction guard screen or cyclone separator see page 128 CMS T 00010368 A 1...

Страница 103: ...cutting discs are blocked If the inner scraper is worn the cutting discs are blocked by adhering soil see page 100 The RoTeC coulter is not spreading seed The seed outlet is slightly blocked Raise th...

Страница 104: ...start running at the wrong time The switch points of the working position sensor are wrong To configure the working position sensor see Configuring the working position sensor The fan speed displayed...

Страница 105: ...5 1 6 Nm CMS I 00003246 The TwinTeC coulter does not guide the seed precisely into the furrow 1 Remove the hose 6 or Remove the Y piece 2 Remove the bolt 7 3 Remove the TwinTeC seed outlet 1 4 Remove...

Страница 106: ...ies 4 8 Install the bolt 9 Install the hose 1 6 Nm 5 6 2 3 4 1Nm CMS I 00003260 TwinTeC cutting discs are blocked 1 Remove the hose 5 or Remove the Y piece 2 Remove the bolt 6 3 Remove the TwinTeC see...

Страница 107: ...sufficiently with fine soil 1 Remove the nut 1 2 Remove the bolt 4 3 Remove the harrow bracket 2 4 Replace the harrow tines 3 5 Move the harrow bracket to the desired position 6 Install the bolt 7 In...

Страница 108: ...position 1 1 2 CMS I 00004678 The following actions must be performed when the harrow tines are worn 1 Remove the nuts 1 2 Remove the bolts 5 and plates 2 3 Replace the harrow tines 3 and 4 4 Install...

Страница 109: ...the residual quantity in a collection bucket 4 When the seed hopper is emptied Close the quick emptying 2 1 CMS I 00006781 9 1 2 Emptying the hopper via the metering unit 1 To unlock the calibration...

Страница 110: ...e the calibration bucket 2 into the guide rails 1 so that the calibration bucket is positioned underneath the metering unit 2 1 CMS I 00006785 4 Open the calibration flap 1 1 CMS I 00006787 9 Parking...

Страница 111: ...r to the ISOBUS software operating manual Emptying 2 1 CMS I 00005259 11 Loosen the bolts with the socket wrench 3 12 Park the socket wrench in the holder 2 13 Turn the bearing cover 1 3 2 1 CMS I 000...

Страница 112: ...lts with the socket wrench 3 22 Park the socket wrench in the holder 2 3 2 1 4 CMS I 00005254 23 Park the sliding shutter 2 on the metering housing 24 Swivel the bolts 3 in front of the sliding shutte...

Страница 113: ...ion bucket 2 1 CMS I 00006792 29 Put the calibration bucket 1 in the parking position 1 CMS I 00006875 30 To lock the calibration bucket attach the linch pin 1 onto the holder 1 CMS I 00006873 9 Parki...

Страница 114: ...t after operation Clean the metering unit after operation 1 Switch off the fan 2 To unlock the calibration bucket remove the linch pin 1 from the holder 1 CMS I 00006873 3 Take the calibration bucket...

Страница 115: ...ring unit 2 1 CMS I 00006785 5 Open the calibration flap 1 1 CMS I 00006787 6 Loosen the bolts 3 with the socket wrench 1 7 Swivel the bolts to the side 8 Take the sliding shutter 2 from its parking p...

Страница 116: ...or see control computer operating manual 2 1 CMS I 00005259 12 Before work is started again park the sliding shutter 2 on the metering unit housing 13 Swivel the bolts 3 in front of the sliding shutt...

Страница 117: ...bucket 2 1 CMS I 00006792 18 Put the calibration bucket 1 in the parking position 1 CMS I 00006875 19 To lock the calibration bucket attach the linch pin 1 onto the holder 1 CMS I 00006873 9 Parking...

Страница 118: ...cap 3 Hang the plug in the hose cabinet 1 2 CMS I 00006891 9 4 Uncoupling the power supply 1 Pull out the plug 1 for the power supply 1 CMS I 00001048 2 Hang the plugs 1 in the hose cabinet 1 CMS I 0...

Страница 119: ...parking supports 1 Release the top link 1 2 Disconnect the top link 1 from the implement from the tractor seat 3 Release the lower links 2 4 To secure the Centaya seeding combination against rolling...

Страница 120: ...hydraulic hose lines 1 in the hose cabinet 1 CMS I 00001250 9 7 Parking the Centaya pack top seed drill 1 To set the coulter pressure to 0 see section Adjusting the coulter pressure on the TwinTeC Spe...

Страница 121: ...ng and identification from the soil tillage implement 1 CMS I 00004527 5 If the pack top seed drill has a tramline marker disconnect the supply line of the pack top seed drill from the soil tillage im...

Страница 122: ...MS I 00007204 9 Remove the linch pin 2 10 Remove the pin 3 11 Disconnect the top link 1 from the soil tillage implement 12 Release the holder 4 13 Take the hydraulic hose lines out of the guide 5 and...

Страница 123: ...ent are lowered The pack top seed drill 1 is standing on the parking supports 17 Install the safety clips 3 on the soil tillage implement CMS I 00003590 18 Slowly drive the tractor with the coupled so...

Страница 124: ...ssure cleaners on electrical or electronic components Never aim the cleaning jet of the high pressure cleaner directly on lubrication points bearings rating plates warning signs and stickers Always ma...

Страница 125: ...Checking the tightening torque for the radar sensor bolts see page 126 Every 10 operating hours daily Cleaning the cyclone separator see page 128 Cleaning the segment distributor head see page 129 Cle...

Страница 126: ...tral bolts have different threads The right central bolt has right hand thread The left central bolt has left hand thread 7 To ensure that the TwinTeC cutting discs touch slightly adjust the spacing o...

Страница 127: ...If the TwinTeC depth control wheel has cracks or fractures replace the depth control wheel 3 Remove the nut and washer 2 4 Replace the damaged TwinTeC depth control wheel 5 Install the nut and washer...

Страница 128: ...orientation of the sealing ring 3 7 Install new TwinTeC cutting discs 8 To ensure that the TwinTeC cutting discs touch slightly see section Checking the TwinTeC cutting disc distance 1 17 Nm 3 2 CMS...

Страница 129: ...raper 7 Remove the nut and washer 8 Replace the depth control wheel scraper 9 Install the washer and nut 10 To check the distance rotate the wheel 10 2 6 Checking the RoTeC depth control discs and RoT...

Страница 130: ...or RoTeC depth control wheel and insert them in the new RoTeC depth control disc or RoTeC depth control wheel 6 Install the lever 2 with the bolt 1 on the new RoTeC depth control disc or RoTeC depth...

Страница 131: ...t 2 and dispose of it 4 Replace the worn furrow former 1 5 Install the a new bolt 2 The bolts for the furrow former are coated and may not be reused 2 1 A CMS I 00004667 10 2 8 Checking the RoTeC cutt...

Страница 132: ...lace the worn RoTeC cutting disc 1 6 Install the bolts 2 1 CMS I 00005324 10 2 9 Checking the tightening torque for the radar sensor bolts INTERVAL After initial operation Every 12 months NOTE When th...

Страница 133: ...rpaulin 2 Clean the charging sieve 1 1 CMS I 00006777 3 Remove the linch pin 1 1 CMS I 00005314 4 Take out the charging sieve 1 5 Clean the hopper with a high pressure cleaner 1 CMS I 00006778 CMS T 0...

Страница 134: ...the separator opening 3 must be free of impurities 1 Check the separator opening 3 2 If the separator opening in clogged open the clips 2 3 Loosen the wing nut 1 4 Remove the cover and clean it 5 Ins...

Страница 135: ...screws 1 2 Remove the cover 2 3 Clean the segment distributor head 3 using a paint brush hand brush or with compressed air 4 Clean the seed outlets and tramline segments 4 using a paint brush hand bru...

Страница 136: ...e the linch pin 1 from the holder 1 CMS I 00006873 2 Take the calibration bucket 1 out of the holder 1 CMS I 00006874 3 Slide the calibration bucket 2 into the guide rails 1 so that the calibration bu...

Страница 137: ...ion opening 1 2 CMS I 00005364 7 Loosen the four knurled screws 4 8 Remove the cover 1 9 To remove the deposits aim a water jet into the seed outlets 3 and into the corrugated tube 2 10 Install the co...

Страница 138: ...The air supply is blown dry 14 Switch off the fan 1 CMS I 00006791 15 Take the calibration bucket 2 from the guide rails 1 16 Empty the calibration bucket 2 1 CMS I 00006792 17 Put the calibration buc...

Страница 139: ...he metering drive due to swelling fertiliser or germinating seed Empty the metering unit after operation Clean the metering unit after operation 1 Switch off the fan 2 To unlock the calibration bucket...

Страница 140: ...calibration bucket 2 into the guide rails 1 so that the calibration bucket is positioned underneath the metering unit 2 1 CMS I 00006785 5 Open the calibration flap 1 1 CMS I 00006787 10 Repairing th...

Страница 141: ...r refer to the ISOBUS software operating manual Emptying or see control computer operating manual 2 1 CMS I 00005259 12 Loosen the bolts with the socket wrench 3 13 Park the socket wrench in the holde...

Страница 142: ...g cover 21 Tighten the bolts with the socket wrench 3 22 Park the socket wrench in the holder 2 3 2 1 4 CMS I 00005254 23 park the sliding shutter 2 on the metering unit housing 24 Swivel the bolts 3...

Страница 143: ...bucket 2 1 CMS I 00006792 29 Put the calibration bucket 1 in the parking position 1 CMS I 00006875 30 To lock the calibration bucket attach the linch pin 1 onto the holder 1 CMS I 00006873 10 Repairin...

Страница 144: ...weekly 1 Check the hydraulic hose lines for damage such as chafing point cuts tears and deformation 2 Check the hydraulic hose lines for leaks Hydraulic hose lines must not be more than 6 years old 3...

Страница 145: ...e To ensure that dirt is not pressed into the lubrication points thoroughly clean the grease nipples and the grease gun Only grease the implement with the lubricants listed in the technical data Press...

Страница 146: ...of lubrication points 1 2 3 CMS I 00006876 Every 100 operating hours 1 2 CMS I 00006877 CMS I 00006238 CMS T 00009836 A 1 10 Repairing the implement Lubricating the implement MG7508 EN GB B 1 31 08 2...

Страница 147: ...3 CMS I 00007038 10 Repairing the implement Lubricating the implement MG7508 EN GB B 1 31 08 2022 AMAZONE 141...

Страница 148: ...the hopper 1 Press in the plastic cap 1 and remove it 1 CMS I 00006790 2 Loosen the nuts 1 3 Remove the washers 2 4 Remove the bolts 3 1 2 3 CMS I 00005349 CMS T 00009814 A 1 CMS T 00009985 A 1 11 Lo...

Страница 149: ...ched slings for lifting If the slings are not attached at the marked lashing points the implement can be damaged during lifting and endanger safety Only attach the slings for lifting at the marked las...

Страница 150: ...nt on the parking supports or jacks CMS I 00006962 WARNING Risk of accidents due to improperly attached lashing straps If the lashing straps are not attached at the marked lashing points the implement...

Страница 151: ...mplement 1 Put the implement on the transport vehicle 2 Attach the lashing straps at the marked points 3 Lash down the implement in compliance with the national regulations for load securing 11 Loadin...

Страница 152: ...0 16 17 mm 49 Nm 69 Nm 83 Nm M10x1 52 Nm 73 Nm 88 Nm M12 18 19 mm 86 Nm 120 Nm 145 Nm M12x1 5 90 Nm 125 Nm 150 Nm M14 22 mm 135 Nm 190 Nm 230 Nm M 14x1 5 150 Nm 210 Nm 250 Nm M16 24 mm 210 Nm 300 Nm 3...

Страница 153: ...2 1 150 Nm 1 600 Nm 1 950 Nm M30 46 mm 1 450 Nm 2 000 Nm 2 400 Nm M30x2 1 600 Nm 2 250 Nm 2 700 Nm KA059 A2 70 A4 70 M CMS I 00000065 M4 M5 M6 M8 M10 M12 M14 M16 M18 M20 M22 M24 2 4 Nm 4 9 Nm 8 4 Nm 2...

Страница 154: ...ing materials Operating materials serve to ensure operational readiness Operating materials include e g cleaning agents and lubricants such as lubricating oil greases or cleaners T Tractor In this ope...

Страница 155: ...121 TwinTeC depth control wheel 121 TwinTeC depth control wheel scraper 122 cleaning Conveyor section 129 Hopper 127 Implement 118 Metering unit 133 closing Roller tarpaulin 55 Contact data Technical...

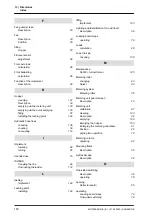
Страница 156: ...stalling 142 lifting Implement 143 Lighting and identification for road travel Description 36 Loading board steps operating 79 Loads calculation 46 Lower link pin checking 138 M Maintenance RoTeC furr...

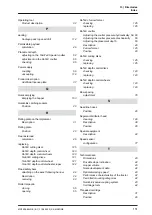
Страница 157: ...tarpaulin closing 55 opening 55 RoTeC furrow former checking 125 replacing 125 RoTeC coulter Adjusting the coulter pressure hydraulically 59 60 Adjusting the coulter pressure mechanically 60 Adjusting...

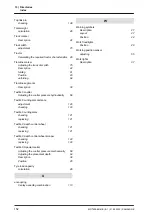
Страница 158: ...t 120 checking 120 TwinTeC cutting discs checking 121 replacing 121 TwinTeC depth control wheel checking 121 replacing 121 TwinTeC depth control wheel scraper checking 122 replacing 122 TwinTeC Specia...

Страница 159: ......

Страница 160: ...AMAZONEN WERKE H DREYER SE Co KG Postfach 51 49202 Hasbergen Gaste Germany 49 0 5405 501 0 amazone amazone de www amazone de MG7508 EN GB B 1 31 08 2022 AMAZONE...

Отзывы: