


Maintenance
Replacing the electrical contact densimeter
G51--161EN02
3/4
02--2011
© ALSTOM 2010. All rights reserved. Information contained in this document is indicative only. No representation or warranty is given or should be
relied on that it is complete or correct or will apply to any particular project. This will depend on the technical and commercial circumstances. It is
provided without liability and is subject to change without notice. Reproduction, use or disclosure to third parties, without express written authority, is
strictly prohibited.
GRID
Installing the new densimeter
Process
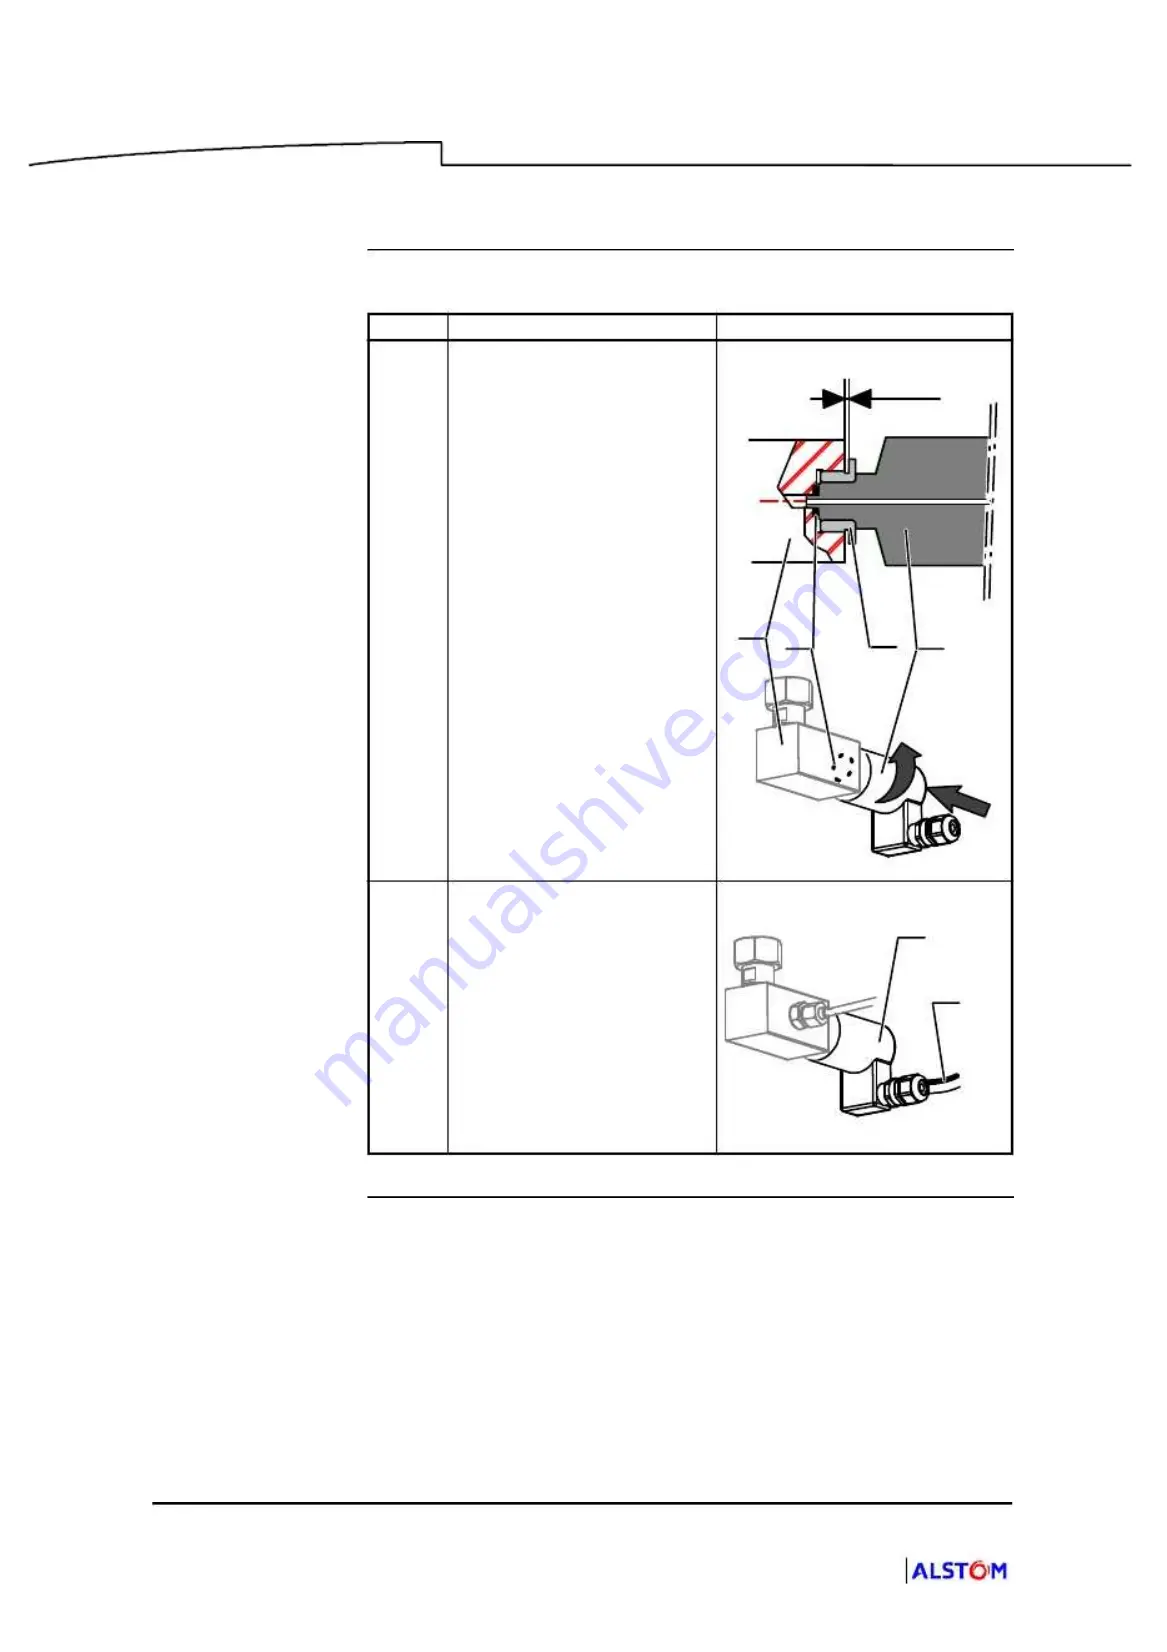
The table below gives the steps of installing the densimeter :
Step
Action
Diagram
6
Assemblyprincipleanddensi-
meter direction :
D
Prepare the new densimeter
(1) with new seal (23).
D
Thighten the screw (3) on
the block (2) with a gap of 2
mm,
D
Maintain the screw (3) in
position (gap 2 mm) and
screw the densimeter (1) and
unscrew it in order to install it
on requested position.
D
Tighten the screw (3) tight-
ening torque
8 daNm
in order
to fix the densimeter.
1
23
2
2mm
3
7
D
Connect thecable (22) of the
densimeter (2).
22
2
Содержание FKG1X
Страница 2: ......
Страница 7: ...GRID High Voltage Switchgear This page is intentionally blank...
Страница 13: ...GRID High Voltage Switchgear This page is intentionally blank...
Страница 17: ...GRID High Voltage Switchgear This page is intentionally blank...
Страница 21: ...GRID High Voltage Switchgear This page is intentionally blank...
Страница 75: ...This page is intentionally blank This page is intentionally blank...
Страница 191: ...GRID ALSTOM Grid SAS 130 rue L on Blum 69611 Villeurbanne France This page is intentionally blank...
Страница 197: ...GRID ALSTOM Grid SAS 130 rue L on Blum 69611 Villeurbanne France This page is intentionally blank...


