Chapter 1: Product Description
21
Examples within
a Loop
Prevention
Switch
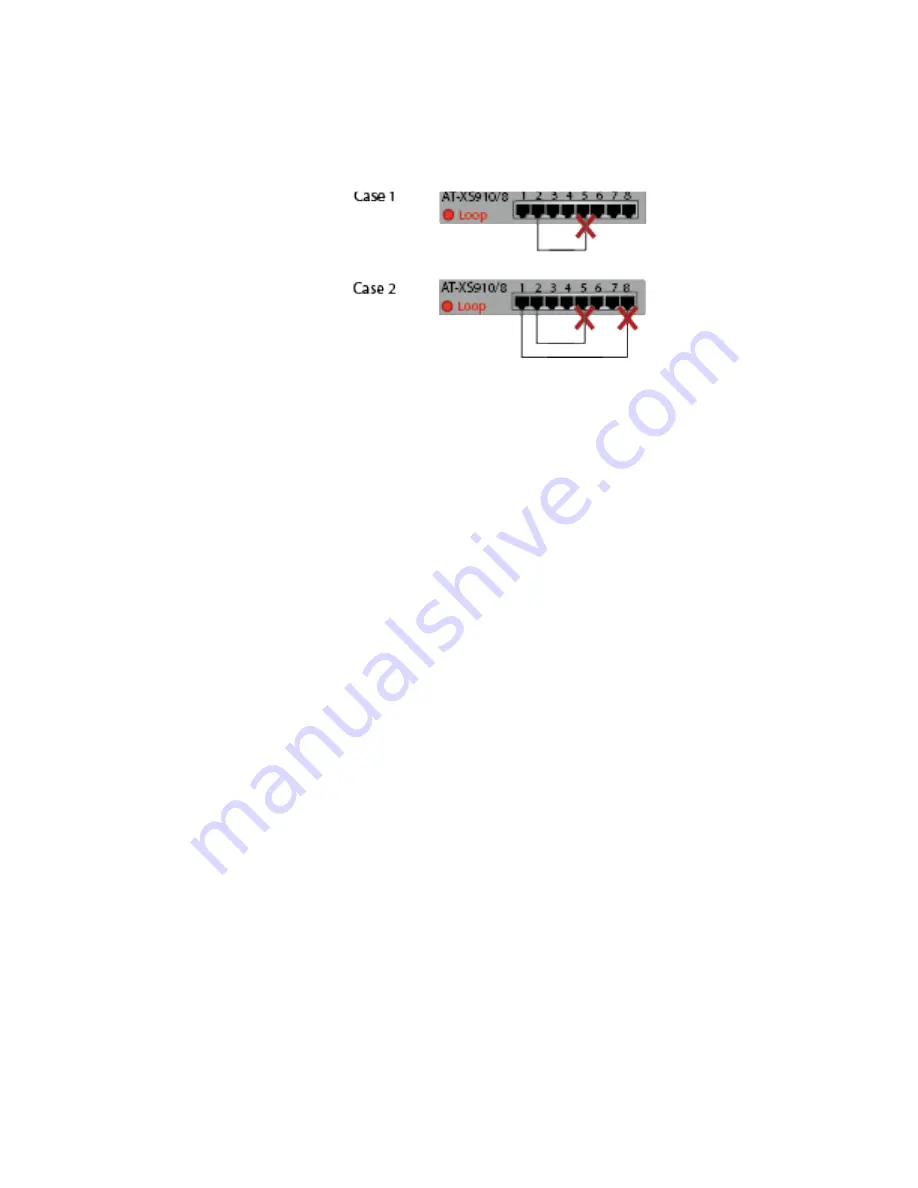
In examples shown in Figure 9, the ports of the AT-XS910/8 switch
connected. When Loop Prevention is enabled, the AT-XS910/8 switch
blocks the port with the higher port number than the link partner port.
x
Figure 9. AT-XS910/8 Switch with Loop Prevention
Guidelines for
Loop Prevention
Here are guidelines for using the Loop Prevention function:
The switch must have a unique MAC address.
In a topology with multiple switches with Loop Prevention enabled,
these switches select a root switch.
The switch with a lower MAC address is selected as a root switch.
Only a root switch blocks its port(s) when a loop is detected.
A port receives Loop Prevention frames even when the port is
blocked.
Enabling Loop
Protection
To enable Loop Prevention, set the Loop Prevention DIP switch on the
front panel to the up position. When Loop Prevention is enabled, Flow
Control is disabled.
Disabling Loop
Protection
To disable Loop Prevention, set the Loop Prevention DIP switch on the
front panel to the down position. When Loop Prevention is disabled, Flow
Control is enabled.
Содержание XS910/8
Страница 1: ...613 003006 Rev A XS910 8 10 GIGABIT ETHERNET UNMANAGED SWITCH Installation and User s Guide...
Страница 10: ...XS910 8 Unmanaged Switch Installation and User s Guide 10...
Страница 24: ...XS910 8 Unmanaged Switch Installation and User s Guide 24...
Страница 45: ...Chapter 3 Installation Using the AT BRKT J24 Wall Mount Bracket 45 Figure 18 Installing the Switch on the Wall...
Страница 46: ...XS910 8 Unmanaged Switch Installation and User s Guide 46...
Страница 56: ...XS910 8 Unmanaged Switch Installation and User s Guide 56...
Страница 58: ...XS910 8 Unmanaged Switch Installation and User s Guide 58...
Страница 62: ...XS910 8 Unmanaged Switch Installation and User s Guide 62...


