TQ6000 GEN2 Access Points User’s Guide
120
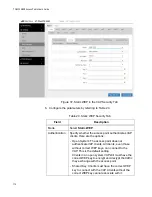
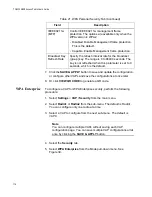
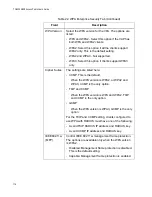
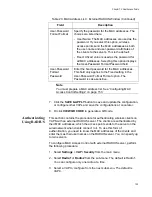
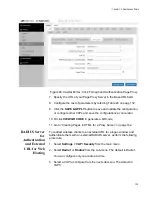
7. Click the
SAVE & APPLY
button to save and update the configuration,
or configure other VAPs and save the configurations at once later.
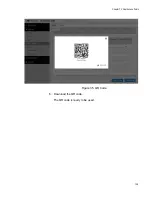
8. Or click
VIEW QR CODE
to generate a QR code.
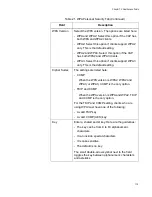
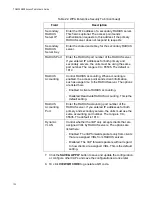
Secondary
RADIUS
Server IP
Enter the IPv4 address of a secondary RADIUS server.
This field is optional. The access point sends
authentication requests to this address if the primary
RADIUS server does not respond to requests.
Secondary
RADIUS
Server Key
Enter the shared secret key for the secondary RADIUS
server.
RADIUS Port
Enter the RADIUS port number of the RADIUS server.
If you entered IP addresses for both primary and
secondary servers, the units must be using the same
port number. The range is 0 to 65535. The default is
1812.
RADIUS
Accounting
Control RADIUS accounting, When accounting is
enabled, the access point sends client information,
such as usage time, to the RADIUS server. The options
are listed here:
- Enabled: Activate RADIUS accounting.
- Disabled: Deactivate RADIUS accounting. This is the
default setting.
RADUIS
Accounting
Port
Enter the RADIUS accounting port number of the
RADIUS server. If you entered IP addresses for both
primary and secondary servers, the units must use the
same accounting port number. The range is 0 to
65535. The default is 1813.
Dynamic
VLAN
Control whether the VAP only accepts clients that are
assigned VIDs by RADIUS servers. The options are
listed here:
- Enabled: The VAP forwards packets only from clients
that are assigned VIDs from RADIUS servers.
- Disabled: The VAP forwards packets without regard
to how clients are assigned VIDs. This is the default
setting.
Table 22. WPA Enterprise Security Tab (Continued)
Field
Description
Содержание TQ6000 GEN2
Страница 4: ......
Страница 8: ...TQ6000 GEN2 Access Points User s Guide 8 ...
Страница 12: ...TQ6000 GEN2 Access Points User s Guide 12 ...
Страница 16: ...TQ6000 GEN2 Access Points User s Guide 16 ...
Страница 40: ...TQ6000 GEN2 Access Points User s Guide 40 Figure 6 Log Window for Event Messages ...
Страница 61: ...Chapter 3 System Settings 61 Displaying the System Log See Displaying the System Log on page 39 ...
Страница 68: ...TQ6000 GEN2 Access Points User s Guide 68 ...
Страница 92: ...TQ6000 GEN2 Access Poinst User s Guide 92 ...
Страница 102: ...TQ6000 GEN2 Access Poinst User s Guide 102 ...
Страница 109: ...Chapter 7 Virtual Access Points 109 Figure 35 QR Code 6 Download the QR code The QR code is ready to be used ...
Страница 156: ...TQ6000 GEN2 Access Points User s Guide 156 Configuring Passpoint Passpoint is not supported ...
Страница 159: ...Chapter 8 Quality of Service 159 Figure 55 QoS Window ...
Страница 176: ...TQ6000 GEN2 Access Points User s Guide 176 ...

