W 3 2 S E R I E S
H I G H P R E S S U R E B R E A T H I N G A I R C O M P R E S S O R
©ALKIN COMPRESSORS
40
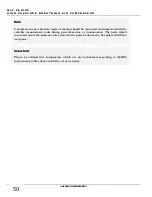
Note II
IF THE COMPRESSOR WILL NOT BE WORKING BUT STORED FOR A LONG
TIME; PURIFIER CARTRIDGE WHICH IS TAKEN OUT SHOULD BE
COMPLETELY EMPTIED, INNER SURFACE SHOULD BE CLEANED AND
DRIED BY BLOWING AIR. IN FAILURE TO DO SO, MAY CAUSE THE
PURIFIER CARTRIDGE GET PARTIALLY CONSUMED AND EVEN WASTED.
If the compressor will be started-up after a long time of storage, it is suggested to do the following steps
before start filling bottles.
1.
Clean the compressor with a clean cloth.
2.
Install a new intake filter.
3.
Install the purifier cartrdige which is just refilled with new chemicals inside the housing.
4.
Open the intakes which have been closed while stored against dust, fume, etc. may enter the
compressor.
5.
Check if there is any leakage and sweating on the gaskets or connections.
6.
Check if there is any leakage on the connections, fittings and safety valves.
7.
Load new oil and check the oil level.
8.
Run the compressor till it gets warm while the filling valves and all the drain valves are open. Make
sure that there is no leakage.
9.
You can run the compressor after completing all the steps mentionned above.
1.12 Operation
1.12.1 Initial Start-up Procedure
Follow up the following procedures when making the initial start-up of the compressor.
1.
Make sure that you have read this manual carefully, and understand it. If you have any questions,
contact us.
2.
Make sure that all the preparations described in the installation section of this manual have been
made.
3.
Check the oil level in the crankcase.
4.
Check the pressure switch and make sure that the pressure adjustments are set at the proper start-stop
pressures. (If it is Automatic Start/Stop Controlled.)
5.
Rotate the compressor flywheel several times by hand to see that it is free and working properly.
6.
Keep all objects such as tools, rugs, etc. away from the compressor.
7.
Check the direction of rotation. Rotation must be in the direction of the arrow marked on the
fanguard and flywheel.
8.
Check the Purifier if the cartridge is installed or not.
9.
Press the start button to start the machine.
10.
After start it up check the oil pressure at the oil pressure gaguge if the oil pressure is consistent with
the given values.
11.
Let the compressor run without producing pressure while the purifier drain valve is open for 10
minutes to observe if any abnormalities in the operation of the compressor exists.
12.
Check the interstage pressures from the pressure gauges on the control panel (only for W32 Canopy
models.)
13.
Check the possible leaks in piping. If there is any leak stop the compressor and let it cool down.
14.
At the end of 10 minutes running the compressor free, close the purifier drain valve allowing the
pressure to rise. Check the last stage safety valve if operating proper or not. The safety valve must
Содержание W32 Canopy
Страница 1: ...W32 SERIES...
Страница 3: ...InstructionsManual and Parts List...
Страница 4: ......
Страница 10: ...W 3 2 S E R I E S H I G H P R E S S U R E B R E A T H I N G A I R C O M P R E S S O R ALKIN COMPRESSORS 10...
Страница 46: ...W 3 2 S E R I E S H I G H P R E S S U R E B R E A T H I N G A I R C O M P R E S S O R ALKIN COMPRESSORS 46...
Страница 60: ...W 3 2 S E R I E S H I G H P R E S S U R E B R E A T H I N G A I R C O M P R E S S O R ALKIN COMPRESSORS 60...
Страница 66: ...W 3 2 S E R I E S H I G H P R E S S U R E B R E A T H I N G A I R C O M P R E S S O R ALKIN COMPRESSORS 66...
Страница 88: ...W 3 2 S E R I E S H I G H P R E S S U R E B R E A T H I N G A I R C O M P R E S S O R ALKIN COMPRESSORS 88...
Страница 94: ...W 3 2 S E R I E S H I G H P R E S S U R E B R E A T H I N G A I R C O M P R E S S O R ALKIN COMPRESSORS 94...
Страница 100: ...W 3 2 S E R I E S H I G H P R E S S U R E B R E A T H I N G A I R C O M P R E S S O R ALKIN COMPRESSORS 100...
Страница 106: ...W 3 2 S E R I E S H I G H P R E S S U R E B R E A T H I N G A I R C O M P R E S S O R ALKIN COMPRESSORS 106...

