Alcorn McBride Light Cue Pro User’s Guide • July 15, 2010 Page 15
Input and Button Configuration
Input configuration
information is stored
in the inputs.cfg file
on the compact flash
card
Hints: You must be
connected to the
LightCuePro to make
changes.
If for any reason the
screen does not fill,
try changing the
Contact/Voltage
buttons to create an
inputs.cfg file on
your LightCuePro
Note: The input
configuration for
voltage/cc may also
be configured from
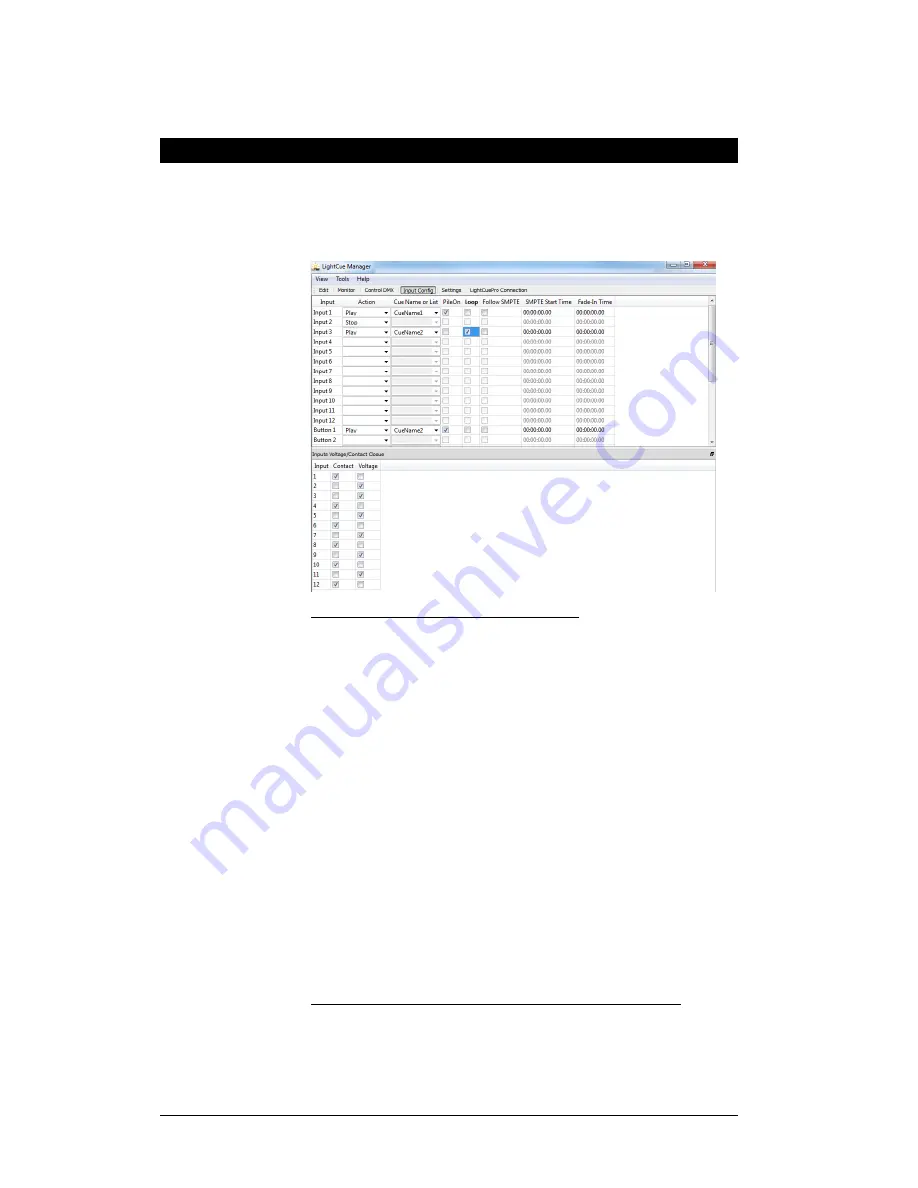
In LightCue Manager, options for voltage or contact closure, as well
as which files should play on a button or input, are configurable
from the "
Input Config
" screen. (shown below) Click on the "Input
Config" on the toolbar to bring up this screen.
To create an action for an input or button
:
1. Select the action (Play, Stop, Still) from the "
Action
" dropdown
list.
2. For the "Play" action, select the
Cue Name
that you wish to play.
3. Select an other
options
relating to playback:
Pile On
: Do not stop playing other cues when the new cue
is played. Up to 40 cues may be piled on. (See "Settings" to
select Highest Takes Priority or Last Takes Priority method
of pile on)
Loop:
Loop cue after cue file finishes playback
Follow SMPTE:
Compare incoming timecode with current
DMX File time to determine current look.
SMPTE Start Time:
The time of that the first frame of the
DMX File data should start playing back.
Fade-In Time:
The amount of time to fade before the Cue
Name or DMX File is played back. Fades from current look
to first look in DMX File.
To change the Voltage\Contact closure mode of the input:
Check the checkbox of the desired input mode on the lower half of
the "Input Config" screen in the LightCue Manager.


