28
5.3.2 Displays in the user screen
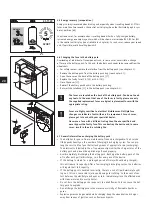
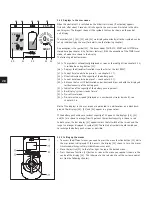
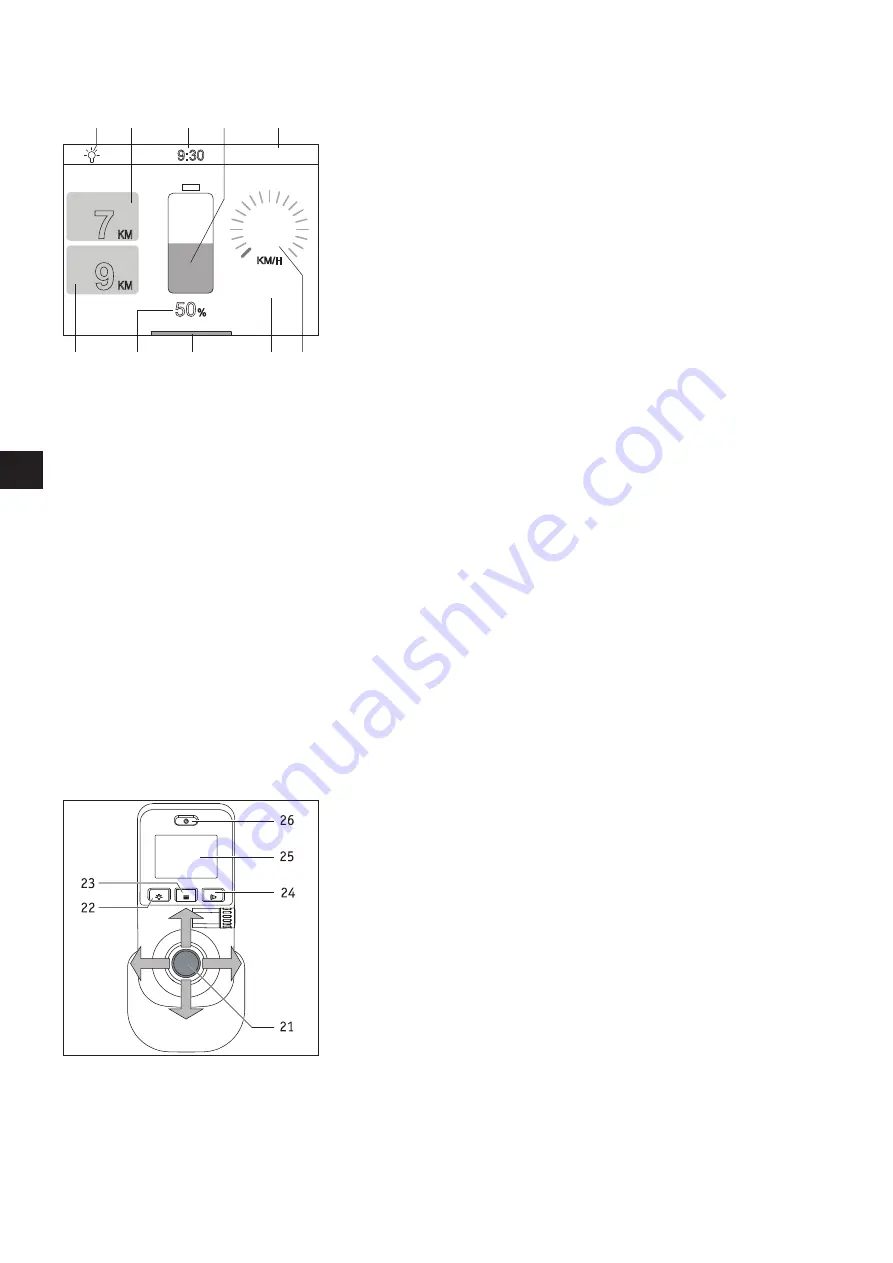
When the control unit is switched on, the Alber start screen (if activated) appears
first and, after about 3 seconds, this changes to the user screen illustrated in the adja-
cent diagram. The diagram shows all the symbols that can be shown on the control
unit display.
The symbols [48], [51], [52] and [54] are displayed constantly; all other symbols can be
set up individually by the user (for details, see the following chapter).
One exception is the symbol [53]. The travel modes TOUR, ECO, SPORT and CUSTOM are
stored here (see chapter 5.3.4 for their features). With the exception of the TOUR travel
mode, all modes are shown in the display.
The following indications mean:
[45] = The symbol is automatically displayed as soon as the spotlight (see chapter 5.2.4)
is switched on using button [15].
[46] = Displays the kilometres travelled since the start or the last RESET.
[47] = Current time (needs to be pre-set – see chapter 5.3.7).
[48] = Visual indication of the capacity of the battery pack.
[49] = Current date (needs to be pre-set – see chapter 5.3.7).
[50] = Distance that can still be travelled under ideal conditions and with the displayed
residual capacity of the battery pack.
[51] = Indication of the capacity of the battery pack in percent.
[52] = Bar display "system is ready for use".
[53] = Pre-set travel mode.
[54] = Pre-set maximum speed (displayed as a number and circular bar chart), see
chapter 5.2.6.
Most of the displays in the user screen are presented in a white colour on a black back-
ground. The displays [48], [53] and [54] appear in a green colour.
If the battery pack achieves a residual capacity of 20 percent, the displays [48], [53]
and [54] are shown in orange; from 10 percent the residual capacity is shown in red.
In both cases, the bar display [52] appears across the full width of the screen and the
range is no longer displayed in symbol [50]. These kind of symbols should remind you
to recharge the battery pack as soon as possible.
5.3.3 Calling up the menus
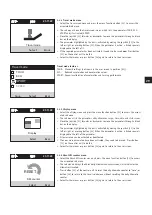
•
To access the different menus, you need to press the menu function button [23] while
the user screen is displayed. If this occurs, the display [25] shows, in turn, the menus
travel mode, display, setting, kilometre counter, reset.
•
Move the joystick [21] to the left or right to access the desired menu.
•
Press the menu function [23] button as soon as the menu you require is shown in the
centre of the display [25]. This takes you to the sub menu to set the various paramet-
ers (see the following chapter).
KM/H
0
7
KM
9
KM
9:30
23.11.20
50
%
5
.
45
46
47
48
49
50
51
52
53 54
SPORT
RANGE
DISTANCE
Содержание e-fix eco
Страница 1: ...Gebrauchsanweisung e fix eco DE Instructions for Use e fix eco EN...
Страница 3: ......
Страница 4: ......
Страница 52: ...47...

