


Page 7
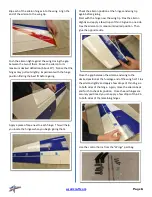
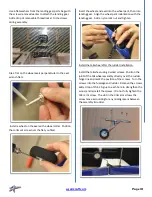
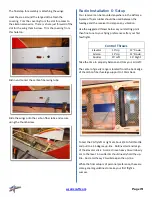
Use sand paper to roughen the lower portion of the
control horns on both sides. This will help the epoxy
bond to the control horn parts.
Test fit the control horn in the slot. Trim or file the slot as
needed to achieve a snug fit.
The control horn should go in all the way in until the
shoulder contacts the aileron. The linkage hole in the
control horn should be aligned with the hinge centerline.
With the control horn in position apply masking tape
around it. This will help keep excess epoxy off the wing
covering.
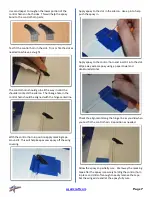
Apply epoxy to the slot in the aileron. Use a pin to help
push the epoxy in.
Apply epoxy to the control horn and insert it into the slot.
Wipe away excess epoxy using a paper towel and
denatured alcohol.
Check the alignment along the hinge line as you did when
you test fit the control horn. Reposition as needed.
Allow the epoxy to partially cure. Peel away the masking
tape after the epoxy is securely holding the control horn
in place and still soft enough to easily remove the tape.
Set the wing aside and let the epoxy fully cure.
Содержание 2M AJ Acuity
Страница 1: ...2M AJ Acuity Assembly Instructions ...


