F08D/F10D
F08D/F10D
8-4
8-4
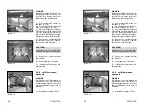
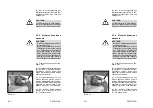
8.2.3 Contrôle du niveau
Réservoir d'huile hydr.
(1) Placer la machine à
l'horizontale.
(2) Amener la flèche porte-godet
dans la position inférieure.
(3) Incliner le dispositif de change-
ment rapide et retirer les boulons à
l'aide du levier de commande de
l'hydraulique supplémentaire (4-9/5).
(4) Ouvrir le capot du moteur.
(5) Contrôler le niveau d'huile
dans le verre-regard.
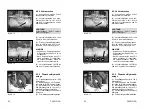
REMARQUE
Le niveau d'huile doit être visible
dans le tiers sup. du verre-regard
(8-5/flèche). Faire l'appoint d'huile
hydraulique à l'aide des tubulures
de remplissage (8-16/flèche).
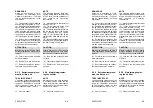
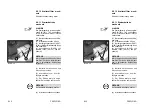
8.2.4 Vidange moteur
(1) Démonter la trappe d'entretien
du carter moteur (SW 13) (8-6/
flèche).
(2) Placer un collecteur d'huile
suffisamment grand au-dessous.
(3) Ouvrir le capot du moteur.
(4) Dévisser le capot de la vis de
purge du moteur.
(5) Visser la tubulure avec le tuyau
du compartiment à outils (4-1/13)
sur la vis de purged'huile.
(6) Retirer le capot du tuyau.
(7) Autre marche à suivre, voir
manuel du moteur.
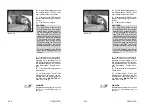
8.2.5 Vidange essieux
8.2.5.1 Essieu arrière,
modèle lente » 20 km/h «
(1) Prévoir un collecteur d'huile
suffisamment grand.
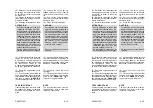
(2) Dévisser les bouchon du pont
(8-7/1, 8-7/2, 8-8/3 et 8-8/4) et de
l'engrenage distributeur (8-8/1 et
8-8/2) et laisser s'écouler l'huile.
8.2.3 Checking the oil level
in the hydraulic oil reservoir
(1) Park the loader in a level
position.
(2) Move the bucket to its lowest
position.
(3) Tilt the quick-change device
and move out the locking bolts
using the hand lever for the auxiliary
hydraulics (4-9/5).
(4) Open the motor cover.
(5) Check the oil level in the sight
glass.
NOTE
The oil level must be visible in the
sight glass (8-5/arrow). If neces-
sary, fill oil into the filler neck (8-16/
arrow).
8.2.4 Changing the engine oil
(1) Unscrew the maintenance flap
from the motor protection (size 13)
(8-6/arrow).
(2) Place a sufficiently large oil drain
pan underneath the motor oil sump.
(3) Open the motor cover.
(4) Unscrew the cover of the oil
drain plug on the motor.
(5) Screw the drainage nozzle
with hose from the tool box (4-1/13)
to the oil drain plug.
(6) Remove the cover cap from
the hose.
(7) Further procedures are to be
found in the Engine Operating
Manual.
8.2.5 Changing the oil in
the axles
8.2.5.1 Rear axle of the
slow loader » 20 km/h «
(1) Place a sufficiently large oil
drain pan underneath the axle.
(2) Unscrew the plugs from the
axle arch (8-7/1, 8-7/2, 8-8/3 and
8-8/4) and the intermediate gear
(8-8/1 and 8-8/2) and let the oil
drain out.
Содержание AF 100
Страница 61: ...F08D F10D F08D F10D Beschilderung Beschilderung Signalisation Signalisation Signs Signs ...
Страница 76: ...F08D F10D F08D F10D 2 8 2 8 Schriftzug Lärmarme Baumaschine Schriftzug Lärmarme Baumaschine ...
Страница 104: ...F08D F10D F08D F10D Beschreibung Beschreibung Description Description Description Description ...
Страница 128: ...F08D F10D F08D F10D Bedienung Bedienung Conduite de véhicule Conduite de véhicule Operation Operation ...
Страница 177: ...F08D F10D F08D F10D Wartung Wartung Entretien Entretien Maintenance Maintenance ...
Страница 219: ...F08D F10D F08D F10D Störung Ursache und Abhilfe Störung Ursache und Abhilfe ...
Страница 222: ...F08D F10D F08D F10D Dérangements causes et remèdes Dérangements causes et remèdes ...
Страница 225: ...F08D F10D F08D F10D Malfunctions causes and remedies Malfunctions causes and remedies ...
Страница 228: ...Anhang Anhang Appendice Appendice Appendices Appendices ...
Страница 229: ......
Страница 230: ......
Страница 237: ......
Страница 242: ...F08D F10D F08D F10D A 10 3 A 10 3 ...
Страница 243: ...F08D F10D F08D F10D B 10 3 B 10 3 ...
Страница 244: ...F08D F10D F08D F10D C 10 3 C 10 3 ...
Страница 245: ...F08D F10D F08D F10D D 10 3 D 10 3 ...
Страница 246: ...F08D F10D F08D F10D E 10 3 E 10 3 ...
Страница 247: ...F08D F10D F08D F10D F 10 3 F 10 3 ...

