


Recovery
5
E5505A Installation Guide
59
9
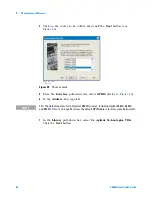
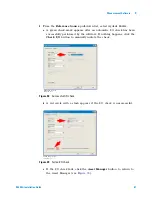
Select “Data disc” and “DVD” in the right
pane.
10
Click the OK button.
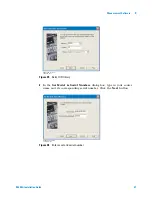
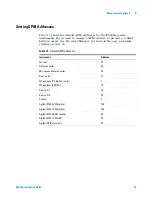
11
In the “ULead Burn.Now - Data Disc”
window, select the “Drag and Drop” icon
(4th from left). Single-click the icon. A small
window opens.
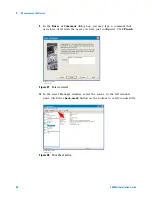
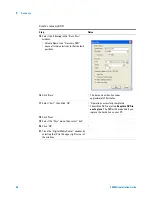
12
Drag files CDR00001.GHO and
CDR00001.GHS to the right pane of the
Burn.Now window. Use the control key (Ctrl)
to select both files.
These two files total about 4 GBytes of content.
13
Close the Explorer window by selecting the
[X] in the upper-right corner of the window.
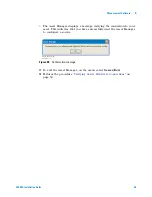
14
In the “ULead Burn.Now - Data Disc”
window, select the “Burn” icon (5th from
left). Single-click the icon. A small “Burn
Disc” window appears.
Create a recovery DVD
Step
Notes
Содержание E5505A
Страница 18: ...18 E5505A Installation Guide 1 General Information ...
Страница 22: ...22 E5505A Installation Guide 2 Flat Panel Display ...
Страница 30: ...30 E5505A Installation Guide 3 System Interconnections ...
Страница 70: ...70 E5505A Installation Guide 5 Recovery Figure 39 Ejector Lever Pulled Up Figure 40 Ejector Lever Pushed Down ...
Страница 84: ...84 E5505A Installation Guide 6 Preventive Maintenance ...
Страница 96: ...96 E5505A Installation Guide A Service Support and Safety Information ...


