


Flat-Panel Display
2
E5505A Installation Guide
21
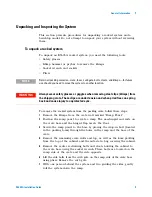
8
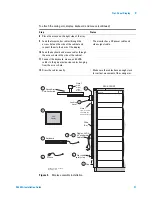
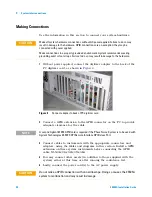
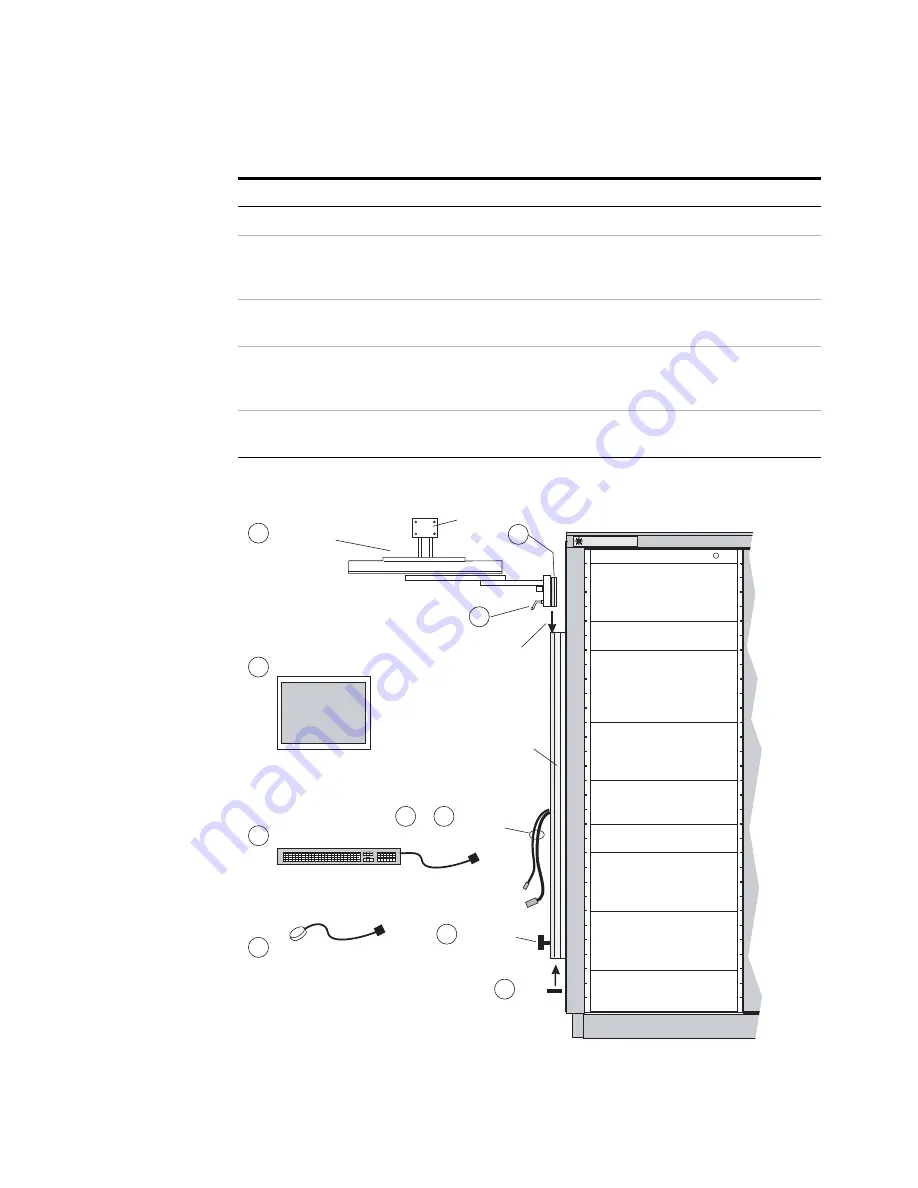
Place the mouse on the right side of the tray.
9
Feed the two monitor cables through the
access hole on the side of the cabinet and
connect them to the back of the display.
•
The monitor has a DC power cable and
video signal cable.
10
Feed the keyboard and mouse cables through
the access hole in the side of the cabinet.
11
Connect the keyboard, mouse, and SVGA
cables to the proper extension cables hanging
from the access hole.
12
Dress the cables neatly.
•
Make sure the cables have enough slack
for vertical movement of the swing arm.
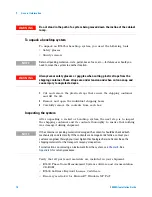
Figure 3
Display assembly installation
To attach the swing arm, display, keyboard, and mouse (continued)
Step
Notes
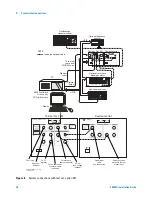
Agilent
SYSTEM
POWER
RACK FRONT
Agilent Technologies
LCD
Display
Slide
Bar
Swing-Arm
Sub-Assembly
Keyboard
Mouse
Cap
1
4
2
5
3
6
7
8
9
11
Display, SVGA,
& Peripherals
Cables
Attach
Display
to this
Bracket
Item 2 should
slide into the
Channel Tracks
Note 1
E5505a_display_assembly
05 Apr 04 rev. 2
Locking
Lever
Star knob
safety stop
Note 2
to
Содержание E5505A
Страница 18: ...18 E5505A Installation Guide 1 General Information ...
Страница 22: ...22 E5505A Installation Guide 2 Flat Panel Display ...
Страница 30: ...30 E5505A Installation Guide 3 System Interconnections ...
Страница 70: ...70 E5505A Installation Guide 5 Recovery Figure 39 Ejector Lever Pulled Up Figure 40 Ejector Lever Pushed Down ...
Страница 84: ...84 E5505A Installation Guide 6 Preventive Maintenance ...
Страница 96: ...96 E5505A Installation Guide A Service Support and Safety Information ...


