


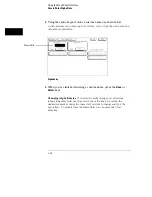


How to Roll Offscreen Data
If there is offscreen data, it must be rolled back onscreen before it can be
viewed or acted upon. The types of data you typically find located offscreen
are Labels, Pods, Terms, Sequence Levels, and data listings. Each of the data
types have a roll field. These roll fields indicate offscreen data by becoming a
dark selectable field with small arrows showing the direction the data is
rolled. In addition, a roll indicator appears that indicates which rollable field
is currently active.
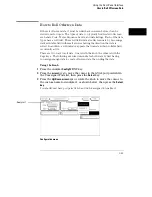
There are two ways to roll data. One is with the knob, the other is with the
Page keys. The following exercise demonstrates both ways by first having
you assign enough data to create offscreen data, then rolling the data.
Using the Knob
1
Press the analyzer
Config
MENU key.
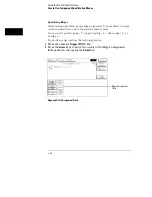
2
Press the
arrow
keys to move the cursor to the A3/A4 pod pair field in
the Unassigned Pods list, then press the
Select
key.
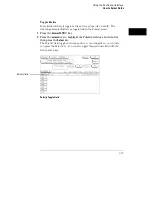
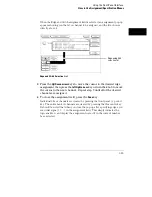
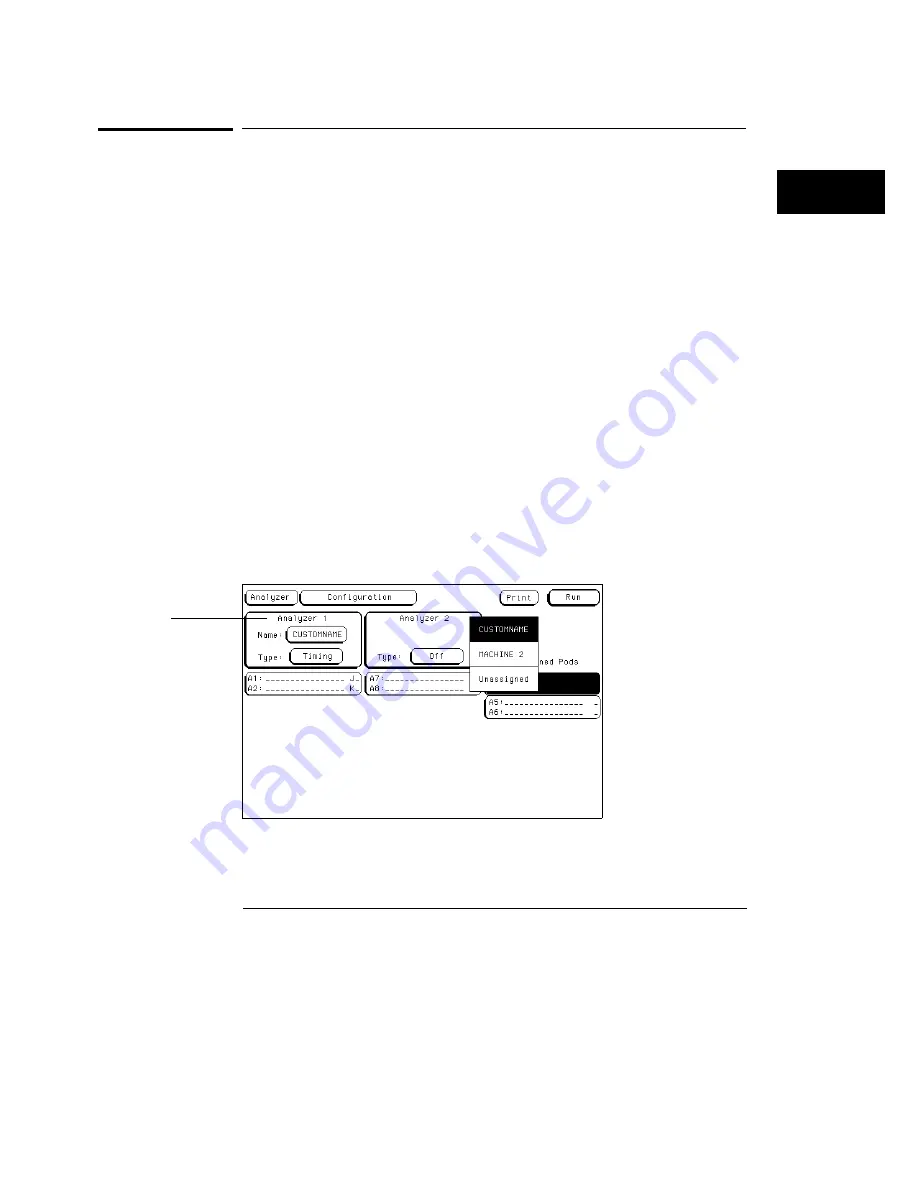
3
Press the
Up/Down arrow
keys or rotate the knob to move the cursor to
the custom name for Analyzer 1 as shown below, then press the
Select
key
.
You should now have pod pairs A1/A2 and A3/A4 assigned to Analyzer 1.
Configuration menu
Analyzer 1
Using the Front-Panel Interface
How to Roll Offscreen Data
3–23
Содержание 1660A Series
Страница 5: ...vi...
Страница 14: ...1 Introduction...
Страница 24: ...2 Probing...
Страница 35: ...Probing Assembling the Probing System 2 12...
Страница 36: ...3 Using the Front Panel Interface...
Страница 65: ...3 30...
Страница 66: ...4 Using the Mouse and the Optional Keyboard...
Страница 74: ...5 Connecting a Printer...
Страница 91: ...5 18...
Страница 92: ...6 Disk Drive Operations...
Страница 118: ...7 The RS 232C GPIB and Centronix Interface...
Страница 121: ...RS 232 GPIB Menu Map Cont The RS 232C GPIB and Centronix Interface 7 4...
Страница 123: ...Printer Controller Menu Map Cont The RS 232C GPIB and Centronix Interface 7 6...
Страница 132: ...8 The System Utilities...
Страница 137: ...9 The Common Menu Fields...
Страница 150: ...9 14...
Страница 151: ...10 The Configuration Menu...
Страница 159: ...11 The Format Menu...
Страница 161: ...Format Menu Map The Format Menu 11 3...
Страница 194: ...11 36...
Страница 195: ...12 The Trigger Menu...
Страница 198: ...Trigger Menu Map The Trigger Menu 12 4...
Страница 199: ...Trigger Menu Map Continued The Trigger Menu 12 5...
Страница 235: ...13 The Listing Menu...
Страница 237: ...Listing Menu Map The Listing Menu 13 3...
Страница 260: ...13 26...
Страница 261: ...14 The Waveform Menu...
Страница 263: ...Waveform Menu Map The Waveform Menu 14 3...
Страница 264: ...Waveform Menu Map cont The Waveform Menu 14 4...
Страница 300: ...14 40...
Страница 301: ...15 The Mixed Display Menu...
Страница 306: ...15 6...
Страница 307: ...16 The Chart Menu...
Страница 310: ...Chart Menu Map The Chart Menu 16 4...
Страница 311: ...Chart Menu Map cont The Chart Menu 16 5...
Страница 336: ...16 30...
Страница 337: ...17 The Compare Menu...
Страница 340: ...Compare Menu Map The Compare Menu 17 4...
Страница 355: ...18 Error Messages...
Страница 363: ...19 Specifications and Characteristics...
Страница 377: ...20 Operator s Service...
Страница 386: ...Troubleshooting Flowchart 1 Operator s Service To use the flowcharts 20 10...
Страница 387: ...Troubleshooting Flowchart 2 Operator s Service To use the flowcharts 20 11...


