

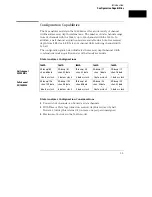


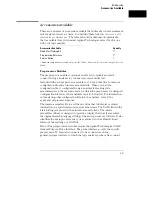


Microprocessor and Bus Specific Interfaces
There are a number of microprocessor and bus specific interfaces
available as optional accessories that are listed in the
Accessories for
Agilent Logic Analyzers
. Microprocessors are supported by
Universal Interfaces or Preprocessor Interfaces, or in some cases, both.
Universal Interfaces are aimed at initial hardware turn-on, and will
provide fast, reliable, and convenient connections to the
microprocessor system.
Preprocessor interfaces are aimed at hardware turn-on and
hardware/software integration, and will provide the following:
•
All clocking and demultiplexing circuits needed to capture the
system’s operation.
•
Additional status lines to further decode the operation of the CPU.
•
Inverse assembly software to translate logic levels captured by the
logic analyzer into microprocessor mnemonics.
Bus interfaces will support bus analysis for the following:
•
Bus support for GPIB, RS-232C, RS-449, SCSI, VME, and VXI.
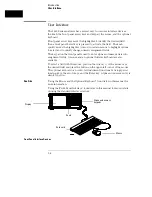
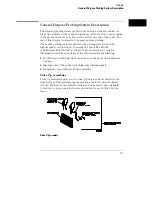
General-Purpose Probing
General-purpose probing involves connecting the logic analyzer
probes directly to your target system without using any interface.
General-purpose probing does not limit you to specific hookup
schemes, for an example, as the probe interface does.
General-purpose probing uses grabbers that connect to both through
hole and surface mount components. General-purpose probing comes
as the standard probing option. You will find a full description of its
components and use later in this chapter.
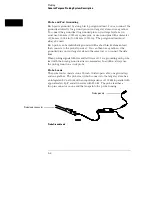
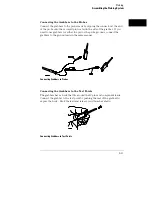
The Termination Adapter
The optional termination adapter allows you to connect the logic
analyzer probe cables directly to test ports on your target system
without the probes.
Probing
2–3
Содержание 1660A Series
Страница 5: ...vi...
Страница 14: ...1 Introduction...
Страница 24: ...2 Probing...
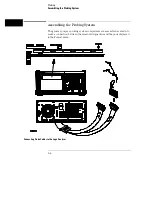
Страница 35: ...Probing Assembling the Probing System 2 12...
Страница 36: ...3 Using the Front Panel Interface...
Страница 65: ...3 30...
Страница 66: ...4 Using the Mouse and the Optional Keyboard...
Страница 74: ...5 Connecting a Printer...
Страница 91: ...5 18...
Страница 92: ...6 Disk Drive Operations...
Страница 118: ...7 The RS 232C GPIB and Centronix Interface...
Страница 121: ...RS 232 GPIB Menu Map Cont The RS 232C GPIB and Centronix Interface 7 4...
Страница 123: ...Printer Controller Menu Map Cont The RS 232C GPIB and Centronix Interface 7 6...
Страница 132: ...8 The System Utilities...
Страница 137: ...9 The Common Menu Fields...
Страница 150: ...9 14...
Страница 151: ...10 The Configuration Menu...
Страница 159: ...11 The Format Menu...
Страница 161: ...Format Menu Map The Format Menu 11 3...
Страница 194: ...11 36...
Страница 195: ...12 The Trigger Menu...
Страница 198: ...Trigger Menu Map The Trigger Menu 12 4...
Страница 199: ...Trigger Menu Map Continued The Trigger Menu 12 5...
Страница 235: ...13 The Listing Menu...
Страница 237: ...Listing Menu Map The Listing Menu 13 3...
Страница 260: ...13 26...
Страница 261: ...14 The Waveform Menu...
Страница 263: ...Waveform Menu Map The Waveform Menu 14 3...
Страница 264: ...Waveform Menu Map cont The Waveform Menu 14 4...
Страница 300: ...14 40...
Страница 301: ...15 The Mixed Display Menu...
Страница 306: ...15 6...
Страница 307: ...16 The Chart Menu...
Страница 310: ...Chart Menu Map The Chart Menu 16 4...
Страница 311: ...Chart Menu Map cont The Chart Menu 16 5...
Страница 336: ...16 30...
Страница 337: ...17 The Compare Menu...
Страница 340: ...Compare Menu Map The Compare Menu 17 4...
Страница 355: ...18 Error Messages...
Страница 363: ...19 Specifications and Characteristics...
Страница 377: ...20 Operator s Service...
Страница 386: ...Troubleshooting Flowchart 1 Operator s Service To use the flowcharts 20 10...
Страница 387: ...Troubleshooting Flowchart 2 Operator s Service To use the flowcharts 20 11...


