


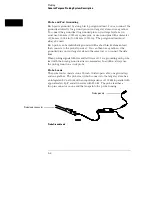


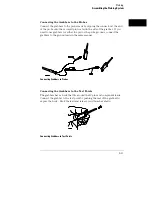


Probe and Pod Grounding
Each pod is grounded by a long, black, pod ground lead. You can connect the
ground lead directly to a ground pin on your target system or use a grabber.
To connect the ground lead to grounded pins on your target system, you
must use 0.63-mm (0.025-in) square pins, or use round pins with a diameter
of 0.66 mm (0.026 in) to 0.84 mm (0.033 in). The pod ground lead must
always be used.
Each probe can be individually grounded with a short black extension lead
that connects to the probe tip socket. You can then use a grabber or the
grounded pins on your target system in the same way you connect the data
lines.
When probing signals with rise and fall times of
≤
1 ns, grounding each probe
lead with the 2-inch ground lead is recommended. In addition, always use
the probe ground on a clock probe.
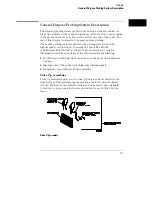
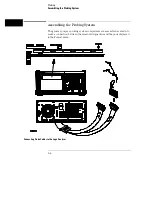
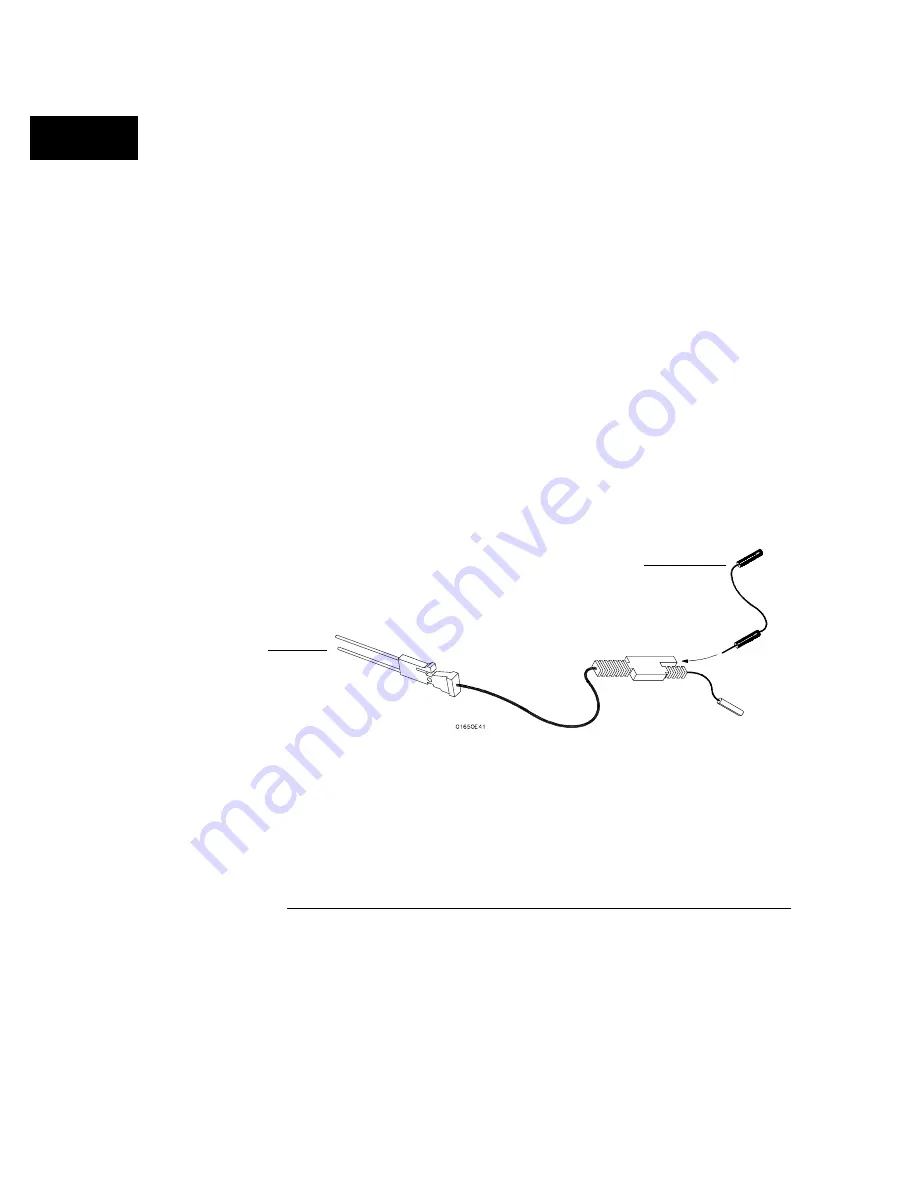
Probe Leads
The probe leads consists of one 12-inch, twisted-pair cable; one ground tap;
and one grabber. The probe lead, which connects to the target system, has
an integrated RC network with an input impedance of 100 k
Ω
in parallel with
approximately 8 pF, and all in series with 250
Ω
. The probe lead has a
two-pin connector on one end that snaps into the probe housing.
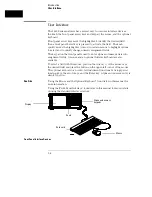
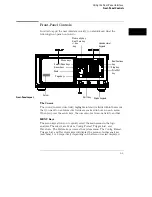
Probe Ground Lead
Probe lead connector
Probe ground
Probing
General-Purpose Probing System Description
2–6
Содержание 1660A Series
Страница 5: ...vi...
Страница 14: ...1 Introduction...
Страница 24: ...2 Probing...
Страница 35: ...Probing Assembling the Probing System 2 12...
Страница 36: ...3 Using the Front Panel Interface...
Страница 65: ...3 30...
Страница 66: ...4 Using the Mouse and the Optional Keyboard...
Страница 74: ...5 Connecting a Printer...
Страница 91: ...5 18...
Страница 92: ...6 Disk Drive Operations...
Страница 118: ...7 The RS 232C GPIB and Centronix Interface...
Страница 121: ...RS 232 GPIB Menu Map Cont The RS 232C GPIB and Centronix Interface 7 4...
Страница 123: ...Printer Controller Menu Map Cont The RS 232C GPIB and Centronix Interface 7 6...
Страница 132: ...8 The System Utilities...
Страница 137: ...9 The Common Menu Fields...
Страница 150: ...9 14...
Страница 151: ...10 The Configuration Menu...
Страница 159: ...11 The Format Menu...
Страница 161: ...Format Menu Map The Format Menu 11 3...
Страница 194: ...11 36...
Страница 195: ...12 The Trigger Menu...
Страница 198: ...Trigger Menu Map The Trigger Menu 12 4...
Страница 199: ...Trigger Menu Map Continued The Trigger Menu 12 5...
Страница 235: ...13 The Listing Menu...
Страница 237: ...Listing Menu Map The Listing Menu 13 3...
Страница 260: ...13 26...
Страница 261: ...14 The Waveform Menu...
Страница 263: ...Waveform Menu Map The Waveform Menu 14 3...
Страница 264: ...Waveform Menu Map cont The Waveform Menu 14 4...
Страница 300: ...14 40...
Страница 301: ...15 The Mixed Display Menu...
Страница 306: ...15 6...
Страница 307: ...16 The Chart Menu...
Страница 310: ...Chart Menu Map The Chart Menu 16 4...
Страница 311: ...Chart Menu Map cont The Chart Menu 16 5...
Страница 336: ...16 30...
Страница 337: ...17 The Compare Menu...
Страница 340: ...Compare Menu Map The Compare Menu 17 4...
Страница 355: ...18 Error Messages...
Страница 363: ...19 Specifications and Characteristics...
Страница 377: ...20 Operator s Service...
Страница 386: ...Troubleshooting Flowchart 1 Operator s Service To use the flowcharts 20 10...
Страница 387: ...Troubleshooting Flowchart 2 Operator s Service To use the flowcharts 20 11...


