
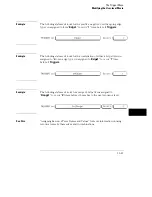


Arming Control Between Analyzers
If both analyzers in a module are turned on, you can configure one analyzer
to arm the other. An example of this is when a state analyzer triggers on a bit
pattern, then arms a timing analyzer which captures and displays the
waveform after it triggers.
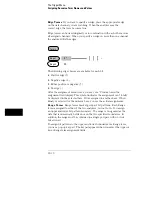
When you select the analyzer name field in the Arming Control menu shown
below, a pop-up menu appears which you use to select where the Arm In
signal is coming from. In addition, a sequence level number field appears
which you use to select the sequence level in which an "arm" flag is placed.
When an analyzer receives an Arm In signal, an "arm" term is placed in a user
selected sequence level and the analyzer automatically begins evaluating its
trigger sequence instruction. If, in the sequence evaluation the "arm" term is
seen first, the analyzer will trigger. However, if the "arm" term is placed
down in the sequence level order, the preceding sequencing could trigger the
analyzer before the "arm" term is seen. Generally, the "arm" term is evaluated
and used the same as the other resource terms within the sequence
instruction.
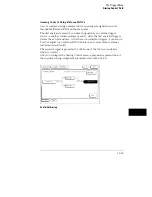
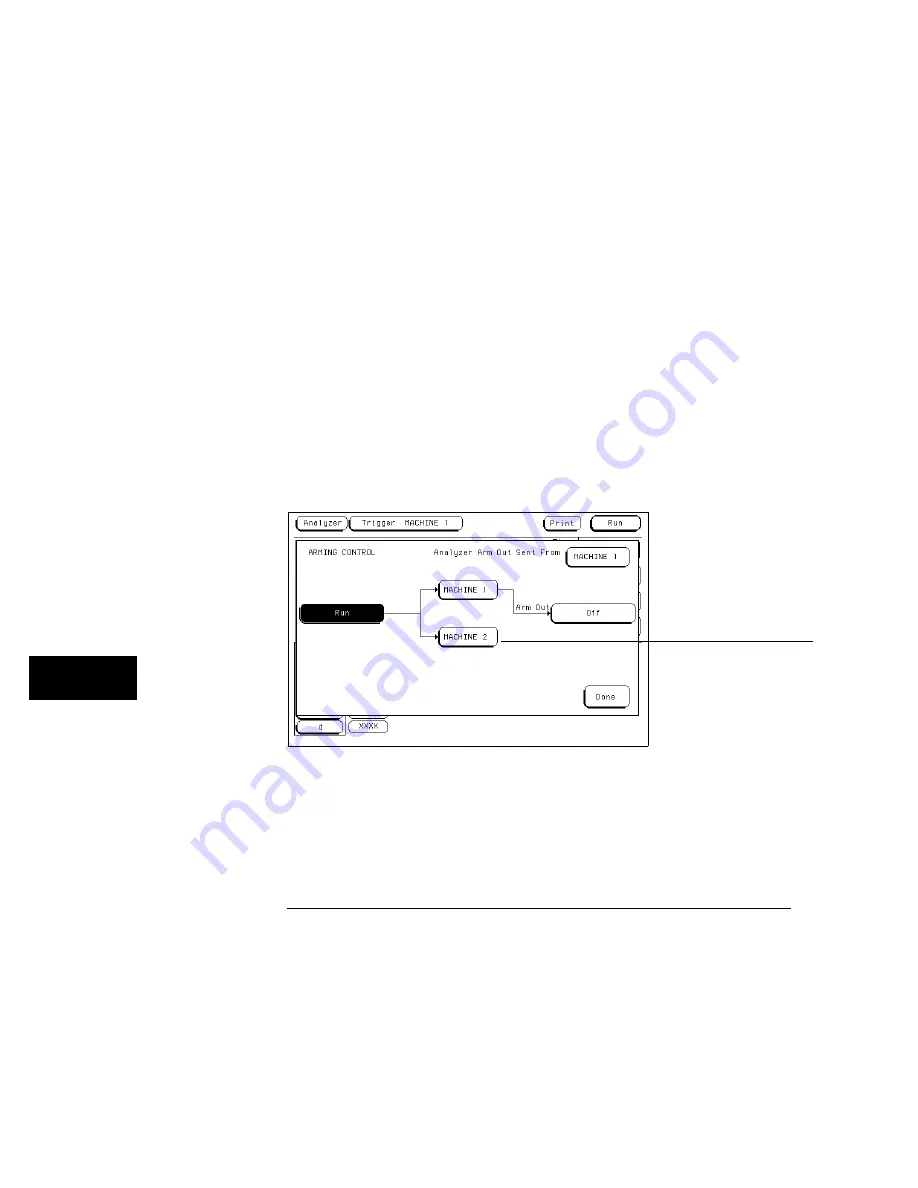
After you configure the Arming Control menu, a graphical representation of
the analyzer arming configuration is displayed as shown below.
Two Analyzer Arming
Analyzer name
The Trigger Menu
Arming Control Field
12–34
Содержание 1660A Series
Страница 5: ...vi...
Страница 14: ...1 Introduction...
Страница 24: ...2 Probing...
Страница 35: ...Probing Assembling the Probing System 2 12...
Страница 36: ...3 Using the Front Panel Interface...
Страница 65: ...3 30...
Страница 66: ...4 Using the Mouse and the Optional Keyboard...
Страница 74: ...5 Connecting a Printer...
Страница 91: ...5 18...
Страница 92: ...6 Disk Drive Operations...
Страница 118: ...7 The RS 232C GPIB and Centronix Interface...
Страница 121: ...RS 232 GPIB Menu Map Cont The RS 232C GPIB and Centronix Interface 7 4...
Страница 123: ...Printer Controller Menu Map Cont The RS 232C GPIB and Centronix Interface 7 6...
Страница 132: ...8 The System Utilities...
Страница 137: ...9 The Common Menu Fields...
Страница 150: ...9 14...
Страница 151: ...10 The Configuration Menu...
Страница 159: ...11 The Format Menu...
Страница 161: ...Format Menu Map The Format Menu 11 3...
Страница 194: ...11 36...
Страница 195: ...12 The Trigger Menu...
Страница 198: ...Trigger Menu Map The Trigger Menu 12 4...
Страница 199: ...Trigger Menu Map Continued The Trigger Menu 12 5...
Страница 235: ...13 The Listing Menu...
Страница 237: ...Listing Menu Map The Listing Menu 13 3...
Страница 260: ...13 26...
Страница 261: ...14 The Waveform Menu...
Страница 263: ...Waveform Menu Map The Waveform Menu 14 3...
Страница 264: ...Waveform Menu Map cont The Waveform Menu 14 4...
Страница 300: ...14 40...
Страница 301: ...15 The Mixed Display Menu...
Страница 306: ...15 6...
Страница 307: ...16 The Chart Menu...
Страница 310: ...Chart Menu Map The Chart Menu 16 4...
Страница 311: ...Chart Menu Map cont The Chart Menu 16 5...
Страница 336: ...16 30...
Страница 337: ...17 The Compare Menu...
Страница 340: ...Compare Menu Map The Compare Menu 17 4...
Страница 355: ...18 Error Messages...
Страница 363: ...19 Specifications and Characteristics...
Страница 377: ...20 Operator s Service...
Страница 386: ...Troubleshooting Flowchart 1 Operator s Service To use the flowcharts 20 10...
Страница 387: ...Troubleshooting Flowchart 2 Operator s Service To use the flowcharts 20 11...


