17
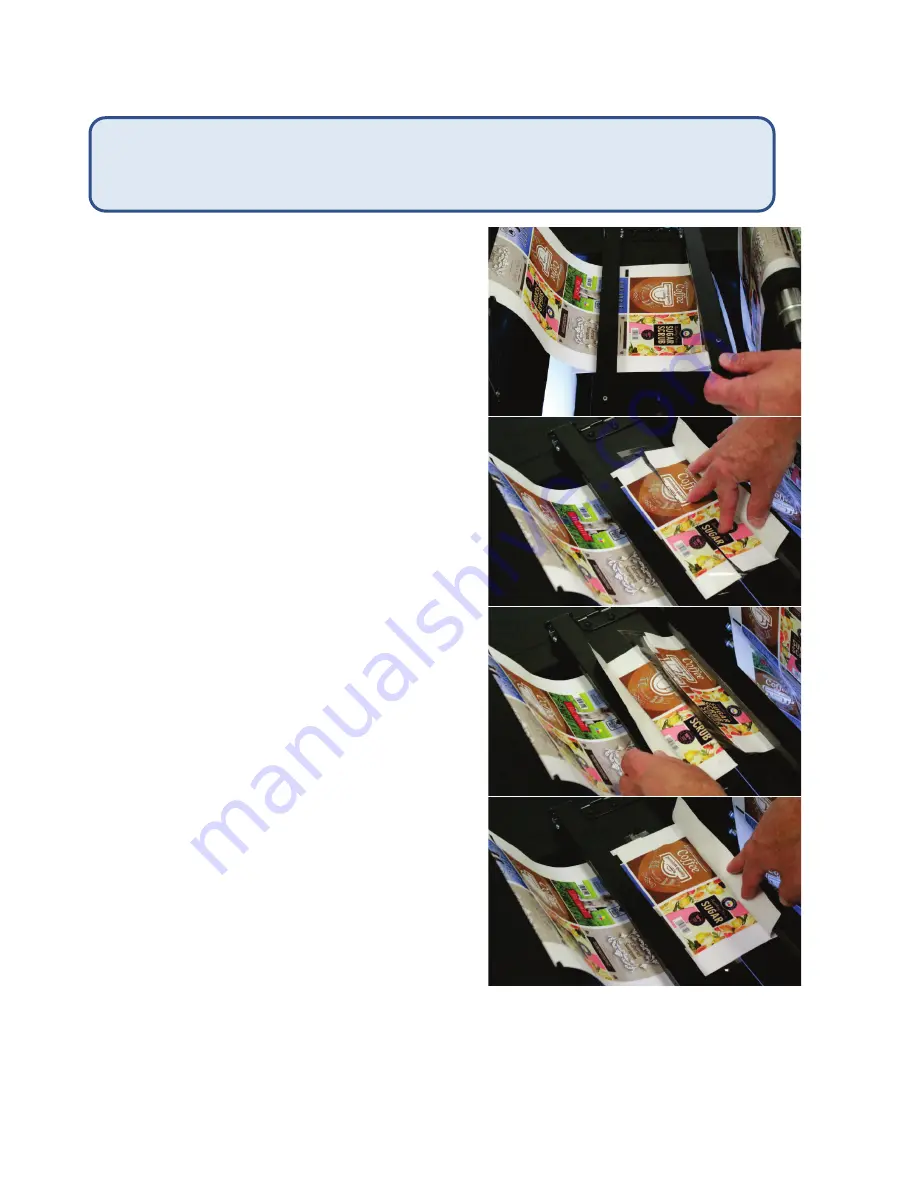
Using the splicing table
1.
When the current roll of media is finished,
stop the DLP-2100 or the loop sensor will stop
the machine when it sees no media.
2.
Push the Emergency Stop button.
3.
Load the new roll of media onto the unwind
mandrel, with the media unwinding clockwise.
4.
Load into the printer and print enough so the
new media can be held in place by both
locking arms.
5.
Align the old and new media on the splicing
table, with the new media on top of the old.
6.
Lower both left and right locking arms.
7.
Using a sharp knife, cut through both pieces of
media, in the slot on the splicing table.
8.
Lift
both
layers of media on
right side
and
apply tape under the bottom layer, as
smoothly as possible. Tape will be above left
side.
9.
Lift
top
layer of media on
left side
and apply
to the tape as well aligned and as smoothly as
possible.
10.
If laminate is not being applied, place another
piece of tape across the top of the splice; if
laminate is being applied, the top tape is not
required.
11.
Lift both locking arms and remove the two
sections of detached media.
12.
Using scissors or a sharp knife, cut the excess
tape on each side of the media, as close to the
media as possible.
a.
Do NOT wrap excess tape over the
edges of the media!
13.
Print enough length to allow the splicing table
to be lifted out of the media path.
14.
Release the Emergency stop button and
Restart
the DLP-2100. You are now ready to continue.
Note:
The printed images do not need to splice together perfectly, but you will need to perform a
Home Cycle
when the splice gets to the cutting cylinder.
The splicing table enables the user to join rolls of media together neatly and correctly, to
allow smooth passage through the die cutting, stripping, and slitting processes. Follow
the instructions below on the use of the DLP-2100 splicing table.
5 & 6
9
9
8


