28
PCA-6176 User's Manual
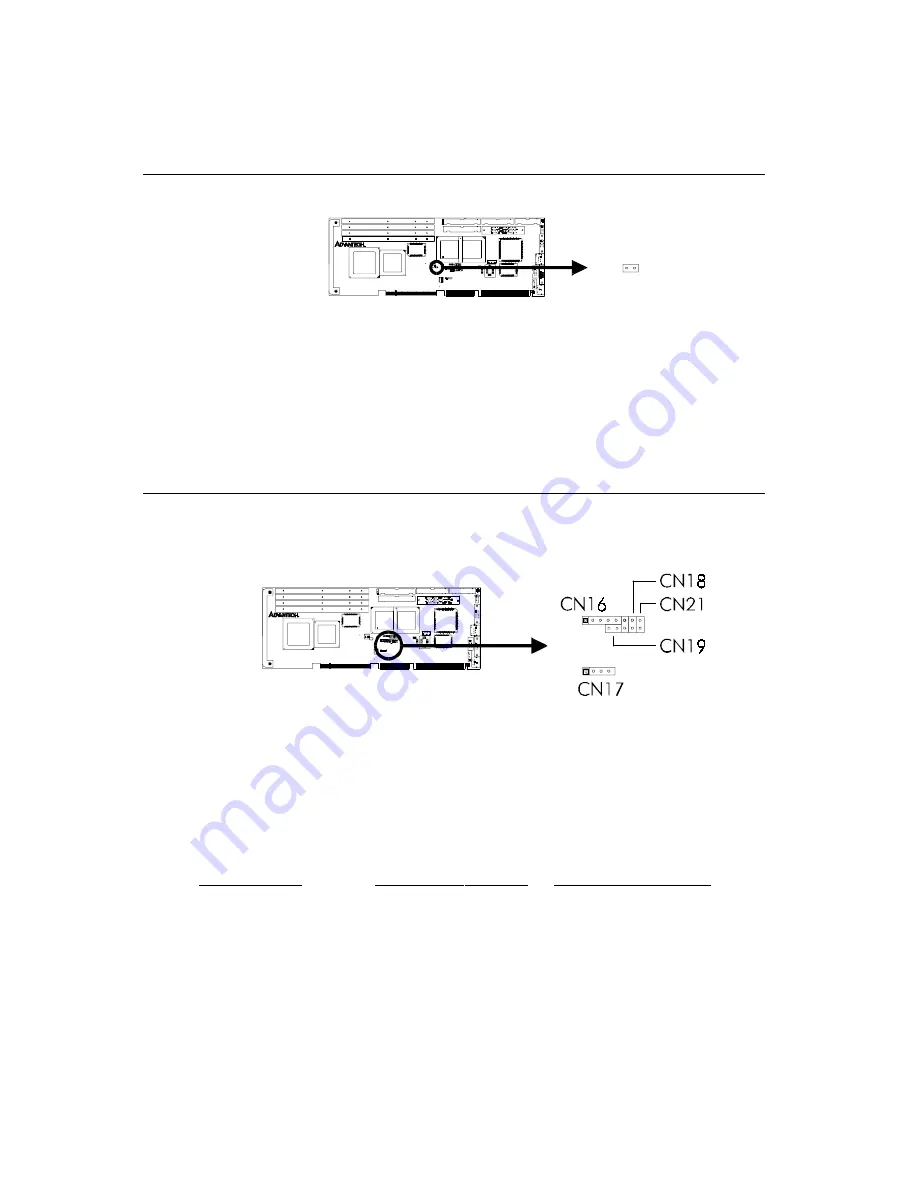
2.13 CPU Temperature Sensor (CN15)
This connector supports hardware monitoring for CPU temperature,
CPU fan speed, and system voltage. For details, refer to Chapter 7:
On-board Security Setup.
2.14 Front Panel Connectors
(CN16, CN17, CN18, CN19 and CN21)
There are several external switches to monitor and control the
PCA-6176.
2.14.1 Keyboard lock and power on LED (CN16)
CN16 is a 5-pin connector for the keyboard lock and power on LED.
Refer to Appendix B Section 13 for detailed information on the pin
assignments. If a PS/2 or ATX power supply is used, the system's
power LED status will be as indicated below:
Power Mode
LED (PS/2 Power)
LED (ATX Power)
System On
On
On
System Suspend
Fast flashes
Fast flashes
System Off
Off
Slow flashes
Содержание PCA-6176 Series
Страница 1: ...PCA 6176 Series Full size Pentium II III processor based PCI ISA bus CPU card ...
Страница 31: ...Chapter 1 Hardware Configuration 19 Figure 1 5 SECC II CPU installation step 1 ...
Страница 32: ...20 PCA 6176 User s Manual Figure 1 6 SECC II CPU installation step 2 ...
Страница 43: ...Award BIOS Setup This chapter describes how to set the card s BIOS configuration data CHAPTER 3 ...
Страница 63: ...Chapter 4 AGP VGA Setup 51 5 Insert disk 1 and select Have Disk 6 Click OK ...
Страница 64: ...52 PCA 6176 User s Manual 8 Select RAGE PRO TURBO AGP English and click OK 7 Select macxw4 inf and click OK ...
Страница 65: ...Chapter 4 AGP VGA Setup 53 9 Click Next 10 Insert disk 2 and click OK ...
Страница 66: ...54 PCA 6176 User s Manual 12 Click Finish to complete the setup procedure 11 Insert disk 3 and click OK ...
Страница 68: ...56 PCA 6176 User s Manual 4 Click Browse to look for the driver program 3 Click Have Disk ...
Страница 69: ...Chapter 4 AGP VGA Setup 57 5 Select atirage and click Open 6 Select ATIRAGE PRO TURBO AGP 2X and click OK ...
Страница 75: ...Chapter 5 LAN Configuration 63 3 Click Next 4 Click Next ...
Страница 76: ...64 PCA 6176 User s Manual 6 Click Browse 5 Follow the instructions on the screen and click Have Disk ...
Страница 77: ...Chapter 5 LAN Configuration 65 7 Select net82557 inf and click OK 8 Click OK ...
Страница 78: ...66 PCA 6176 User s Manual 10 Click Next 9 Click OK ...
Страница 79: ...Chapter 5 LAN Configuration 67 11 Click Finish 12 Click Yes ...
Страница 82: ...70 PCA 6176 User s Manual 6 Select Intel R PRO Adapter and click OK 5 Click OK ...
Страница 84: ...72 PCA 6176 User s Manual ...
Страница 102: ...90 PCA 6176 User s Manual Figure 7 3 Restarting Windows ...
Страница 104: ...92 PCA 6176 User s Manual 4 Complete the setup Figure 7 5 Hardware Doctor setup completion screen ...
Страница 110: ...98 PCA 6176 User s Manual ...
Страница 114: ...102 PCA 6176 User s Manual ...


