Chapter 2 Connecting Peripherals
23
2.2
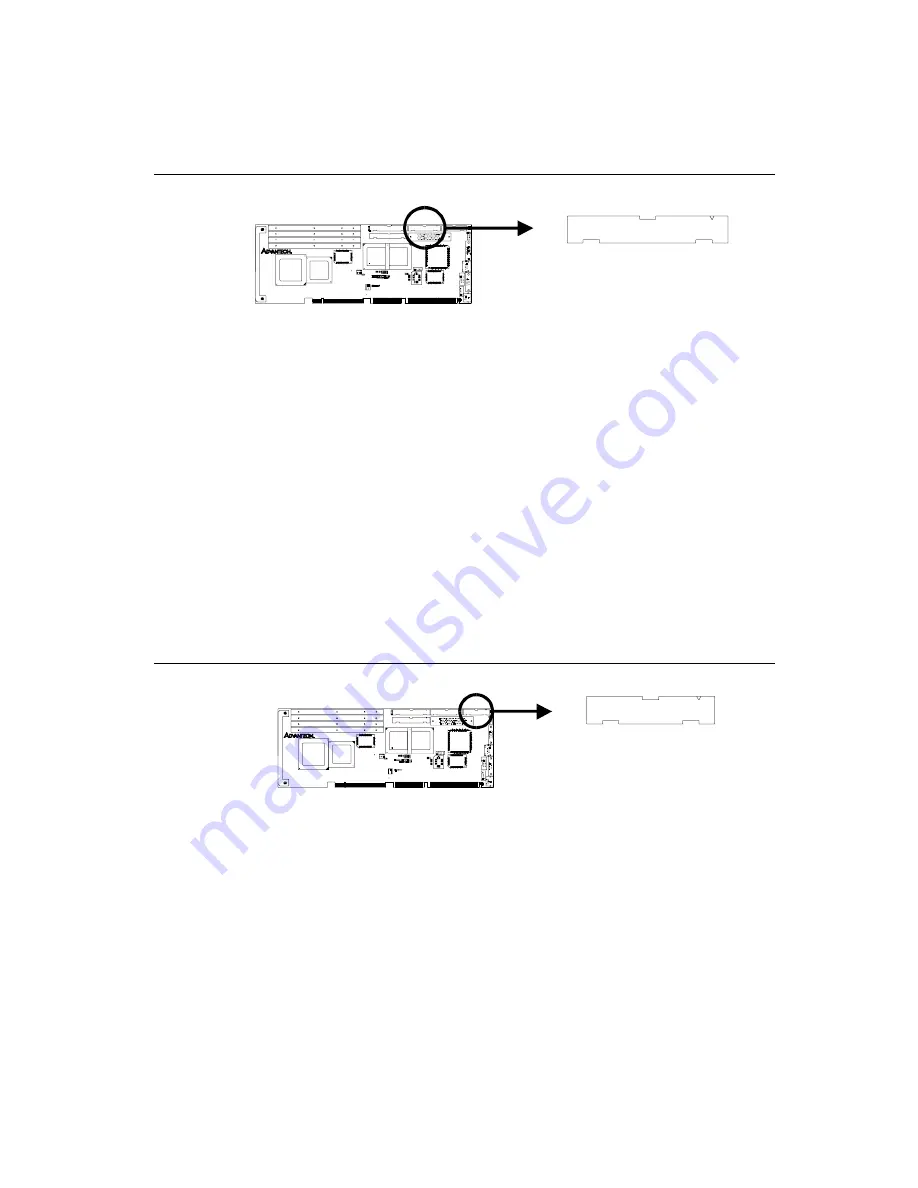
Floppy Drive Connector (CN3)
You can attach up to two floppy disk drives to the PCA-6176's
on-board controller. You can use any combination of 5.25"
(360 KB/1.2 MB) and/or 3.5" (720 KB/1.44/2.88 MB) drives.
The card comes with a 34-pin daisy-chain drive connector cable. On
one end of the cable is a 34-pin flat-cable connector. On the other end
are two sets of floppy disk drive connectors. Each set consists of a
34-pin flat-cable connector (usually used for 3.5" drives) and a
printed circuit-board connector (usually used for 5.25" drives). You
can use only one connector in each set. The set on the end (after the
twist in the cable) connects to the A: floppy drive. The set in the
middle connects to the B: floppy drive.
2.3
Parallel Port Connector (CN4)
The parallel port is normally used to connect the CPU card to a
printer. The PCA-6176 includes an on-board parallel port, accessed
through a 26-pin flat-cable connector, CN4. The card comes with an
adapter cable which lets you use a traditional DB-25 connector. The
cable has a 26-pin connector on one end and a DB-25 connector on
the other, mounted on a retaining bracket. The bracket installs at the
end of an empty slot in your chassis, giving you access to the
connector.
The parallel port is designated as LPT1, and can be disabled or
changed to LPT2 or LPT3 in the system BIOS setup.
Содержание PCA-6176 Series
Страница 1: ...PCA 6176 Series Full size Pentium II III processor based PCI ISA bus CPU card ...
Страница 31: ...Chapter 1 Hardware Configuration 19 Figure 1 5 SECC II CPU installation step 1 ...
Страница 32: ...20 PCA 6176 User s Manual Figure 1 6 SECC II CPU installation step 2 ...
Страница 43: ...Award BIOS Setup This chapter describes how to set the card s BIOS configuration data CHAPTER 3 ...
Страница 63: ...Chapter 4 AGP VGA Setup 51 5 Insert disk 1 and select Have Disk 6 Click OK ...
Страница 64: ...52 PCA 6176 User s Manual 8 Select RAGE PRO TURBO AGP English and click OK 7 Select macxw4 inf and click OK ...
Страница 65: ...Chapter 4 AGP VGA Setup 53 9 Click Next 10 Insert disk 2 and click OK ...
Страница 66: ...54 PCA 6176 User s Manual 12 Click Finish to complete the setup procedure 11 Insert disk 3 and click OK ...
Страница 68: ...56 PCA 6176 User s Manual 4 Click Browse to look for the driver program 3 Click Have Disk ...
Страница 69: ...Chapter 4 AGP VGA Setup 57 5 Select atirage and click Open 6 Select ATIRAGE PRO TURBO AGP 2X and click OK ...
Страница 75: ...Chapter 5 LAN Configuration 63 3 Click Next 4 Click Next ...
Страница 76: ...64 PCA 6176 User s Manual 6 Click Browse 5 Follow the instructions on the screen and click Have Disk ...
Страница 77: ...Chapter 5 LAN Configuration 65 7 Select net82557 inf and click OK 8 Click OK ...
Страница 78: ...66 PCA 6176 User s Manual 10 Click Next 9 Click OK ...
Страница 79: ...Chapter 5 LAN Configuration 67 11 Click Finish 12 Click Yes ...
Страница 82: ...70 PCA 6176 User s Manual 6 Select Intel R PRO Adapter and click OK 5 Click OK ...
Страница 84: ...72 PCA 6176 User s Manual ...
Страница 102: ...90 PCA 6176 User s Manual Figure 7 3 Restarting Windows ...
Страница 104: ...92 PCA 6176 User s Manual 4 Complete the setup Figure 7 5 Hardware Doctor setup completion screen ...
Страница 110: ...98 PCA 6176 User s Manual ...
Страница 114: ...102 PCA 6176 User s Manual ...


