7
ActronAir
is constantly seeking ways to improve the design of its products, therefore specifications are subject to change without notice.
Copyright © 2022 Actron Engineering Pty. Ltd.
CP05 & CP10 CONTROL INTERFACE INSTALLATION GUIDE
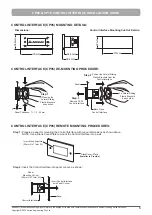
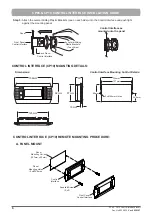
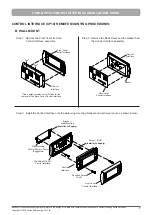
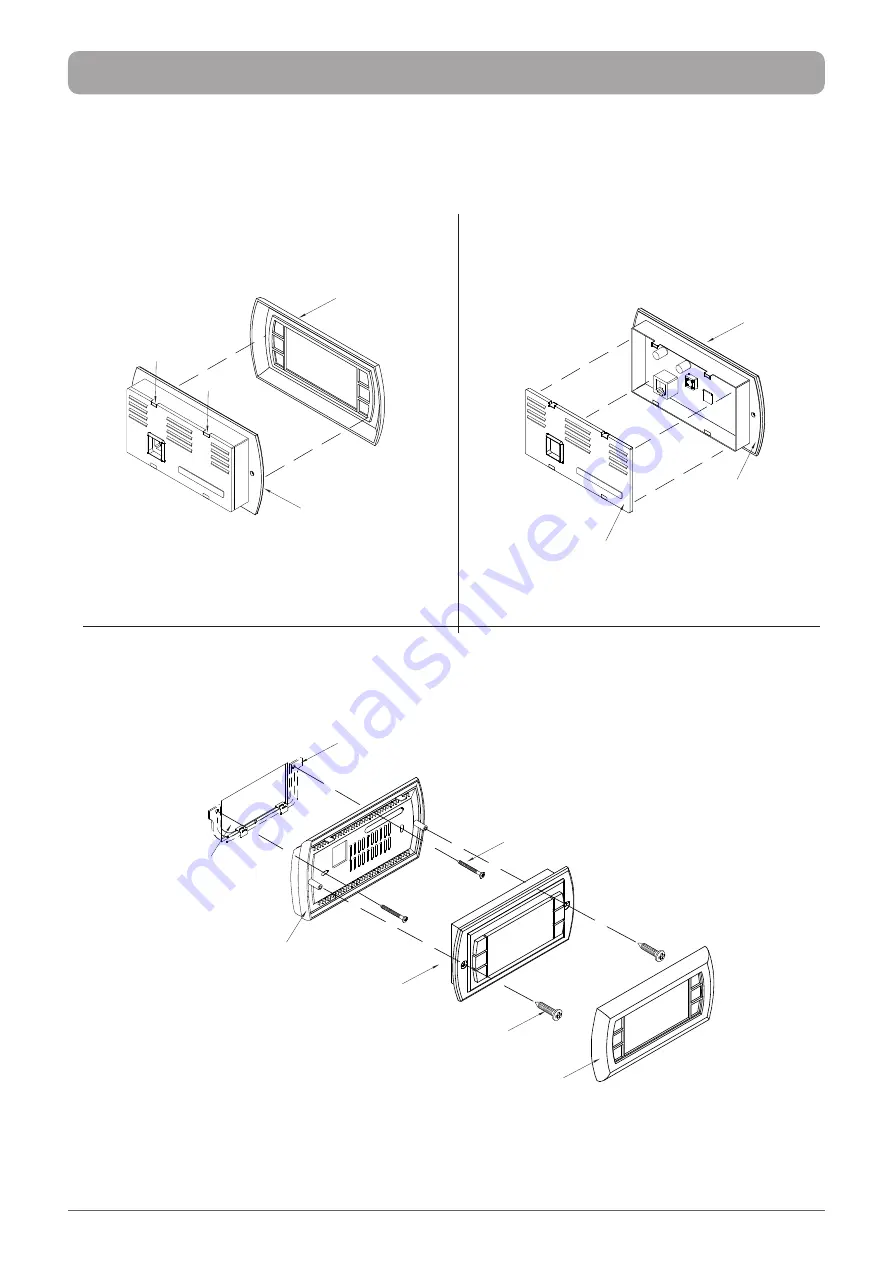
CONTROL INTERFACE (CP10) REMOTE MOUNTING PROCEDURES:
B. WALL MOUNT
Supplied Screw
(2-off)
Screw - (2-off)
(Installer to Supply)
Bracket -
Wall Mounting
(Installer to Supply)
Front Cover
Control Interface
Control
Interface
Wall Mount Cover -
Control Interface
Wall Mounting
Cut-Out 50mm x 70mm
(Suggested)
Step 1. Remove the Front Cover from the
Control Interface assembly.
Step 2. Remove the Back Cover and the Gasket from
the Control Interface assembly.
Step 3. Install the Control Interface onto the wall using mounting bracket and wall mount cover, as shown below:
Tab
*
Tab
*
*
Use a small screwdriver to lift Tabs for the
removal of the Back Cover-Control Interface
Control
Interface
Front Cover
Control Interface
Control
Interface
Gasket
Back Cover
Control Interface
Содержание CP05
Страница 13: ...THIS PAGE WAS INTENTIONALLY LEFT BLANK ...
Страница 14: ...THIS PAGE WAS INTENTIONALLY LEFT BLANK ...
Страница 15: ...THIS PAGE WAS INTENTIONALLY LEFT BLANK ...

