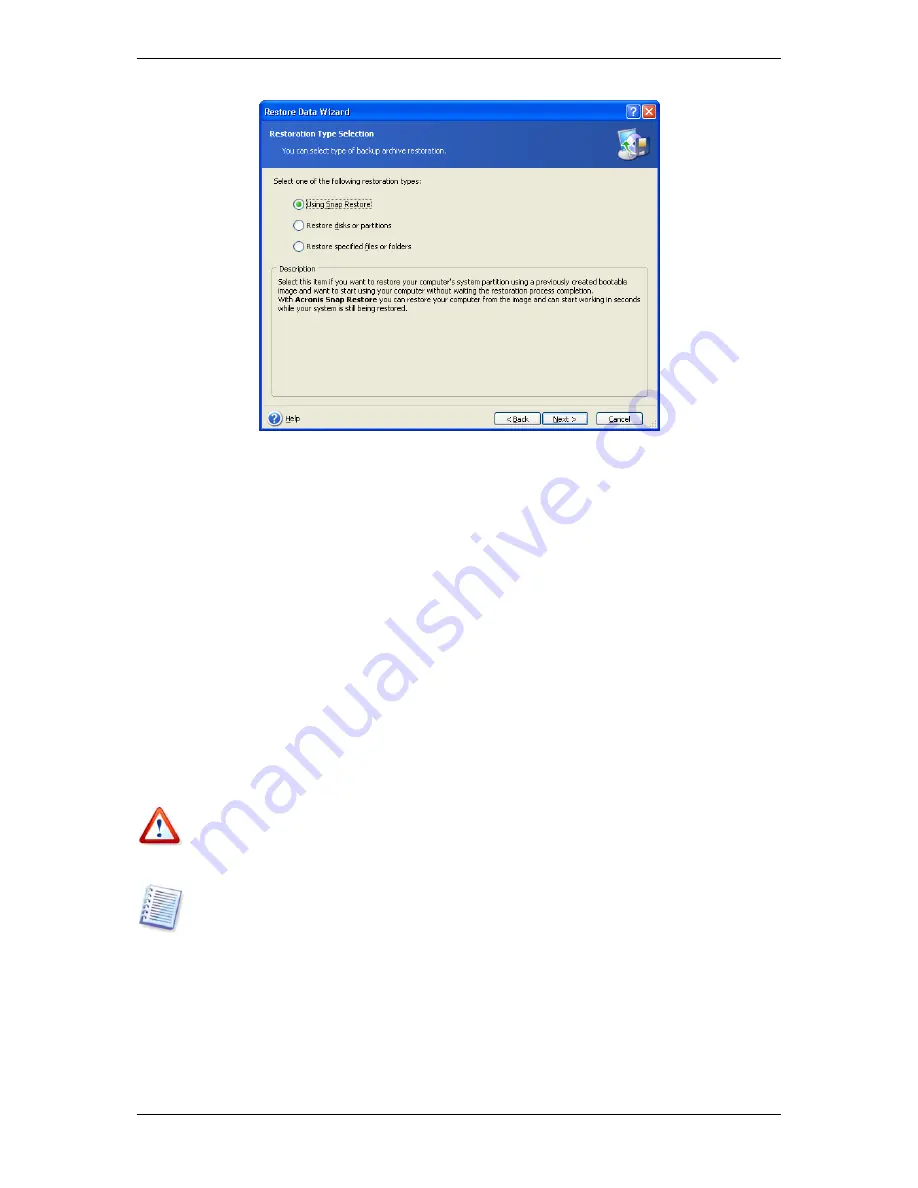
Restore specified files or folders
With this selection, you will be further offered to select where to restore selected folders/files
(original or new location), choose files/folders to be restored and so on. These steps look like
those in file archive restore. However, watch your selection: if you are to restore files instead
of disk/partition, uncheck the unnecessary folders. Otherwise you will restore a lot of
excessive files. Then you will be taken directly to Restoration Summary screen (
6.3.12
Restoration summary and executing resto a ion
).
r t
.
Restore disks or partitions
Having selected a usual way of disks/partitions recovery, you will have to make all settings
described below.
Using Snap Restore
When restoring a system disk/partition image from Acronis Secure Zone, you will have the
third choice – to use
Acronis Snap Restore
. Having selected this option, you will proceed
directly to the summary window (
6 3.12 Restoration summary and executing restoration
). In
a few seconds after pressing
Proceed
the computer will reboot to the restored system. Log
in and start work – no more reboots or other actions are required. For more about Acronis
Snap Restore, see
3.5 Acronis Snap Restore
.
When performing Snap Restore, the current Acronis True Image Home version always
restores the entire system disk. Therefore, if your system disk consists of several partitions
and you are planning to use Acronis Snap Restore, all partitions must be included into the
image. Any partitions which are missing from the image will be lost.
Snap Restore of Windows 98/Me systems is not available.
However, you can choose an ordinary way of restoration for that image. This will allow you
to make changes to the restored partition that would not be possible when using Acronis
Snap Restore.
Finally, if you are not going to recover the system, but only want to repair damaged files,
select
Restore specified files or folders
.
2. Click
Next
.
Copyright © Acronis, Inc., 2000-2006 35


