
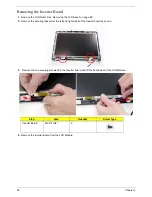


Chapter 3
99
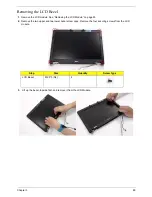
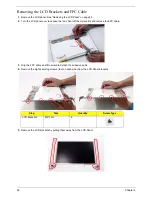
8. Secure the cable by pressing down on the securing
strip.
9. Align the hinges with the LCD back cover and
replace the LCD panel.
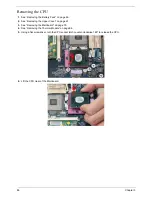
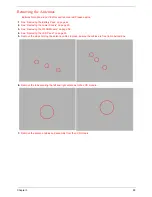
10.
Replace the camera board in the bracket.
11.
Replace the securing screw on the camera board.
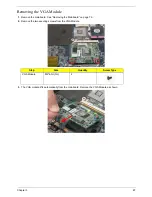
12.
Replace the Camera Module in the bottom cover.
13.
Replace the two securing screws on the Camera
Module bracket as shown.
Содержание Extensa 4630G
Страница 6: ...VI...
Страница 10: ...X Table of Contents...
Страница 14: ...4 Chapter 1 System Block Diagram...
Страница 34: ...24 Chapter 1...
Страница 51: ...Chapter 2 41 3 Reboot the system and key in the selected string qjjg9vy 07yqmjd etc for the BIOS user password...
Страница 52: ...42 Chapter 2...
Страница 60: ...50 Chapter 3 7 Remove the WLAN cover as shown...
Страница 95: ...Chapter 3 85 7 Lift the Thermal Module clear of the Mainboard...
Страница 114: ...104 Chapter 3 3 Connect the RJ 11 cable to the modem module as shown...
Страница 118: ...108 Chapter 3 2 Replace the two securing screws...
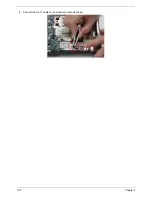
Страница 122: ...112 Chapter 3 2 Connect the seven cables on the mainboard as shown B C D E F G A...
Страница 128: ...118 Chapter 3 3 Turn the computer over and replace the five securing screws...
Страница 175: ...Chapter 6 165...
Страница 184: ...Appendix A 174...
Страница 188: ...178 Appendix B...
Страница 190: ...180 Appendix C...
Страница 193: ...183 Wireless Function Failure 136 WLAN Board 52...
Страница 194: ...184...