


AcerAltos 9100 Series User’s Guide
2-14
2.8
CPU Board Installation
After setting the jumpers and installing memory modules and CPUs, install the
CPU board into the CPU board slot on the system board.
Follow these steps to install the CPU board:
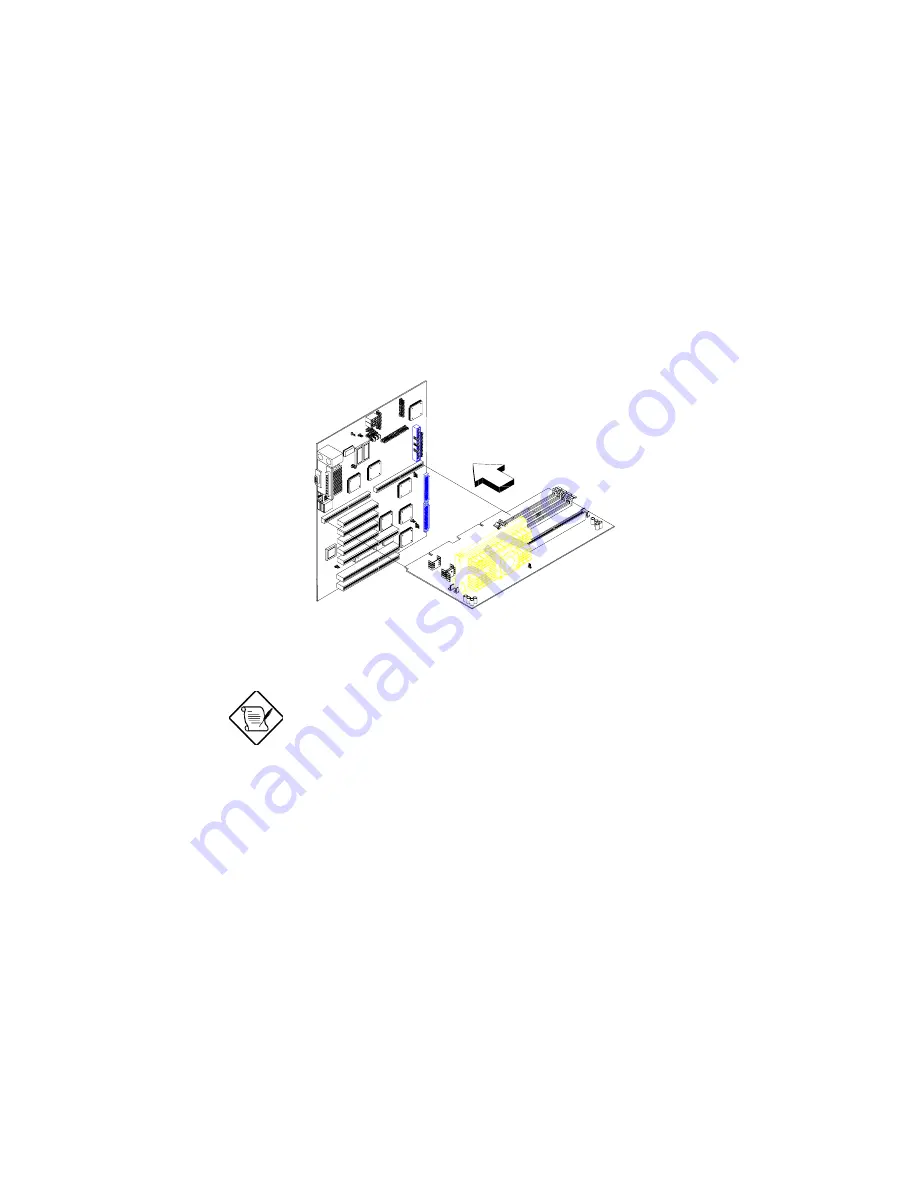
1. Position the CPU board over the slot on the system board such that the
component side (CPU side) faces upward.
2. Gently insert the edge connector of the board into the slot.
Figure 2-14 Installing the CPU Board
Make sure that the CPU board is properly seated
in the slot.
Содержание Altos 9100 Series
Страница 1: ...AcerAltos 9100 Series User s Guide ...
Страница 115: ...Chapter 5 System Housing 5 15 5 Connect the signal and power cables to the drive ...
Страница 124: ...AcerAltos 9100 Series User s Guide 5 24 5 9 Connecting External Devices 5 9 1 Connecting a Monitor ...
Страница 125: ...Chapter 5 System Housing 5 25 5 9 2 Connecting a Keyboard ...
Страница 126: ...AcerAltos 9100 Series User s Guide 5 26 5 9 3 Connecting a Mouse Mouse ...
Страница 127: ...Chapter 5 System Housing 5 27 5 9 4 Connecting a Printer ...
Страница 128: ...AcerAltos 9100 Series User s Guide 5 28 5 10 Complete System Connections ...
Страница 149: ... SSHQGL ULYH 7UD 0DQDJHPHQW 6 VWHP ...


