manualshive.com logo in svg
background image

Operating instructions


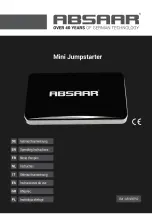
ABSAAR

8

3) SAFETY INSTRUCTIONS

 RISK OF ELECTRIC SHOCKS

 !

•  Do not expose the Mini Jumpstarter to rain, water, vapour 

or condensation.

•  Do not insert any foreign bodies or objects in the connector 

of the clamps or in the USB port.

•  Always keep children at a distance.

•  Do not open the Mini Jumpstarter to change the internal 

batteries. The batteries cannot be replaced.

 RISK OF EXPLOSION

 !

•  Do not expose the device to direct sunlight!

•  When using the Mini Jumpstarter, do not smoke and keep 

any incandescent objects at a distance!

•  Do not use the Mini Jumpstarter in confined smoke-filled 

spaces such as in the hold of a motorboat.

•  Do not use the Mini Jumpstarter near to propane tanks.

•  The clamps of the Mini Jumpstarter must be connected to 

the correct polarities of the vehicle:

•  Red Positive (+) clamp of the Mini Jumpstarter to the Red 

Positive (+) terminal of the vehicle battery.

•  Black Negative (-) clamp of the Mini Jumpstarter to the 

Black Negative (-) Terminal of the vehicle battery.

• 

An Inversion of polarity can damage the Mini Jumpstarter!

 FIRE HAZARD !

•  Do not crush.

•  Do not perforate.

•  Do not make the clamps touch each other or create an 

electrical connection between them with a piece of metal 

or a conductor. This can damage the Mini Jumpstarter or 

create a hazard.

•  Always disconnect the connector of the clamps immediately 

after use.

•  Do not store the Mini Jumpstarter with the clamps connected 

to the device.

•  The Mini Jumpstarter is only designed to be used for a 

very short period of time. Each start-up attempt should not 

exceed 3 seconds. Using the Mini Jumpstarter for more than 

3 seconds can damage it. Wait for 1 minute between each 

start-up attempt.

 CAUTION

Working temperature. Do not expose to working tempera

-

tures in excess of +60°C (+140°F) or less than -20°C (-4°F). 

Using the Mini Jumpstarter above or below these temper

-

atures can reduce the capacity of the Mini Jumpstarter’s 

internal battery or shorten the service life of the battery.


COMMENT :

Store the Mini Jumpstarter in a sheltered space away from 

extreme temperatures for best performance in conditions 

of extreme cold.

The Mini Jumpstarter is supplied with a Li-Cobalt rechargeable 

battery. Always dispose of the devices that have reached the 

end of their service life at a dedicated collection point. Contact 

your local authority or retailer for advice on how to recycle 

your appliances.

People 

(children in particular)

 who lack the knowledge or 

have insufficient experience with the device or have a 

physical, sensory or mental handicap should only use the 

device under the supervision of someone responsible who 

will ensure their safety. Children must be supervised and 

must not be allowed to play with this device.

4) SPECIFICATIONS :

Model

AB-MJS150 Mini Jumpstarter

Dimensions

138 x 78 x 18 mm

Weight

230g 

(390g with the cable and clamps)

Power supply/charging 

current

5 V / 1,5 A with Micro-USB

Output current

• 

5 V/2.0 A;


for smartphone, tablet, camera, etc.

• 

12 Volt Jumpstarter;


for a fuel-powered vehicle whose engine 

size does not exceed 2500 cc)

• 

0.5 W LED; 

Additional light or Flash

Rated start-up aid 

current

150 A

Peak start-up aid 

current

300 A

Working temperature

-20°C to 60°C

Содержание AB-MJS150

Страница 1: ......

Страница 2: ...PLOI 11 DE GEBRAUCHSANWEISUNG 3 IT ISTRUZIONI DI SERVIZIO 19 ES NSTRUCCIONES DE USO 23 NL INSTRUCTIES 15 GR 27 PL INSTRUKCJA OBS UGI 31 MSA INTERNATIONAL SA Avenue de L Europe P le Europ en de D velop...

Страница 3: ...UNG Explosive Gase Flammen und Funken verhindern Dieses leicht entflammbare Gas kann durch vorf lle entweichen und unter schlechten l ftungsbedingungen in der umgebung der Batterie ein explosives gemi...

Страница 4: ...r kurzen sofortigen Gebrauch konzipiert Machen Sie keine Startversuche von mehr als 3 Sekunden auf einmal Durch den Gebrauch von mehr als 3 Sekunden kann der Mini Jumpstarter besch digt werden Warten...

Страница 5: ...chiedenen Ladezust n der internen Batterie des Mini Jumpstarters Dr cken Sie den Ein Ausschalter 6 die LED Anzeige 5 zeigt den Ladezustand der internen Batterie an und schaltet sich automatisch nach 3...

Страница 6: ...rters alle 3 Mo nate auf auch wenn der Mini Jumpstarter nicht in Betrieb war 3 Vor einem erneuten Startversuch sich immer vergewissern dass die Klemmen und der Anschluss perfekt angeschlossen sind 4 W...

Страница 7: ...o rain WARNING Explosive gases Avoid flames and sparks This highly inflammable gas can escape through the vents and form an explosive mixture in the air near to the battery when the area is not proper...

Страница 8: ...short period of time Each start up attempt should not exceed 3 seconds Using the Mini Jumpstarter for more than 3 seconds can damage it Wait for 1 minute between each start up attempt CAUTION Working...

Страница 9: ...n of the charge statuses when recharging the internal battery of the Mini Jumpstarter Press the power supply button 6 the LED indicator 5 indicates the charge status of the internal battery and automa...

Страница 10: ...ou have not used the Mini Jumpstarter 3 Always make sure that clamps and the connector are prop erly connected before attempting to start up of the vehicle 4 If the engine does not start up at the fir...

Страница 11: ...itez les flammes et tincelles Ce gaz facilement inflammable peut s chapper et former un m lange explosif dans l atmosph re pr s de la batterie dans des conditions de mauvaise ventilation PAS D TINCELL...

Страница 12: ...e d marrage de plus de 3 secondes la fois Une utilisation de plus de 3 secondes peux endommager le Mini Jumpstarter Patienter 1 minute entrechaque tentative de d marrage ATTENTION Temp rature de fonct...

Страница 13: ...e internal battery 0 25 LED n 1 clignote 25 50 LED n 1 et n 2 clignotent 50 75 LED n 1 n 2 et n 3 clignotent 75 99 LED n 1 n 2 n 3 et n 4 clignotent 100 end of charging process Toutes les LED sont all...

Страница 14: ...sans avoir utilis le Mini Jumpstarter 3 Les pinces et le connecteur doivent toujours tre parfaitement connect es avant d effectuer une tentative de d marrage 4 Si le moteur n a pas d marr du premier...

Страница 15: ...t toestel niet bloot aan regen WAARSCHUWING Explosieve gassen Vermijd vlammen en vonken Dit licht ontvlambare gas kan lekken via de ventilatieopeningen en bij ontoereikende ventilatie rondom de accu e...

Страница 16: ...en gebruikt Onderneem geen pogingen om langer dan 3 seconden per keer te starten Een gebruik van langer dan 3 seconden kan de Mini Jumpstarter beschadigen 1 minuut wachten na elke startpoging OPGELET...

Страница 17: ...adstatus van de interne batterij van de Mini Jumpstarter Druk op de aan uitknop 6 de ledindicator 5 geeft de laadstatus weer van de interne batterij en stopt na 30 seconden met werken als er geen ladi...

Страница 18: ...DEN zelfs als u de Mini Jumpstarter niet hebt gebruikt 3 Zorg er altijd voor dat de klemmen en de connector naar be horen zijn aangesloten vooraleer u probeert te starten 4 Als de motor na de 1e pogin...

Страница 19: ...i di sicurezza applicabili delle Direttive Europee Non esporre alla pioggia AVVERTENZA Gas esplosivi Evitare le fiamme e le scintille Questo gas altamente infiammabile pu fuggire dalle bocche di areaz...

Страница 20: ...tivo di avviamento non deve superare i 3 secondi L utilizzo del Mini JumpStarter per pi di 3 secondi potrebbe danneggiarlo Attendere 1 minuto dopo ogni tentativo di avviamento ATTENZIONE Temperatura d...

Страница 21: ...arico durante il carica mento della batteria interna del Mini JumpStarter Premendo il pulsante di alimentazione 6 l indicatore LED 5 indica lo stato di carica della batteria interna e si spegne automa...

Страница 22: ...pStarter ogni 3 mesi anche se non si utilizza il Mini JumpStarter 3 Fare sempre in modo che i morsetti e il connettore siano collegati correttamente prima di tentare di avviare il veicolo 4 Se il moto...

Страница 23: ...ble a trav s de las v lvulas de ventilaci n y formar una mezcla explosiva de gases en torno a la bater a si dicha zona no fuera correctamente ventilada NO PRODUZCA NING N TIPO DE CHISPA O LLAMA NI ENC...

Страница 24: ...tiliza el miniarrancador durante m s de 3 segundos ste podr a resultar da ado Espere 1 minuto entre intento e intento de arranque PRECAUCI N Temperatura de trabajo No exponga el dispositivo a tempe ra...

Страница 25: ...ndo la bater a interna del mini Arrancado de bater a Pulse el bot n de alimentaci n el ctrica 6 el indicador LED 5 indica el estado de carga de a bater a interna y se desconecta autom ticamente una ve...

Страница 26: ...ter as 3 Aseg rese siempre de que las pinzas y el conector est n co rrectamente conectados antes de intentar arrancar el veh culo 4 Si no arrancara el veh culo al primer intento espere 1 minuto antes...

Страница 27: ...27 GR AB MJS150 W 1 W 2...

Страница 28: ...Mini Jumpstarter Mini Jumpstarter Mini Jumpstarter Mini Jumpstarter 3 Mini Jumpstarter 3 1 Working temperature 60 C 140 F 20 C 4 F Mini Jumpstarter Mini Jumpstarter Mini Jumpstarter Mini Jumpstarter L...

Страница 29: ...0 25 LED 1 25 50 LEDs 1 2 50 75 LEDs 1 2 3 75 99 LEDs 1 2 3 4 100 LEDs Mini Jumpstarter 6 LED 5 30 100 75 LEDs 75 50 LEDs 1 2 3 50 25 LEDs 1 2 25 1 LED 1 1 0 LED 1 0 LEDs LED 1 1 power 6 1 2 S O S 3...

Страница 30: ...ABSAAR 30 7 2 Mini Jumpstarter 3 1 2 Mini Jumpstarter 30 2002 96 1 Mini Jumpstarter 75 2 Mini Jumpstarter Mini Jumpstarter 3 4 1 5 Jumpstarter 6 Mini Jumpstarter Mini Jumpstarter 8 1 2 3 4...

Страница 31: ...azy wybuchowe Unika otwartego ognia i iskier Z akumulatora mo e wydobywa si wysoce atwopalny gaz i tworzy w powietrzu mieszanin wybuchow gdy otoczenie akumulatora nie jest w a ciwie wentylowane UNIKAJ...

Страница 32: ...Mini Jumpstarter jest przeznaczony do dzia ania w bardzo kr tkich odcinkach czasu Ka dorazowa pr ba rozruchu nie mo e przekroczy 3 sekund U ywanie Mini Jumpstartera d u ej ni 3 sekundy mo e spowodowa...

Страница 33: ...nej baterii Mini Jumpstartera Wci nij przycisk zasilania 6 wka nik LED 5 wska e stan na adowania wewn trznej baterii i wy czy si automatycznie po 30 sekundach je eli bateria nie jest adowana 100 75 Ws...

Страница 34: ...lub do dystrybutora sprz tu Recykling wymaga niewielkiego wy si ku z twojej strony a du o znaczy dla ca ego wiata W przypadku uszkodzenia Skontaktuj si z dystrybutorem urz dzenia 7 PROCEDURA WSPOMAGA...

Страница 35: ...www absaar com...

Страница 36: ...MSA INTERNATIONAL SA Avenue de L Europe P le Europ en de D veloppement PED L 4802 LAMADELAINE LUXEMBOURG...

Отзывы: