8
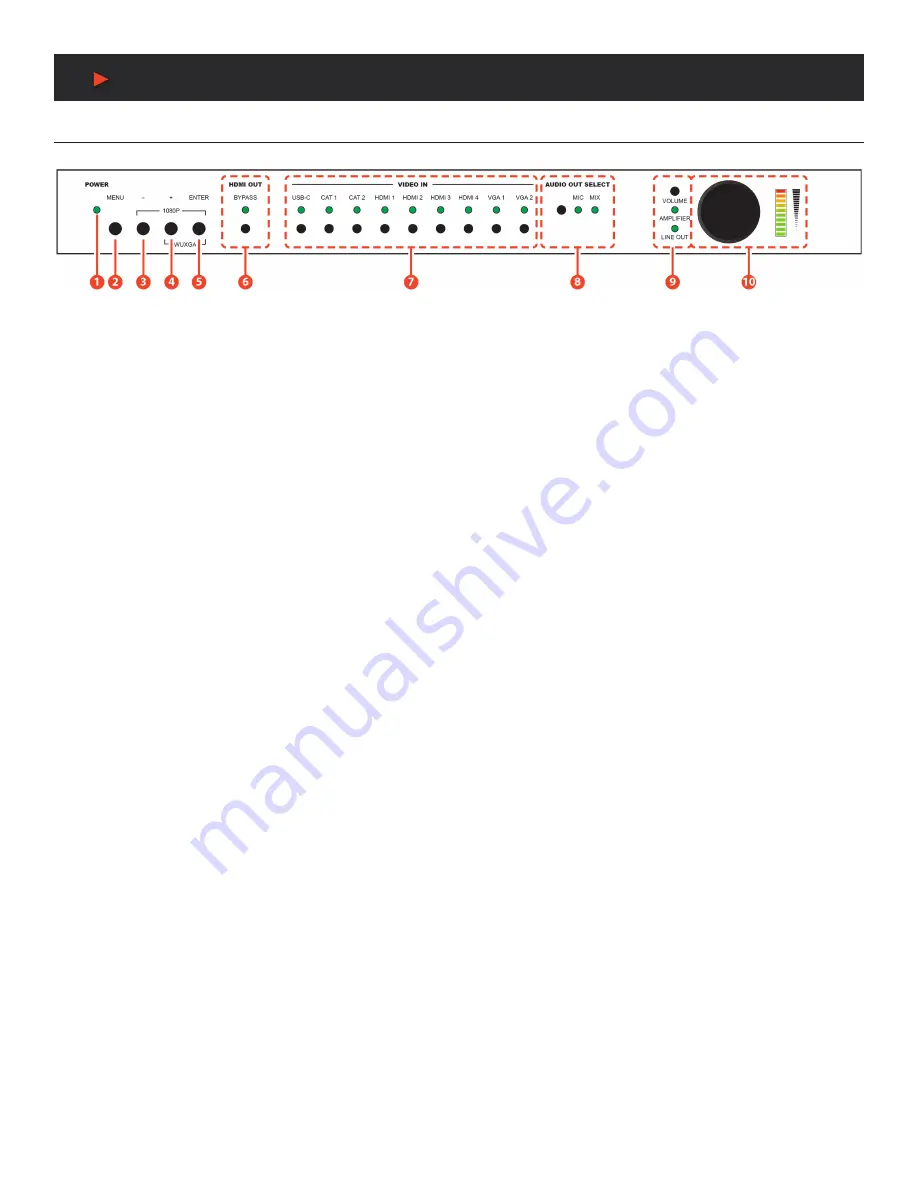
FRONT PANEL
FRONT PANEL
q
POWER LED:
This LED will illuminate to indicate the unit is on and receiving power.
w
MENU BUTTON:
Press to enter the OSD menu, or to back out from menu items.
e
MINUS (-) BUTTON:
Press to move down or adjust selections within OSD menus.
r
PLUS (+) BUTTON:
Press to move up or adjust selections within OSD menus.
Note:
Pressing the
“+”
button when not in a menu will toggle the video freeze feature.
t
ENTER BUTTON:
Press to confirm a selection within the OSD or to go deeper into a menu item.
Note:
Pressing
“ENTER”
and
“+”
together will reset the output resolution to WUXGA (1920x1200@60Hz). Pressing
“ENTER”
and
“-”
together will reset the output resolution to 1080p@60Hz.
y
HDMI OUT BYPASS BUTTON & LED:
Press this button to enable or disable the HDMI video Bypass function. When bypass is
enabled, the LED will illuminate.
u
VIDEO IN BUTTONS & LEDS:
Press any of these buttons to switch immediately to the corresponding input. An LED will illuminate
to indicate which source is currently selected.
i
AUDIO OUT SELECT BUTTON & LEDS:
Press this button to select the microphone mix mode of the unit. The LED will illuminate
to indicate the current mix mode. When both LEDs are off, the mixer is disabled.
Note:
Activating Mixer On mode, or MIC Only mode will automatically disable HDMI Out Bypass mode.
o
VOL. BUTTON & LEDS:
Press this button to select which audio output’s volume is controlled by the volume knob. When both LEDs
are off, the knob controls the HDMI audio output (LPCM 2.0 only).
a
VOL. ROTARY KNOB & LEDS:
Rotating the knob increases or decreases the currently selected audio output’s volume level. The
LED bar will change according to the current level. Pressing in on the knob toggles the audio mute function.
A
NEU
VIDEO


