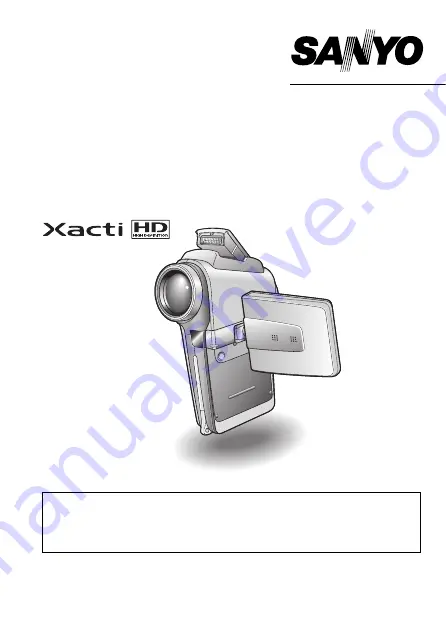
background image

VPC-HD1EX
VPC-HD1E
VPC-HD1

INSTRUCTION MANUAL

Digital Movie Camera

Please read these instructions carefully before using the camera.
Make sure to read and understand the separate booklet “

SAFETY MANUAL

”. 

Keep this manual in a safe place for later reference.

Important note

This manual explains how to safely operate the VPC-HD1EX, VPC-HD1E and 
VPC-HD1.
Any information regarding only one of these products will be labeled as such.

Summary of Contents for Xacti VPC-HD1

Page 1: ...fore using the camera Make sure to read and understand the separate booklet SAFETY MANUAL Keep this manual in a safe place for later reference Important note This manual explains how to safely operate the VPC HD1EX VPC HD1E and VPC HD1 Any information regarding only one of these products will be labeled as such ...

Page 2: ...tion If this equipment does cause harmful interference to radio or television reception which can be determined by turning the equipment off and on the user is encouraged to try to correct the interference by one or more of the following measures h Reorient or relocate the receiving antenna h Increase the separation between the equipment and receiver h Connect the equipment into an outlet on a cir...

Page 3: ... separately from your household waste Please dispose of this equipment at your local community waste collection recycling centre In the European Union there are separate collection systems for used electrical and electronic products Please help us to conserve the environment we live in Symbols used in this manual HINT Points giving some extended instructions or special points to pay attention to C...

Page 4: ...D RUNNING Preparing the camera 1 Insert the card 2 Connect the cable adaptor to the camera and connect the AC adaptor Card slot cover Card slot Card To power outlet Supplied cable adaptor Supplied AC adaptor Supplied power cord ...

Page 5: ... h To stop recording press the video clip recording button again kStill image photography 1 Open the monitor unit and press the ON OFF button for at least 1 second to turn the camera on 2 Set the main switch to REC 3 Press the still image shooting button h The image is captured 24 24 00 10 15 00 10 15 F3 5 F3 5 1 30 1 30 24 00 10 15 F3 5 1 30 ON OFF button Main switch Video clip recording button S...

Page 6: ... selected video clip begins h When the main switch is moved to REC the display changes to the Shooting Screen kStill image playback 1 Set the main switch to PLAY h The display switches to the Playback Screen h To view other images toggle the SET button to the left or right h When the main switch is moved to REC the display changes to the Shooting Screen When you are finished using the camera Press...

Page 7: ...English vi ...

Page 8: ... 52 Audio recording on page 56 Log the date and time of your photos DATE AND TIME SETTING on page 36 Zoom in on the subject USING THE ZOOM on page 60 Close up photography FOCUS RANGE super macro mode on page 79 For more accurate focus FOCUS RANGE manual focus on page 79 Set the focus to a narrow range FOCUS AREA SETTING on page 81 Optimize the photo quality VIDEO CLIP MODE IMAGE QUALITY SETTING on...

Page 9: ...G WITH THE FLASH red eye reduction on page 61 Photographing landscapes SCENE SELECT landscape mode on page 73 Take a self photo SELF TIMER on page 86 Make images lighter or darker EXPOSURE CORRECTION on page 63 Measure the brightness of a specific area LIGHT MEASURING MODE SETTING on page 82 Adjust the camera s sensitivity ISO SENSITIVITY on page 83 For a more precise exposure setting EXPOSURE SET...

Page 10: ...93 Adjust the monitor brightness MONITOR BRIGHTNESS on page 130 Playback on a TV CONNECTING TO A TV on page 149 Set the TV system TV OUTPUT SETTING on page 133 Data managing processing Search for image audio data 9 image display playback on page 49 Delete data ERASING DATA on page 97 Protect images from accidental erasure IMAGE PROTECT on page 95 Format a card FORMATTING A CARD on page 142 Delete ...

Page 11: ...NG THE POWER 26 TURNING THE CAMERA ON AND OFF 30 OPERATION BUTTONS 34 DATE AND TIME SETTING 36 BASIC OPERATION BEFORE TAKING PICTURES 39 VIDEO CLIP RECORDING AND PLAYBACK 42 CAPTURING AND PLAYING BACK STILL IMAGES 46 SHOOT A STILL IMAGE WHILE RECORDING A VIDEO CLIP 51 SEQUENTIAL SHOTS 52 RECORDING IN THE HD MODE 54 AUDIO RECORDING AND PLAYBACK 56 SHOOTING AND PLAYBACK WITH THE REMOTE CONTROL UNIT ...

Page 12: ...AREA SETTING 81 LIGHT MEASURING MODE SETTING 82 ISO SENSITIVITY 83 WHITE BALANCE 84 SELF TIMER 86 SEQUENTIAL SHOTS MODE SETTING 87 PLAYBACK DISPLAYING THE PLAYBACK SETTING SCREENS 89 PLAYBACK METHOD 93 PLAYBACK VOLUME 94 IMAGE PROTECT 95 ERASING DATA 97 ROTATE IMAGE 99 CHANGING IMAGE SIZE RESIZE 100 EXTRACTING A STILL IMAGE FROM A VIDEO CLIP 101 EDITING VIDEO CLIPS 102 PRINT SETTINGS 109 SMOOTH PL...

Page 13: ...UME OF AN EXTERNAL MICROPHONE 131 SCREEN LANGUAGE 132 TV OUTPUT SETTING 133 POWER SAVE FUNCTION 137 FILE NO RESET FUNCTION 139 FORMATTING A CARD 142 RESETTING THE CAMERA SETTINGS 144 CHECKING THE REMAINING CARD MEMORY 145 CHECKING THE REMAINING BATTERY PACK CHARGE 147 OTHER DEVICES AND CONNECTIONS CONNECTING TO A TV 149 DIRECT PRINTING 153 CONNECTING AN EXTERNAL MICROPHONE 162 APPENDICES COMMONLY ...

Page 14: ...IES i Handstrap and camera case 1 set i SANYO Software Pack CD ROM 2 i Li ion battery pack 1 i Docking station 1 i Dedicated S AV interface cable 1 i Dedicated USB interface cable 1 i Dedicated component cable 1 i AC adaptor and power cord 1 ...

Page 15: ...25 for remote control unit 1 i Lens cap and strap 1 i Cable adaptor 1 i Microphone connection cable 1 i Core for external microphone 1 i SAFETY MANUAL safety precautions booklet Please read this booklet carefully before using the digital camera i Quick Guide ...

Page 16: ...9 English CHECKING THE INCLUDED ACCESSORIES How to use the accessories k Handstrap k Lens cap ...

Page 17: ...English 10 k Camera case Media cards that can be used with this camera The type of card that can be inserted into and used with this camera is i SD Memory Card ...

Page 18: ...capture still images while recording a video clip The docking station makes it simple to connect other devices to your camera providing you with the double advantages of both high functionality and ease of use Wide screen recording and playback HD mode page 54 In addition to the standard recording mode normal mode 4 3 aspect ratio your camera can both record and play back video clips in the wide s...

Page 19: ...s you record at 60 fps Capture still shots while recording a video clip page 51 Suppose that while you re recording a video clip there s a scene you d like to keep as a still photo Your camera makes it possible to record the still photo without interrupting the video clip recording VIDEO CLIP MPEG4 640x480 60fps HR 33 00 01 13 F3 5 1 40 Video clip recording button Still image shooting button ...

Page 20: ...implifies those complicated connections to your TV or computer Just set the camera in the docking station and you can view your photos on your TV or computer right away To AC adaptor Dedicated USB interface cable TV Printer Docking station Computer Dedicated S AV interface cable Dedicated component cable ...

Page 21: ...abilities Remote control unit Cable adaptor TV Printer Battery charger optional Separately sold or commercially available SD Memory Card AC adaptor supplied i Card reader i DPOF compatible printer i Photo shop Computer Docking station i Card reader i DPOF compatible printer i Photo shop ...

Page 22: ...Flash button Flash i Extends when the flash button is pressed Speaker Remote control sensor Lens Flash unit Monitor unit Strap holder Battery cover lock External microphone jack MIC Battery cover Stereo microphone Charge indicator Monitor unit ...

Page 23: ...English 16 To open the monitor unit ON OFF button ...

Page 24: ...ng button Video clip recording button Zoom switch MENU button Card slot cover Monitor SET button Tripod stand hole h Open the monitor unit before mounting the camera on a tripod HD NORM button Main switch Docking station terminal Sequential single button O ON OFF button ...

Page 25: ...English 18 Docking station Front Rear Docking station terminal Operation mode button USB AV terminal DC IN terminal USB AV terminal COMPONENT terminal ...

Page 26: ...tch toward the W P side 8 CH button 9 MENU button 1 inoperative 2 inoperative 3 SET button 4 Works the same as toggling SET button to the left 5 Works the same as toggling SET button up 6 Works the same as toggling SET button to the right 7 Works the same as toggling SET button down 8 CH button 9 MENU button Operation shortcuts are not available from the remote control unit Cable adaptor In the sh...

Page 27: ...efore using it in your camera page 142 If an unformatted card is used the card itself may become unusable 1 Open the card slot cover and insert the card in the card slot 2 Insert the card all the way in h Firmly insert the card until it clicks into place 3 Close the card slot cover Card slot cover Card slot Card ...

Page 28: ...ill protrude slightly and you can then pull it out CAUTION Do not attempt to forcibly remove the card i Doing so may damage the card or the stored data If the multi indicator is flashing red i Never remove the card when the multi indicator is flashing red as doing so may result in loss of data stored in the card ...

Page 29: ...nect your camera to a computer printer or TV as well as to charge the battery pack installed in the camera 1 Connect the docking station to a power outlet h Use the supplied AC adaptor and power cord Docking station To power outlet DC IN terminal Supplied AC adaptor Supplied power cord ...

Page 30: ...amera Insert the battery Install the supplied battery CR2025 in the remote control unit 1 Pull out the battery case 2 Insert the supplied battery h Wipe the battery with a soft dry cloth before inserting it h Insert the battery with the mark facing upward 3 Reinsert the battery case Battery case Battery for remote control unit ...

Page 31: ...the path between it and the remote control sensor CAUTION i If the remote control unit is operated in sunlight or under inverter lighting the remote control receiving range may become shorter This is a characteristic of the infrared remote control unit and is not a defect To avoid this malfunction when operating the remote control unit take care to shield the remote control sensor from strong ligh...

Page 32: ... Aim the infrared emitter at the remote control sensor on the docking station 2 Hold down the CH button and press the J button for about 3 seconds 3 Press a button on the remote control unit and check that the camera is receiving correctly h The remote control codes are retained even if the batteries in the remote control unit or camera are replaced h If the remote control codes for the remote con...

Page 33: ... be supplied from a power outlet if the docking station or the cable adaptor is used Charging the battery pack 1 While pressing the battery cover lock slide it 1 and pull out the battery cover toward the bottom of the camera 2 2 Open the battery cover 3 h The battery cover comes off Battery cover lock Battery cover ...

Page 34: ...hat the camera is correctly oriented in relation to the terminal contacts in the docking station h Charging begins when the camera is set in the docking station h During charging the charge indicator is lit red When charging is completed the charge indicator turns off h If the charge indicator flashes red it indicates that the battery pack is defective or the camera is not correctly set in the doc...

Page 35: ...before attempting to charge it HINT About the internal backup battery i This camera s internal battery serves to maintain the date and time settings as well as the shooting settings The backup battery will be fully charged when the battery pack is kept in the camera continuously for about 2 days In the fully charged state the backup battery will maintain the camera settings for about 7 days When n...

Page 36: ...Using the docking station Use the supplied power cord to connect the docking station to a power outlet and set the camera in the docking station Using the cable adaptor Connect the cable adaptor to the camera and use the supplied power cord to connect the cable adaptor to a power outlet Supplied AC adaptor Supplied cable adaptor To power outlet Supplied power cord ...

Page 37: ...he main switch To shoot pictures Set to REC To play back images Set to PLAY 2 Open the monitor unit 3 Press the ON OFF button for at least 1 second h The camera turns on and an image appears on the monitor Monitor unit Monitor ON OFF button Main switch Recording Playback ...

Page 38: ...zoom switch h Press the flash button h Press the HD NORM button h Press the sequential single button O i After the power save function has been active for about 1 hour the camera will switch to the standby mode In this case you can restore the power by pressing the ON OFF button or by closing and then opening the monitor unit i When the AC adaptor is connected the power save function will become a...

Page 39: ...ting has been completed page 36 i The current time is shown on the monitor when the camera is turned on CAUTION If the K icon appears i When a picture is taken the date and time it was captured are recorded with it If the date and time settings have not been completed page 36 the date and time cannot be recorded with the captured images For this reason immediately after the camera is turned on the...

Page 40: ...the camera s monitor may appear slightly different depending on the angle of view Prolonged exposure of the monitor to direct sunlight or leaving the camera in a high temperature environment such as in a car are conditions that may adversely affect the color display and which should therefore be avoided i If the monitor is exposed to strong light it may result in an abnormal brightness in a part o...

Page 41: ...familiar with it right away VIDEO CLIP MPEG4 640x480 30fps SHQ SCENE SELECT FULL AUTO PHOTO RESOLUTION 2592x1944 5M S 2 Press the MENU button h The Menu Screen appears Select the icon above or below 1 Turn on the camera To select the icon above toggle the SET button up To select the icon below toggle the SET button down SET button MENU button 2 Press the MENU button h The Menu Screen appears Selec...

Page 42: ...oggle the SET button to the right To select the icon to the left toggle the SET button to the left Actuate the selected icon Press the SET button The selected icon moves to the left end of the lineup VIDEO CLIP MPEG4 640x480 60fps HR VIDEO CLIP MPEG4 640x480 60fps HR VIDEO CLIP MPEG4 640x480 60fps HR ...

Page 43: ...ber 24 2006 1 Display the Option Screen page 118 2 Select the clock set icon C and press the SET button h The Clock Set Screen appears h The current date and time settings are shown h Follow the procedures below to enable or disable the date display during playback to set the display format for the date and to set the date and time h To return to the Option Screen press the MENU button or select E...

Page 44: ...n h The Set Time Screen appears 3 Set the time to 19 30 h The time is set in the following order Set the hour Set the minute h A 24 hour clock is used for the time display 4 Press the SET button 5 Set the order in which the date is displayed during playback 1 Select DISP 2 Press the SET button h The Set Date Format Screen appears 3 Toggle the SET button up or down h Toggle the SET button up to cha...

Page 45: ...k is being replaced an internal battery will maintain the date and time settings However there is a small chance the settings may be lost The backup will last for about 7 days It is recommended to check that the date and time settings are still correct after replacing the battery pack and before shooting or recording of any type follow steps 1 and 2 To correct the date and time settings i After st...

Page 46: ...ake sure that the lens and flash are not blocked by your fingers or the strap HINT i Images captured in the still image shooting mode can be rotated when they are played back page 99 i When the optical zoom is used or when the autofocus is operating the image may appear to waver but this is not a malfunction Correct hold Incorrect hold A finger is blocking the lens or flash ...

Page 47: ...at the center of the image or dark subjects or locations Use the focus lock function to lock the focus on an object with contrast at the same distance as the desired subject i Subjects without vertical lines Use the focus lock function to lock the focus while framing the subject vertically then re orient the camera to compose a horizontally framed image The following examples are some of the situa...

Page 48: ... taking pictures with the subject lit from behind While the image data is being recorded i While the multi indicator is flashing red the image data is being written to the memory during which time it is not possible to capture another image Another image can be captured after the flashing red indicator turns off However even when the multi indicator is flashing red depending on the camera s intern...

Page 49: ... unit If the camera is in the power save mode Press the ON OFF button 2 Set the main switch to REC 3 Press the video clip recording button h Recording begins 4 End the recording h Press the video clip recording button again to stop recording 00 00 15 00 00 15 00 00 15 Main switch Monitor unit Recording time Video clip recording button ...

Page 50: ... clip 5 Set the main switch to PLAY h The video clip just recorded is shown on the monitor 6 Press the SET button h Playback of the video clip begins Main switch SET button Example After recording a video clip HD mode Example After recording a video clip Normal mode ...

Page 51: ...the SET button to the right During reverse playback After pausing playback press and hold the SET button to the left To accelerate playback Forward playback During forward playback toggle the SET button to the right The playback speed changes each time the SET button is toggled to the right as follows Normal playback 2x 5x 10x 15x Toggle the SET button to the left to resume normal playback speed R...

Page 52: ...ugh making it appear jerky The video will always be displayed properly on the monitor or a television When the remaining card memory becomes 10 percent or less of the total card capacity i The remaining memory icon 10 appears on the monitor i Depending on the card shooting may end even before the possible shooting time indicated Display the video clip playback point i During video clip playback pr...

Page 53: ... h The autofocus operates and the image is focused focus lock 2 Continue to gently press the still image shooting button all the way h The shutter releases and the image is captured h You can view the captured image on the monitor by keeping the still image shooting button depressed when you capture the image post view page 124 F3 5 F3 5 1 40 1 40 F3 5 1 40 Main switch Target mark Shutter speed Ap...

Page 54: ...he shutter speed and aperture are displayed i When the camera focuses and the target mark appears at the same time the shutter speed and aperture settings are also displayed You can use them as a reference when shooting If the camera shake icon appears i During still image shooting if the shutter speed is slow and the possibility that the image may be blurred due to camera shake becomes high the c...

Page 55: ...e monitor 2 Select the image you wish to view To display the previous image toggle the SET button to the left To display the next image toggle the SET button to the right h For video clips and audio data press the SET button to start playback 100 0001 100 0001 100 0001 SET button Main switch ...

Page 56: ...ight to move the orange frame to the desired image and press the SET button Instead of pressing the SET button you can push the zoom switch toward the T side to show the image full screen HINT i The 9 image multi playback display can also be accessed by selecting P on the Playback Setting Screen 101 0002 0003 0001 0005 0006 0004 0008 0009 0007 SET button Main switch Folder number Zoom switch Audio...

Page 57: ...d image To magnify Magnification increases each time the zoom switch is pushed toward the T side To return to normal size Magnification decreases each time the zoom switch is pushed toward the W P side h Press the SET button to return to the normal 100 view HINT The magnified portion of the image can be saved as a separate image i Press the still image shooting button The magnified portion is save...

Page 58: ...ing a video clip the flash does not operate i When shooting a still image while recording a video clip the display briefly pauses and then returns to the video clip display after the still image is captured i If the still image resolution is set to v it automatically changes to r and the image is captured i If the video clip mode is set to T and the still image resolution is set to A the resolutio...

Page 59: ...ain switch to REC 3 Press the sequential single button O h The camera switches to the sequential shots mode and the sequential shots icon P appears on the monitor h Each time the sequential single button is pressed the camera switches between the single shot mode and the sequential shots mode 4 Press the still image shooting button h Shooting begins Shooting continues as long as the still image sh...

Page 60: ... the focus during sequential shots shooting i When sequential shots are captured the autofocus operates when the still image shooting button is pressed halfway fixing the focus i Sequential shots shooting at a resolution of v is not possible If the resolution is set to v it automatically changes to s Can the self timer and or flash be used i The self timer and flash do not operate when shooting se...

Page 61: ... normal mode and HD mode 1 Press the ON OFF button for at least 1 second to turn the camera on 2 Set the main switch to REC 3 Press the HD NORM button h The monitor display changes to the 16 9 aspect ratio HD mode h Each time the HD NORM button is pressed the mode switches between the HD mode and the normal mode 4 Press the video clip recording button F3 5 F3 5 1 31 1 31 19 19 00 00 28 00 00 28 F3...

Page 62: ...HD MODE Outline of the HD Mode Shooting Screen In the HD mode the lighter area on the screen indicates the recording area F3 5 F3 5 1 8 1 8 19 19 00 00 28 00 00 28 F3 5 1 8 19 00 00 28 Normal mode capture area HD mode capture area ...

Page 63: ...main switch to REC 2 Press the MENU button h The menu display appears 3 From the video clip mode menu select the audio memo icon and press the SET button h The audio recording mode is enabled h The menu display is canceled if the MENU button is pressed VIDEO CLIP MPEG4 640x480 30fps SHQ F3 5 1 40 12 00 10 15 Remaining time ...

Page 64: ... clip recording button while shooting h The maximum time for recording a continuous audio memo is about 13 hours 5 End the recording h Press the video clip recording button again to stop recording HINT You can capture a still image during an audio recording i Note however that if the resolution in the still image mode is set to k it automatically changes to r and the image is captured 00 09 45 ...

Page 65: ... forward only 5x 10x and 15x h Toggle the SET button to the left or right during playback to activate fast forward fast reverse h The playback speed changes each time the SET button is toggled to the left or right Fast forward toggle the SET button to the right 2x 5x 10x 15x Toggle the SET button to the left to return to normal speed Fast reverse toggle the SET button to the left 15x 10x 5x Toggle...

Page 66: ...g the supplied remote control unit 1 Prepare the remote control unit page 23 2 Turn the camera on and set the main switch to REC or PLAY h Set the main switch to REC for shooting or to PLAY for playback 3 Aim the remote control unit at the camera s remote control sensor h Open the monitor unit 4 Press the buttons on the remote control unit to operate the camera ...

Page 67: ...ptical zoom press the zoom switch lightly to zoom slowly and press more strongly to zoom quickly h When the optical zoom factor is at maximum zooming stops temporarily When the zoom switch is pressed toward the T side again the mode changes to the digital zoom mode and zooming continues 3 Take the picture For video clip recording see page 42 For shooting single shots see page 46 For shooting seque...

Page 68: ...the flash mode that is appropriate for the surrounding conditions The flash can be enabled only when taking single shot still images 1 Set the main switch to REC 2 Press the flash button to extend the flash h The flash setting appears on the monitor No flash indication The camera will detect the subject brightness and use the flash only when required In a backlight situation if only the center of ...

Page 69: ...e with every image captured regardless of the conditions Use this setting under backlight conditions when the subject is in shade under fluorescent lighting conditions etc forced flash l The flash will not operate even in dark situations Use this setting when capturing an image in a location where flash photography is prohibited or when shooting a night landscape scene flash off J The digital came...

Page 70: ...le the SET button to the right h The exposure correction bar appears 3 Toggle the SET button to the left or right to adjust the exposure h The exposure setting numerical value is shown at the left end of the exposure bar h The exposure can be set to a value from 1 8EV to 1 8EV h The exposure correction bar is canceled when the MENU button or the SET button is pressed 12 00 00 15 MENU button SET bu...

Page 71: ...e exposure correction setting is canceled in the following cases i When the pointer is set to the center position i When the Option Screen is accessed i When the main switch is set to PLAY i After the power is turned off ...

Page 72: ...o displays PAGE 1 and PAGE 2 The PAGE 1 settings page 67 cover the basic shooting settings and the PAGE 2 settings page 69 provide you with more detailed settings 1 Turn on the camera page 30 2 Set the main switch to REC 3 Press the MENU button h The Shooting Setting Screen appears h Pressing the MENU button again will cancel the Shooting Setting Screen VIDEO CLIP MPEG4 640x480 30fps SHQ MENU butt...

Page 73: ... a Shooting Setting Screen 2 Toggle the SET button to the left h The Shooting Setting Screen PAGE changes h Each time the SET button is toggled to the left the PAGE changes VIDEO CLIP MPEG4 640x480 30fps SHQ IMAGE STABILIZER VIDEO VIEW Example Shooting Setting Screen PAGE 1 Example Shooting Setting Screen PAGE 2 PAGE indication ...

Page 74: ...67 English DISPLAYING THE SHOOTING SETTING SCREENS Overview of the Shooting Setting Screens PAGE 1 VIDEO CLIP MPEG4 640x480 30fps SHQ ...

Page 75: ...ity V Record at 1 280 720 pixels 30 frames per second high image quality Make an audio recording r Shoot image at 2 592 1 944 resolution about 5 million pixels normal compression k Shoot image at 3 680 2 760 resolution about 10 million pixels s Shoot image at 2 592 1 944 resolution about 5 million pixels low compression t Shoot image at 1 600 1 200 resolution about 2 million pixels A Shoot image a...

Page 76: ...69 English DISPLAYING THE SHOOTING SETTING SCREENS PAGE 2 IMAGE STABILIZER VIDEO VIEW ...

Page 77: ...eo clip field of view display q Shoot using the still image field of view display Image stabilizer function off All ranges mode Normal mode Manual mode Super macro close up mode K 5 point range finder focus setting C Spot focus setting n Multi section light measuring setting W Center weighted light measuring setting Y Spot light measuring setting t Auto sensitivity corresponds to ISO 50 to 200 Cor...

Page 78: ...e desired icon from the video clip mode menu and press the SET button h This completes the video clip mode setting CAUTION When editing video clips i In order for video clips to be joined they must have been photographed in the same mode i Video clips that were photographed in different modes cannot be joined Setting Resolution units pixels Frame rate Image quality HD mode U 1 280 720 30 fps Very ...

Page 79: ...pose 1 Display the PAGE 1 Shooting Setting Screen page 65 2 Select the still image mode menu 3 Select the desired icon from the still image resolution menu and press the SET button h This completes the still image resolution setting Setting Resolution units pixels Compression Applicable shooting mode s k 3 680 2 760 Standard compression Single shot s 2 592 1 944 Low compression Single shot sequent...

Page 80: ...e the camera i A table showing the limitations for settings corresponding to scene select icons other than is on page 179 The camera automatically makes the optimum settings suitable for the surrounding conditions full auto a Capture a split second image of a fast moving subject sports mode Enhance the 3D feeling of the subject by blurring the background portrait mode For beautiful shots of distan...

Page 81: ...set a slow shutter speed to shoot the flow of a background scene By using the flash in combination with a slow shutter speed you can create beautiful photographs of people against a background night scene slow synchro photography g This allows you to set a specific aperture size and enable disable the ND filter The camera automatically sets an appropriate shutter speed based on this setting apertu...

Page 82: ...mage may be increased i To minimize noise in the image enable the noise reduction function page 126 i The manual exposure setting automatically becomes if the scene select function is active or if the mode is set to the AE shift sequential shots mode i In the sequential shots mode the shutter speed is faster than 1 15 sec i When a video clip is recorded in a video mode other than T with the shutte...

Page 83: ...from the filter menu and press the SET button h This completes the filter setting h To return to normal photography select from the filter menu and press the SET button HINT i A table showing the limitations for settings corresponding to filter icons other than is on page 179 No filter is used none Skin tones are enhanced in close up shots cosmetic filter W Snap black and white photos monochrome f...

Page 84: ... difficult for the motion compensation function to work correctly i When using a tripod the docking station or other means to stabilize the camera please turn the motion compensation function off If the motion compensation function is enabled when it is not actually needed it may result in an image that appears unnatural p Compensate for camera shake during video clip recording The field of view d...

Page 85: ...pensation q setting the video clip recording range is as shown in the recording standby screen i When the still image shooting resolution is set to or A and the scene selection function to a or page 73 a still image captured during video clip recording will have the same field of view as the video clip During still image shooting Display during recording standby During video clip recording For set...

Page 86: ...ton h This completes the focus range setting HINT i From the Shooting Screen you can quickly change the focus range setting by toggling the SET button down i When the focus range is set to super macro the zoom is temporarily set to the wide end i You can lock the focus by toggling the SET button up Wide end 10 cm 3 94 in to infinity Tele end 1 m 3 28 ft to infinity total range mode 80 cm 31 50 in ...

Page 87: ...range i The focus distance indication shows the distance between the lens surface and the subject i In some cases there may be a slight variance between the distance numerical figure you set in the manual focus mode and the actual distance About zoom movement when using the manual focus i If the focus distance is set to 70 cm 27 56 in or less the zoom changes to the largest setting that is suitabl...

Page 88: ...ed a target mark appears Spot focus The camera focuses on the subject in the center of the monitor 1 Display the PAGE 2 Shooting Setting Screen page 65 2 Select the focus mode menu K 5 point range finder focus is selected C Spot focus is selected 3 Select the desired icon from the focus mode menu and press the SET button h The focus area is set h When the spot focus setting is selected the focus m...

Page 89: ...the image after first modulating the light only at the center spot of the monitor 1 Display the PAGE 2 Shooting Setting Screen page 65 2 Select the light measuring mode EXP MEASURE menu n Multi section light measuring W Center weighted light measuring Y Spot light measuring 3 Select the desired light measuring mode from the light measuring mode EXP MEASURE menu and press the SET button h This comp...

Page 90: ...INT i By setting a higher ISO sensitivity you can set higher shutter speeds and capture images in darker locations but noise in the captured images may increase or the images may be irregular t Sets the ISO sensitivity automatically equivalent to ISO 50 to 200 video clip shooting mode ISO 200 to 800 Sets the sensitivity to ISO 50 equivalent video clip shooting mode ISO 200 u Sets the sensitivity t...

Page 91: ...sed on the natural and artificial light conditions r For shooting outside on a sunny day o For shooting outside on a cloudy day p For shooting inside under fluorescent lighting q For shooting inside under incandescent lighting This setting is used for a more accurate white balance using the existing light source one push Please use it when the light source cannot be identified for example Setting ...

Page 92: ...he white balance setting is programmed for the icon it is retained even if another white balance setting r o p or q is selected If you changed to another setting whenever you select the icon and press the SET button the previously programmed setting is recalled HINT To cancel the white balance setting i Perform step 1 select and then press the SET button ...

Page 93: ...snapped the self timer is automatically reset to off N When x is selected i When the still image shooting button or video clip recording button is pressed the multi indicator will blink for about 10 seconds and then the image is captured Also 4 seconds before the shutter releases the indication shown in the illustration appears on the monitor i If you swivel the monitor unit towards the subject th...

Page 94: ...o select the sequential shots mode 2 Display the PAGE 1 Shooting Setting Screen page 65 Standard sequential shots P Takes standard sequential shots page 52 Auto bracket shots I A series of images is captured while the exposure shutter speed and aperture size automatically changes Normal exposure 0 9EV 0 9EV Sequential single button ...

Page 95: ...the desired icon from the sequential shots menu and press the SET button h This completes the sequential shots mode setting HINT How many shots in the auto bracket series i Three images are captured in the auto bracket shots mode Can the flash be used i The flash does not operate when shooting sequential shots ...

Page 96: ...isplays PAGE 1 and PAGE 2 The PAGE 1 settings page 91 cover the basic playback settings and the PAGE 2 settings page 92 provide you with more detailed settings 1 Turn on the camera page 30 2 Set the main switch to PLAY 3 Press the MENU button h The Playback Setting Screen appears h Pressing the MENU button again will cancel the Playback Setting Screen PLAYBACK METHOD Set play all or 1 clip MENU bu...

Page 97: ... 89 2 Toggle the SET button to the left h The Playback Setting Screen changes to the other PAGE h Each time the SET button is toggled to the left the PAGE changes PLAYBACK METHOD Set play all or 1 clip ROTATE Rotate image Example Playback Setting Screen PAGE 1 Example Playback Setting Screen PAGE 2 PAGE indication ...

Page 98: ...es in the 9 frame multi display format 3 Playback volume control page 94 h Adjust the playback volume for video clips and audio data 4 Data protect setting page 95 h Protect data from accidental erasure 5 Erase page 97 h Delete images from the card memory 6 Option icon page 118 h Display the Option Screen 7 PAGE display page 90 8 Help display page 123 9 Remaining battery power page 147 PLAYBACK ME...

Page 99: ...a still image from a video clip 4 Video clip edit page 102 h Edit video clips 5 Print settings page 109 h Specify the print settings DPOF settings 6 Smooth playback page 116 h Video clips are played back smoothly 7 Option icon page 118 h Display the Option Screen 8 PAGE display page 90 9 Help display page 123 0 Remaining battery power page 147 ROTATE Rotate image ...

Page 100: ... Display only the selected image pages 43 and 48 3 Select the desired playback mode When PLAY ALL is selected h The screen to set the time that each image is displayed appears 1 Toggle the SET button to the right to select playback time 2 Toggle the SET button up or down to specify the time that each image is shown 3 Press the SET button 4 Press the SET button h The display time is set and you are...

Page 101: ...ess the SET button h The volume control bar appears 3 Toggle the SET button left or right to adjust the volume and press the SET button h The volume is set and you are returned to the Playback Setting Screen HINT i During video clip or audio memo playback if you move the zoom switch the volume control bar will appear allowing you to adjust the volume PLAY VOLUME VOLUME SETTING 1 ...

Page 102: ...protect icon A and press the SET button h LOCK appears h If the protect mode has already been enabled for the data then UNLOCK appears 3 Toggle the SET button up or down to select YES and press the SET button h The protect mode is set for the data h The protect mark B indicates that the data is locked h To return to the Playback Setting Screen press the MENU button PROTECT LOCK YES EXIT PROTECT UN...

Page 103: ...ased if the card is reformatted page 142 HINT To select a different image in steps 2 and 3 i Toggle the SET button to the left or right To cancel the protect mode for an image i Display the desired data and repeat steps 1 to 3 The protect mark B will disappear and the protect mode is canceled ...

Page 104: ... a time ERASE ALL Erases all the data from the card EXIT Returns to the Playback Setting Screen 3 Toggle the SET button up or down the select the erase mode and press the SET button h The Erase Confirmation Screen appears ONE ERASE h Toggle the SET button to the left or right to select the data you wish to erase ERASE ALL h Toggle the SET button to the left or right confirm that all data are to be...

Page 105: ... Erase Confirmation Screen again appears To erase the data select YES and press the SET button When data erase is completed NO IMAGE is shown CAUTION i Data which is protected from accidental erase cannot be erased To erase protected data set the protect setting for the data to off page 95 and then follow the data erase procedure HINT i You can also access the One Erase Confirmation Screen from th...

Page 106: ...reen appears 3 Select RIGHT or LEFT and press the SET button h Each time the SET button is pressed the image is rotated another 90 degrees HINT i An image for which the protect mode has been enabled cannot be rotated To rotate a protected image cancel the protect mode before beginning the rotate image procedure page 95 RIGHT Rotates image clockwise 90 degrees LEFT Rotates image counterclockwise 90...

Page 107: ...e Screen appears 3 Toggle the SET button up or down to select the new image size 4 Press the SET button h Resizing begins HINT Why can t the image be resized i An image can be resized only to a smaller or the same size not to a larger size 2M 1600 1200 The saved image will be 1 600 1 200 pixels 1 2M 1280 960 The saved image will be 1 280 960 pixels 0 3M 640 480 The saved image will be 640 480 pixe...

Page 108: ... 2 Playback Setting Screen page 89 3 Select the extract still icon 7 and press the SET button h The screen to extract an image appears 4 Select YES and press the SET button h The image is extracted HINT To select a different image frame in step 3 i Toggle the SET button to the left or right YES The image is copied and saved as a still image the original data is left unchanged EXIT You are returned...

Page 109: ...ttery pack becoming depleted in the middle of video clip editing before starting to edit be sure that a sufficiently charged battery pack is installed in the camera or connect the AC adaptor i It is recommended that a computer be used to edit long video clips Procedure to save part of a video clip as a separate clip J Select whether to delete the portion before the cut point or after the cut point...

Page 110: ...ze of the video clips increases the card memory may become full making it impossible to edit the video clips In this case you will need to free some of the memory on the card either by deleting data that are no longer necessary page 97 or by performing the procedure to erase the original video clip s pages 106 and 108 Display the video clip that will come first J J Join the video clips Press the S...

Page 111: ...the selected scene or the portion from the selected scene to the end of the video clip h To select the desired scene quickly you can use a combination of the fast forward or reverse playback pause and image by image playback functions page 44 h The actual cut point may be slightly before or after the displayed scene 3 Display the PAGE 2 Playback Setting Screen page 89 First part Latter part Cut po...

Page 112: ...ct the portion you wish to delete DELETE 1ST PART Delete the first part of the video clip DELETE 2ND PART Delete the latter part of the video clip 6 Press the SET button h A screen appears for you to confirm whether or not you want to keep the original video clip EDIT VIDEO DELETE 1ST PART DELETE 2ND PART JOIN EXIT DELETE 1ST PART KEEP ORIGINAL IMAGE YES NO EXIT ...

Page 113: ...d video clip is saved as a new video clip h If NO was selected the edited video clip is saved as a new video clip and the original video clip is erased h When editing ends you are returned to the Playback Setting Screen HINT i If the original video clip is protected even if you select NO in steps 7 and press the SET button the original video clip will not be erased If you want it to be erased you ...

Page 114: ...d 1 Display the first video clip 2 Display the PAGE 2 Playback Setting Screen page 89 3 Select the edit video icon k and press the SET button h The Edit Video Screen appears 4 Select the join icon x Currently showing video clip Video clip to be joined Video clip end Video clip start EDIT VIDEO DELETE 1ST PART DELETE 2ND PART JOIN EXIT ...

Page 115: ...g starts h The two video clips are saved together as a separate video clip h If NO was selected in step 8 the original video clips are erased when the joined video clip is saved h When editing ends you are returned to the Playback Setting Screen HINT i If the original video clip is protected even if you select NO in steps 8 and press the SET button the original video clip will not be erased If you...

Page 116: ...Display the PAGE 2 Playback Setting Screen page 89 2 Select the print settings icon b and press the SET button h The Print Setting Screen appears ALL IMAGES The specified print settings apply to all the still images on the card EACH IMAGE The print settings are specified for each individual image INDEX All the still images are printed as miniature images thumbnail images several images on one prin...

Page 117: ...F Digital Print Order Format is a print order format You can connect your camera to a DPOF compatible printer to produce your prints You can also set the print settings for the desired images and then have the reserved images printed automatically page 159 About the finished prints i Images that have been rotated will be printed in their original orientation i The quality of the print output will ...

Page 118: ...EACH IMAGE The set print settings are applied only to the image currently displayed 3 Press the SET button h The Date Copies Print Screen appears h If EACH IMAGE was selected toggle the SET button to the left or right to display the desired image to print h Under SETTINGS the settings that are currently active for the displayed image are shown You can toggle the SET button to the left or right to ...

Page 119: ...date 4 Press the SET button h You are returned to the Date Copies Print Screen Specifying the number of prints 1 Toggle the SET button up or down to select COPIES 2 Press the SET button h The Print Number Screen appears 3 Toggle the SET button up or down to specify the number of prints h Toggle the SET button up or down until the desired number of prints is displayed 4 Press the SET button h You a...

Page 120: ...ET button If the print settings were changed Select MODIFY PRINT SETTING and press the SET button Index print Printing out many small images on one sheet is called an index print This is convenient for use as a list of the images you have captured 1 Display the Print Setting Screen page 109 2 Select INDEX ALL IMAGES EXIT DATE SETTINGS COPIES DATE COPIES YES 1 YES 1 MODIFY PRINT SETTING ...

Page 121: ...n 4 Select YES and press the SET button h This completes the setting for the index print You are returned to the Print Setting Screen Changing the print settings 1 Follow steps 1 to 4 on pages 111 and 112 2 Select MODIFY PRINT SETTING and press the SET button INDEX PRINT YES EXIT SET INDEX PRINT ALL IMAGES EXIT DATE SETTINGS COPIES DATE COPIES YES 1 YES 1 MODIFY PRINT SETTING ...

Page 122: ...EAR 3 Press the SET button h The Confirm All Clear Screen appears YES Clear the print settings for all images EXIT Cancel the clear procedure and return to the Print Setting Screen 4 Select YES and press the SET button h All the print settings are cleared and you are returned to the Print Setting Screen ALL CLEAR YES EXIT DATE COPIES YES 1 CLEAR ALL SETTINGS ...

Page 123: ...oth Playback Screen appears ON Activate smooth playback OFF Deactivate smooth playback 3 Select ON and press the SET button h This completes the smooth playback setting HINT i Depending on the recording conditions the smooth playback effect may be insignificant in some cases i This feature does not work for video clips that were recorded in the HD mode i This feature does not work when the dedicat...

Page 124: ... again the Information Screen is canceled 1 Video clip mode settings 2 Image or sound number 3 Protect setting 4 File size 5 Shooting or recording time 6 Remaining battery charge 7 Date and time of image 8 Still image resolution settings 100 0002 2592x1944 987KB IRIS 2005 12 25 19 00 EXPOSE SHUTTER F3 3 1 30 INFO 0 3 100 0003 256KB AAC 2005 12 25 19 00 00 00 11 INFO 100 0001 640x480 30fps 4 2MB MP...

Page 125: ...reen appears 2 Toggle the SET button up or down to select the PAGE indication 3 Toggle the SET button to the right and select the option icon h The Option Screen appears h The Option Screen is canceled if the MENU button is pressed 4 Toggle the SET button down h The menu appears ADV SETTINGS CAMERA SETTINGS PAGE indication Option icon CLOCK SET OPERATION BEEP HELP DISP POST VIEW WIND NOISE REDUC N...

Page 126: ... of the Option Screen 1 3 RESET SETTINGS FORMAT FILE NO RESET POWER SAVE TV OUTPUT SETTINGS LANGUAGE LCD BRIGHTNESS DIGITAL ZOOM FLICKER REDUCT IMAGE SETTINGS NOISE REDUCTION WIND NOISE REDUC POST VIEW HELP DISP EXT MIC VOLUME OPERATION BEEP CLOCK SET ...

Page 127: ...8 Flicker reduction page 128 h Set the flicker reduction function on or off 9 Digital zoom setting page 129 h Enable or disable the digital zoom 0 Monitor brightness page 130 h Adjust the brightness of the monitor A External microphone page 131 h Adjust the input level of a microphone connected to the camera B Screen language page 132 h Select the language in which the monitor messages are display...

Page 128: ...wn on the screen h If ALL OFF is selected and the SET button pressed all the operation sounds are muted h If EXIT is selected and the SET button pressed you are returned to the Option Screen TURN ON OFF Mute or enable the sound that is produced when the power is turned on or off SHUTTER Select the sound that is produced when the still image shooting button is pressed or when a photo is taken using...

Page 129: ...ooting button to preview the selected operation sound h If OFF is selected no sound is produced h Toggle the SET button up or down to select the desired setting and press the SET button If OPERATION VOL was selected h The screen to select the volume for the operation sounds appears h You can select an operation sound volume from 1 minimum to 7 maximum h Toggle the SET button up or down to select t...

Page 130: ...n page 118 2 Select the help display icon r and press the SET button h The Help Setting Screen appears ON The HELP messages are enabled OFF The HELP messages are disabled 3 Toggle the SET button up or down to select the desired setting and press the SET button h This completes the help display setting HELP DISP ON OFF ...

Page 131: ...Option Screen page 118 2 Select the post view icon o and press the SET button h The Post view Screen appears 1 SEC The post view image is displayed for 1 second 2 SEC The post view image is displayed for 2 seconds OFF The post view image is not displayed 3 Select the desired setting and press the SET button h This completes the post view setting POST VIEW 1 SEC 2 SEC OFF ...

Page 132: ...tion icon and press the SET button h The Wind Noise Reduction Screen appears ON The wind noise reduction function is turned on OFF The wind noise reduction function is turned off 3 Select the desired setting and press the SET button h This completes the wind noise reduction setting HINT i For normal shooting set the wind noise reduction to OFF If the function is enabled when there is no wind the a...

Page 133: ...se Reduction Screen appears 3 Select the desired setting and press the SET button h This completes the noise reduction setting HINT i The noise reduction function operates when the shutter speed is slower than 1 4 second i Compared to normal shooting the image processing time after shooting is slightly longer ON The noise reduction function is enabled OFF The noise reduction function is disabled N...

Page 134: ...e SET button h The Image Settings Screen appears 3 Select the desired setting and press the SET button h This completes the image quality setting NORMAL Shoot with image quality at normal VIVID Color saturation is increased SOFT The sharpness is subdued for a softer image SOFTVIVID The sharpness is softened and color saturation is increased IMAGE SETTINGS NORMAL VIVID SOFT SOFT VIVID ...

Page 135: ... and press the SET button h The Flicker Reduction Screen appears 3 Select the o icon from the flicker reduction menu and press the SET button h This completes the flicker reduction setting HINT i If the flicker reduction setting is used outdoors on a very bright day a halation effect which produces diffused rings of light around bright light areas may occur i The manual exposure control and flicke...

Page 136: ... 2 Select the digital zoom icon Q and press the SET button h The Digital Zoom Screen appears ON Digital zoom can be used OFF Digital zoom cannot be used 3 Select the desired setting and press the SET button h This completes the digital zoom setting HINT i The digital zoom does not function in the following situation When the resolution is set to k DIGITAL ZOOM ON OFF ...

Page 137: ...htness icon and press the SET button h The brightness control display appears 3 Toggle the SET button to the left or right to set the brightness and press the SET button h The monitor brightness is set HINT i The display in step 2 can also be accessed from the Shooting Screen Press the MENU button for at least 1 second the brightness control display will appear and you can then adjust the monitor ...

Page 138: ...lay the Option Screen page 118 2 Select the external microphone volume icon W and press the SET button h The volume adjustment bar appears 3 Toggle the SET button to the left or right to adjust the input level and press the SET button h This completes the input level setting for the external microphone 3 EXT MIC VOLUME VOLUME SETTING ...

Page 139: ...age 118 2 Select the language icon z and press the SET button h The Language Screen appears DEUTSCH German ENGLISH English ESPAÑOL Spanish FRANCAIS French ITALIANO Italian NEDERLANDS Dutch Russian Japanese Korean Chinese traditional Chinese simplified 3 Select the desired language and press the SET button h The selected display language is set LANGUAGE ...

Page 140: ...e 118 2 Select the TV output settings icon j and press the SET button h The TV Output Setting Screen appears TV SYSTEM Set the type of TV signal that is output from the USB AV terminal TV TYPE Set the TV s aspect ratio EXIT Return to the Option Screen TV OUTPUT SETTINGS TV SYSTEM NTSC TV TYPE EXIT TV OUTPUT SETTINGS TV SYSTEM NTSC Example When TV SYSTEM was selected ...

Page 141: ... HD mode with an aspect ratio of 16 9 are reproduced with an aspect ratio of 4 3 letterbox format with black bars at the top and bottom of the picture Images recorded in the HD mode with an aspect ratio of 16 9 are vertically compressed squeeze format to produce a picture having an aspect ratio of 4 3 4 Toggle the SET button up or down to select the desired parameter 5 Press the SET button 6 Selec...

Page 142: ...is changed However note that for some TVs that have an auto detect function the output may not conform to the table or the TV display may not change at all TVTYPE setting TV type to be connected Image data to be displayed TV display 16 9 Still image Video clip in normal mode Video clip in HD mode 4 3 Still image Video clip in normal mode Video clip in HD mode ...

Page 143: ...the screen size setting on your TV please refer to the instruction manual for your TV When the aspect ratio of the output still image won t be 16 9 i The still image output should be 4 3 16 9 Still image Video clip in normal mode Video clip in HD mode 4 3 Still image Video clip in normal mode Video clip in HD mode The image is stretched vertically TVTYPE setting TV type to be connected Image data ...

Page 144: ...ed time standby time before the power save function is activated 1 Display the Option Screen page 118 2 Select the power save icon and press the SET button h The Power Save Setting Screen appears BATT CAM Set the standby time for the shooting modes when the battery pack is used BATT PB Set the standby time for the playback modes when the battery pack is used EXT PWR CAM PB Set the standby time for...

Page 145: ...Toggle the SET button up or down to set the standby time Up Increases the standby time Down Decreases the standby time 5 Press the SET button h The standby time is set 6 Select EXIT and press the SET button h You are returned to the Option Screen POWER SAVE BATT CAM 1 min Example When BATT CAM is selected ...

Page 146: ...equently it results in more than one card containing images with the same numbers By setting the file number reset function to OFF even if the card is reformatted or the card is replaced with another card the consecutive numbering of file names continues from the last number recorded by the camera File number reset function ON File number reset function OFF File name image number Card A 0001 0002 ...

Page 147: ...age continues from last file number recorded on Card A When the highest file number on Card B before replacing is higher than the highest file number on Card A the file number of the next recorded image continues from last file number recorded on Card B Card A 0001 0002 0012 0013 Card B 0001 0002 0014 0015 0025 0026 Previously recorded files Replace card Card A 0001 0002 0012 0013 Card B 0020 0021...

Page 148: ...le number reset function is ON OFF The file number reset function is OFF 4 Select OFF and press the SET button h The file number reset function is deactivated HINT i Until the file number reset function is turned ON consecutive file names are assigned It is recommended that the file number reset function be returned to ON at the end of each photography session FILE NO RESET ON OFF ...

Page 149: ...ng the lock switch to the unlocked position 1 Display the Option Screen page 118 2 Select the format icon 1 and press the SET button h The Format Screen appears h In normal use a full format is not necessary However in case a card error occurs even after normal formatting executing a full format may resolve the problem FORMAT A normal formatting is executed FULL FORMAT The entire card is scanned a...

Page 150: ...data from a reformatted card i If a card is reformatted or the data is erased from the card using the camera or a computer the card s control data may be merely modified and the data itself may not be completely erased from the card i In some cases it may be possible to recover the data from a reformatted card using special software for that purpose However if the camera is used to execute a full ...

Page 151: ... Reset Settings Screen appears YES Reset to the factory preset settings NO Do not change the settings and return to the Option Screen 3 Select YES and press the SET button h The camera settings are reset to the factory preset settings HINT i Note that the following settings do not change with this procedure Date and time setting Language setting TV system setting RESET SETTINGS RESET YES NO ...

Page 152: ...ding time 1 Set the main switch to REC and turn on the camera page 30 h The remaining number of images appears in the upper left of the monitor h The remaining video recording time appears in the upper right of the monitor h The remaining number of images and video recording time will differ depending on the resolution and compression settings For audio recordings 1 Set the camera to the audio rec...

Page 153: ...e more images either install a new card or save the images to a computer and then erase them page 97 from the card i When the remaining number of images or the remaining video recording time is 0 it may be possible to capture a few more images by setting a lower resolution setting pages 71 and 72 or selecting a different image quality setting ...

Page 154: ...n the ambient temperature is low may appear early for an incorrect indication of the remaining charge Also depending on the conditions of use of the camera or the ambient conditions temperature etc the indicated remaining charge may change Therefore this indication can only be used as a general approximation of the remaining charge Battery pack remaining charge indicator Battery remaining charge A...

Page 155: ...ambient temperature temperatures below 10 C 50 F the number of images that can be saved on a fully charged battery pack will vary greatly i It is recommended that you prepare an extra battery pack s when taking pictures at a wedding or while traveling for example so you don t miss capturing images of important moments due to the battery pack power running out The same is recommended for taking pho...

Page 156: ... is set in the docking station press the operation mode button on the docking station When connecting to a standard video input terminal When connected the images are not produced normally on the TV monitor To AC adaptor White plug To Audio Input L terminal Red plug To Audio Input R terminal Yellow plug To Video Input terminal Set the input to VIDEO Supplied dedicated S AV interface cable i Insert...

Page 157: ...e not produced normally on the TV monitor To AC adaptor USB AV terminal Yellow plug Not connected Set the input to VIDEO Supplied dedicated S AV interface cable i Insert the plug with the n mark facing up S terminal White plug To Audio Input L terminal Red plug To Audio Input R terminal ...

Page 158: ...pull out the cable carefully i When connecting the cables make sure that the cable plugs are correctly oriented and that they match the shapes of the terminal sockets on the devices Push the plugs in straight when connecting them If undue force is used to connect a cable it may permanently damage the connector pins in the terminal socket i Do not use excessive force when connecting and disconnecti...

Page 159: ... on the TV If your TV does not have 720p video input capability i The images will not appear on the TV Camera Menu Screen and TV Menu Screen i The Menu Screen appears only on the TV monitor so please operate the camera while looking at the TV monitor i The layout of the Menu Screen as it appears on the TV is different from that on the camera To AC adaptor COMPONENT D terminal Supplied dedicated co...

Page 160: ...ridge printing Print preparations 1 Install the card in the camera open the monitor unit to turn on the camera and turn on the printer 2 Use the supplied docking station or adaptor to connect the camera to the printer USB CONNECTION CARD READER PictBridge PC CAMERA CANCEL Supplied dedicated USB interface cable i Insert the plug with the n mark facing up To USB connector on the printer USB AV termi...

Page 161: ...sed to connect a cable it may permanently damage the connector pins in the terminal socket i Do not use excessive force when connecting and disconnecting cables Caution when connecting a printer i If the power to the printer is turned off while it is connected the camera may not operate correctly If the camera does not operate correctly disconnect the USB interface cable turn off the camera and th...

Page 162: ...and print it 1 Complete the printing setup page 153 2 Select the one image icon Y and press the SET button h The screen to select images for printing appears 3 Toggle the SET button to the left or right to display the image you wish to print h Specify the image to print 100 0009 ONE IMAGE COPIES PRINT EXIT 1 ...

Page 163: ...ints 3 Press the SET button h PRINT is selected 5 Press the SET button h Printing begins HINT To cancel printing 1 During printing toggle the SET button down h The Confirm Cancel Printing Screen appears 2 Select YES and press the SET button h If EXIT is selected and the SET button is pressed printing resumes 100 0009 ONE IMAGE COPIES PRINT EXIT 1 ...

Page 164: ... setup page 153 2 Select the all images icon u and press the SET button h The Print All Images Screen appears 3 Select PRINT and press the SET button h Printing begins CAUTION Printing is not possible if there are more than 999 still images in the card i Delete unwanted images before printing 100 0009 ALL IMAGES PRINT EXIT ...

Page 165: ...x print of all the images on the card 1 Complete the printing setup page 153 2 Select the index print icon and press the SET button h The Index Print Screen appears 3 Select PRINT and press the SET button h Printing begins 100 0009 INDEX PRINT EXIT ...

Page 166: ...ET button h The Print Scheduled Images Screen appears 3 Select PRINT and press the SET button h Printing begins h Printing begins about 1 minute after the SET button is pressed HINT i In step 2 if you toggle the SET button to the left or right you can confirm the images that are set to print and their DPOF settings CAUTION i Reserved images printing w is not possible if a printer is used that does...

Page 167: ... SET button h The Printer Settings Screen appears MEDIA TYPE Specify the type of paper used for printing PAPER SIZE Specify the size of paper used for printing LAYOUT Specify how the images are to be arranged on the paper QUALITY Select the print quality for the images DATE STAMP Print the date the photo was taken EXIT Return to the PictBridge Screen PRINTER SETTINGS PRINTER VALUE PRINTER VALUE PR...

Page 168: ... The contents of the settings that can be made for each parameter will differ depending on the printer When PRINTER VALUE is selected h The images will be printed according to the settings specified on the printer side 4 Select EXIT and press the SET button h You are returned to the Printing Mode Screen HINT i The printer setting parameters will differ depending on the printer that is connected i ...

Page 169: ... level of the connected microphone can be adjusted page 131 i When an external microphone is connected the camera s stereo microphone is disabled Stereo microphone Microphone connection cable External microphone jack MIC To reduce unwanted electromagnetic radiation i Affix the core for the external microphone supplied to the cable ...

Page 170: ...ry pack in an environment of 10 to 40 C 50 to 104 F Why doesn t recharging end The battery pack life has expired Replace with a new battery pack If this is not effective consult your dealer Why does the icon appear The remaining battery pack power is low Use the supplied AC adaptor or replace the battery pack with a fully charged one Shooting Why does the multi indicator flash red Recorded data is...

Page 171: ...r larger and for printing a close up of part of a photo trimming G A For printing standard photo photo service sizes For photos displayed on a web page or sent as e mail attachments What is the difference between the digital zoom and the optical zoom Because shooting with the optical zoom uses the optics of a physical lens you can shoot without losing minute details in the image The digital zoom o...

Page 172: ...ed in cold weather why does the image seem to leave traces as it moves Condition due to the monitor characteristics Not a malfunction Spots that appear in the monitor only appear in the monitor and will not be recorded with the images Why does the displayed image contain some red blue and green dots or why are black spots visible Viewing images Why is the image too bright The subject was too brigh...

Page 173: ...ges stored on a card from a different digital camera Play back images that were recorded on a card using this camera Why do vertical stripes appear If a bright subject is shot in the video clip shooting mode vertical stripes may appear on the monitor or in the image Not a malfunction Why isn t the magnified image clear Due to the characteristics of the camera magnified images appear less clear Not...

Page 174: ...he playback volume of the camera What is the difference among the normal video composite video output S video output and progressive output Normal video com posite video output Combines Y lumi nance signal and chrominance signal and outputs the combined signal S video output Out puts the Y signal and chrominance signal separately Progressive signal Outputs the Y signal B Y signal and R Y signal se...

Page 175: ... There is a problem with the printer Please refer to the instruction manual for your printer Misc The CANNOT EDIT VIDEO message appears You have attempted to join video clips having different resolutions or frame rates Select video clips that have the same resolution or frame rates Why is a noise heard from a nearby TV or radio during bat tery recharging Electromagnetic waves are emitted from the ...

Page 176: ... the camera s video output to NTSC or PAL If you have questions about using the AC adaptor and power cord abroad please consult with a dealer near you for advice Why does the SYSTEM ERROR message appear A problem has occurred within the camera or card Check the following items 1 Remove the card and then install it again 2 Remove the bat tery pack and then install it again 3 Install a different car...

Page 177: ...upplied 22 26 29 The battery pack has not been inserted correctly Reinsert the battery pack making sure to orient it correctly The camera turns off by itself The power save function is operating Turn on the camera again 31 Shooting An image is not captured when the still image shooting button or video clip recording button is pressed The power is not turned on If the power save function was activa...

Page 178: ...tic flash mode or forced flash mode 61 The battery pack is dead Recharge the battery pack or replace with a new battery pack Or connect the AC adaptor supplied 22 26 29 The digital zoom does not work The still image mode is set to v The digital zoom setting is set to OFF Set the still image mode to s Set the digital zoom setting to ON 72 129 A warning tone beep beep beep sounds and it is not possi...

Page 179: ... wait for the camera to cool down before using it again Monitor No playback image appears The main switch is not set to PLAY Set the main switch to PLAY 43 48 Viewing images The image is too dark The flash was blocked by a finger or other object Hold the camera correctly and make sure the flash is not obstructed 39 The subject was too far away Capture the image in the range of opera tion of the fl...

Page 180: ...tivity to t 83 The image is not in focus The subject is too close to the camera Capture the image with the subject within the photographable range Select the correct focus setting for your needs 79 The focus setting is not correct The camera moved when the still image shooting button was pressed camera shake Hold the camera correctly and slowly press the still image shooting button halfway to lock...

Page 181: ...lume settingonthecamera is too low Adjust the play back volume 94 Connecting to a TV There is no color in the image The image is distorted The TV output setting is not correct Select the cor rect TV output setting 133 Both the dedicated S AV interface cable and the dedicated component cable are connected Make the correct connection 152 No image or sound The digital cam era is not cor rectly connec...

Page 182: ...power cord of the AC adaptor is connected correctly 22 The camera is not correctly connected to the docking station When inserting the camera in the docking station push down on it to make sure that the connection between the camera and the docking station is secure 26 The camera is in the shooting mode Set the camera to the playback mode or turn the camera off Alternatively press the docking stat...

Page 183: ... 95 The audio guide does not sound The audio guide setting is set to OFF Set the audio guide setting to ON 121 The recording capacity is less than that indicated in the section Possible No of Images Possible Shooting Time Possible Recording Time The recording capacity is less than the value specified for the card Depending on the card the capacity may be less than the specified value Please refer ...

Page 184: ...l unit at the camera s remote control sensor within a range of about 30 degrees horizontally from the remote control sensor 23 24 Something is obstructing the spacebetween the remote control unit and the camera s remote control sensor Remove or move the obstructing object The remote control unit battery is consumed Replace with a new battery The remote control unit battery is not correctly inserte...

Page 185: ... far from the camera s remote control sensor Operate the remote control unit from a position up to 7 meters from the docking station 23 24 The remote control codes for the remote control unit and camera s remote control sensor are different Change the remote control code 25 Problem Cause Action Reference page ...

Page 186: ...it changes to when the scene select function is set to anything other than Setting Remarks Sports a Focus range cannot be selected Portrait Landscape Night view Fireworks Focus range Fixed at Flash Fixed at l Lamp Q Still image mode Can be set to or A Flash Fixed at l Focus range cannot be selected Noise reduction Fixed at _ Setting Remarks Cosmetic Focus range cannot be selected Monochrome W Stil...

Page 187: ... the DCF standard Video clips Conforms to ISO standard MPEG 4 format Audio MPEG 4 audio AAC compression 48 kHz sampling rate 16 bit stereo format Data storage media SD Memory Card Camera effective number of pixels Approx 5 10 Megapixels Image sensor 1 2 5 inch CCD Virtual number of pixels Approx 5 36 megapixels interlace scan primary color filter Still image shooting mode recording resolution Sing...

Page 188: ...on f 38 mm to 380 mm Autofocus 9 groups 12 elements including three with five aspheric surfaces Galvanometer iris Internal ND filter Aperture Open F 3 5 Wide to 3 5 Tele Smallest F 8 0 Wide to 8 0 Tele Exposure control type Programmable AE Shutter speed priority AE Aperture priority AE Manual exposure control Exposure correction available from the Shooting Setting Screen 0 1 8EV in 0 3EV steps Lig...

Page 189: ... from Shooting Setting Screen Maximum ISO sensitivity up to 1 600 equivalent when Scene Select function is set to Q Image stabilizer Electronic Monitor 2 2 inch organic EL Approx 210 000 pixels Frame coverage Approx 100 Flash working range GN 6 4 Approx 35 cm 13 78 in to 2 5 m 8 20 ft Wide Approx 1 m 3 28 ft to 2 5 m 8 20 ft Tele Flash modes Auto flash forced flash flash off red eye reduction Focu...

Page 190: ...C adaptor supplied VAR G9 Power consumption 4 3 W When using the Li ion battery during recording Dimensions excluding protrusions 80 W 119 H 36 D mm 3 15 W 4 69 H 1 42 D in Maximum dimensions Volumetric capacity Approx 204 cc Weight Approx 210 g 7 4 oz camera only without battery pack and card ...

Page 191: ...p 75 Ω unbalanced sync negative C signal 0 286 Vp p 75 Ω unbalanced NTSC color TV system PAL color TV system switchable from the Option Screen USB USB 2 0 High speed COMPONENT 720p output terminal 720p video output Y signal 1 0Vp p 75 Ω unbalanced tri level sync Pb and Pr signals 0 7Vp p 75 Ω unbalanced MIC microphone input terminal Ø2 5 mm stereo mini jack converts to a Ø3 5 mm stereo mini jack b...

Page 192: ...ng time for each video clip will differ depending for example on the card capacity environmental conditions temperature and shooting conditions etc Shooting recording mode Resolution setting SD Memory Card 512 MB 1 GB 2 GB Still image mode k 151 images 297 images 596 images s 202 images 399 images 795 images r 302 images 595 images 1 190 images t 766 images 1 510 images 2 950 images A 1 200 images...

Page 193: ...ure 0 to 40 C 32 to 104 F recharge 20 to 60 C 4 to 140 F storage Humidity 20 to 80 no condensation Dimensions 94 W 40 7 H 92 D mm 3 70 W 1 60 H 3 62 D in Weight Approx 70 g 2 5 oz Part number BRC C2 Power supply Lithium battery CR2025 Dimensions 32 4 W 68 H 15 6 D mm 1 28 W 2 68 H 0 61 D in Weight Approx 16 g 0 6 oz including battery ...

Page 194: ...Multi indicator status Camera status Green Lit Connected to computer or printer USB Flashing Power save mode active Orange Lit Connected to the dedicated S AV interface cable or the dedicated component cable Red Lit Charging Flashing Slow During self timer photography Fast Accessing card Very fast Battery charge error or rise in internal temperature Multi indicator ...

Page 195: ...0 C 32 to 104 F operation 20 to 60 C 4 to 140 F storage Humidity 20 to 80 no condensation Dimensions 46 W 24 H 77 8 D mm 1 81 W 0 94 H 3 06 D in Weight without power cord Approx 140 g 4 9 oz Power cord rated value VPC HD1 AC 125 V 7 A VPC HD1EX VPC HD1E AC 250 V 2 5 A Model number DB L40 Voltage 3 7 V Rated output 1 200 mAh Ambient environment Temperature 0 to 40 C 32 to 104 F during use when char...

Page 196: ...s manual i Sanyo Electric shall not be held responsible for any problems resulting from the use of this camera i Sanyo Electric declines all responsibility for damages due to improper use of the camera failure to adhere to the instructions given in this manual or repairs or changes done by those other than a technician authorized by the manufacturer i Sanyo Electric shall not be held responsible f...

Page 197: ...the picture This two step method is the way to ensure that your photos are perfectly focused k Reasons for unfocused images 1 The still images shooting button was pressed all the way in one step 2 After the image was focused the subject moved h Even if camera focuses the subject once if the distance between the camera and the subject is changed the subject may become out of focus 3 The focus setti...

Page 198: ...e the manual focus page 80 In addition to the autofocus a manual focus mode is also incorporated in your camera In the autofocus mode the distance between the camera and the subject is automatically determined when you press the still images shooting button halfway In contrast to this with the manual focus mode you manually set the focus by specifying the correct distance between the camera and th...

Page 199: ...ture by using the flash for example or changing the exposure setting Photographing moving subjects sports mode a Points i Match the camera s movement with that of the subject i Set the zoom to the Wide end wide angle i Don t be too hesitant to press the still images shooting button or you ll miss the action NOTE i Tips to not missing those great action shots Make sure you re holding the camera cor...

Page 200: ...he flash operates keep the camera and the subjects motionless for about 2 seconds Photographing scenery landscape mode Points i Shoot using a high resolution i For zoom photography use the optical zoom i Pay attention to picture composition NOTE i When shooting with a wide angle setting or if you intend to enlarge the photo the higher the resolution the better i To zoom in on distant scenery it s ...

Page 201: ...MEMO ...

Page 202: ...SANYO Electric Co Ltd ...

Reviews: