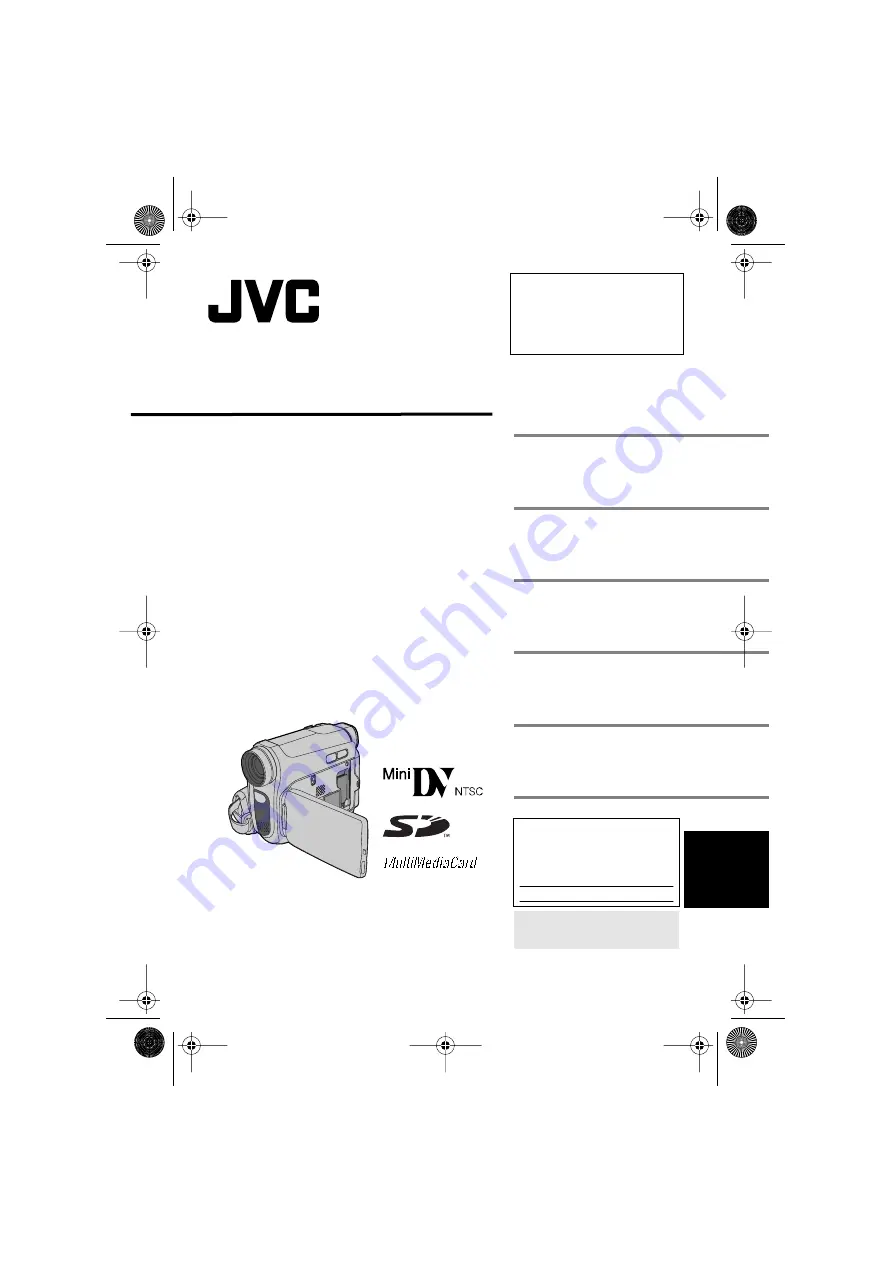
background image


ENGLISH


GR-D770U


ENGLISH


LYT1652-001B


TERMS


Dear Customer,


Thank you for purchasing this digital 
video camera. Before use, please 
read the safety information and 
precautions contained in the pages 
3 – 5 to ensure safe use of this 
product.


INSTRUCTIONS


DIGITAL VIDEO CAMERA


GETTING STARTED


7


RECORDING & PLAYBACK


18


DIGITAL STILL CAMERA 
(D.S.C.) RECORDING & 
PLAYBACK


24


ADVANCED FEATURES


29


REFERENCES


42

48


For Customer Use: 


Enter below the Model No. and 
Serial No. which is located on the 
bottom of the camcorder. Retain 
this information for future reference. 


Model No.


Serial No.

To deactivate the demonstration, 
set “DEMO MODE” to “OFF”. 
(


 pg. 29, 32) 


GR-D770US_EN.book  Page 1  Friday, December 15, 2006  2:11 PM

Summary of Contents for GR-D770U

Page 1: ...CTIONS DIGITAL VIDEO CAMERA GETTING STARTED 7 RECORDING PLAYBACK 18 DIGITAL STILL CAMERA D S C RECORDING PLAYBACK 24 ADVANCED FEATURES 29 REFERENCES 42 48 For Customer Use Enter below the Model No and Serial No which is located on the bottom of the camcorder Retain this information for future reference Model No Serial No To deactivate the demonstration set DEMO MODE to OFF pg 29 32 GR D770US_EN bo...

Page 2: ...y pressing the button brightens the image darkened by backlight pg 36 Data Battery You can check the battery status by simply pressing the DATA button pg 14 Auto Button You can change the recording mode between manual setting to the standard mode setting of the camcorder by pressing the AUTO button pg 20 Dual Rec You can capture and view still images without disturbing the recording in progress pg...

Page 3: ...emory cards marked or can be used with this unit SDHC Memory Card cannot be used with this camcorder Remember that this camcorder is not compatible with other digital video formats It is recommended that you use JVC brand cassette tapes Your camcorder is compatible with all brands of commercially available cassette tapes complying with the MiniDV standard but JVC brand cassette tapes are designed ...

Page 4: ...ying the appliance When the equipment is installed in a cabinet or on a shelf make sure that it has sufficient space on all sides to allow for ventilation 10 cm 3 15 16 or more on both sides on top and at the rear Do not block the ventilation holes If the ventilation holes are blocked by a newspaper or cloth etc the heat may not be able to get out No naked flame sources such as lighted candles sho...

Page 5: ...e fallen into the apparatus the apparatus has been exposed to rain or moisture does not operate normally or has been dropped Before cleaning turn off the camcorder and remove the battery pack and AC Adapter To clean the exterior Wipe gently with a soft cloth Put the cloth in diluted mild soap and wring it well to wipe off heavy dirt Then wipe again with a dry cloth To clean the LCD monitor Wipe ge...

Page 6: ...ges 25 Auto Playback Of Images 25 Index Playback Of Files 25 Removing On Screen Display 25 ADDITIONAL FEATURES FOR D S C 26 Resetting The File Name 26 Protecting Files 26 Deleting Files 27 Setting Print Information DPOF Setting 27 Initializing A Memory Card 28 ADVANCED FEATURES 29 MENUS FOR DETAILED ADJUSTMENT 29 Changing The Menu Settings 29 Recording Menus 30 Playback Menus 33 FEATURES FOR RECOR...

Page 7: ...or more core filter If a cable has only one core filter the end that is closest to the filter should be connected to the camcorder Make sure to use the provided cables for connections Do not use any other cables Regarding This Manual Operation To select 3 6 FOCUS Move the control lever up 4 7 Move the control lever down 2 LIGHT Move the control lever right 1 1 QUICK REVIEW Move the control lever l...

Page 8: ...corder on off by opening closing the LCD monitor or pulling out pushing in the viewfinder NOTES The image will not appear simultaneously on the LCD monitor and the viewfinder When the viewfinder is pulled out while the LCD monitor is opened you can select which one to use Set PRIORITY to the desired mode in SYSTEM Menu pg 32 Colored bright spots may appear all over the LCD monitor or the viewfinde...

Page 9: ...specification and extensions thereof The logo is used for products compliant with the i LINK standard The connectors are located beneath the covers Audio Video Output Connector AV pg 23 39 DC Input Connector DC pg 13 Indicators âPOWER CHARGE Lamp pg 13 Other Parts äLCD Monitor pg 8 ãViewfinder pg 15 åCard Cover pg 17 çBattery Pack Mount pg 13 éShoulder Strap Eyelet pg 12 èGrip Strap pg 12 êSpeaker...

Page 10: ... Gain Up Mode pg 31 5Shutter Speed pg 39 6White Balance Indicator pg 37 7Selected Effect Indicator pg 38 8Selected Program AE Indicator pg 38 9Approximate Zoom Ratio pg 19 Zoom Indicator pg 19 Shooting Icon Appears and blinks during shooting Card Icon pg 24 Appears during shooting Blinks in white when a memory card is not loaded Image Size Picture Quality 640 x 480 F FINE and 640 x 480 S STANDARD ...

Page 11: ...g 22 63 Playback Fast Forward Shuttle Search 1 Rewind Shuttle Search 8 Pause 7Date Time pg 33 8VOLUME Volume Level Indicator pg 21 9Time Code pg 33 During D S C Playback 1Battery Remaining Power Indicator 2Folder File Number 3Operation Mode Indicator 4Date Time 1 L 2 20 2 M V 1 I O X L 2 DE C 1 1 1 3 20 A 0 M 7 x3 6 B I T U 5 ME 2 1 3 4 6 5 7 8 9 LP BLANK SEARCH PUSH STOP BUTTON TO CANCEL 100 0013...

Page 12: ... Open the pad and make grip adjustments Before making the adjustment remove any security tags that may be attached to the velcro 1 Peel off the pad and thread the end of the strap through the eyelet 2 Thread the strap through the buckle adjust its length and use the strap guide to fix it in place 3 Position the buckle near the eyelet and reattach the pad Place here during shooting Eyelet Strap Gui...

Page 13: ...ed the battery is worn out and needs to be replaced Please purchase a new one Since the AC Adapter processes electricity internally it becomes warm during use Be sure to use it only in well ventilated areas After 5 minutes have elapsed in Record Standby mode with the cassette inserted and no operation is performed the camcorder will automatically turn off its power supplied from the AC adapter In ...

Page 14: ...le recording is in progress If COMMUNICATION ERROR appears instead of the battery status even though you tried to press DATA several times there may be a problem with your battery In such a case consult your nearest JVC dealer Using AC Power Perform step 4 5 in Charging The Battery Pack pg 13 NOTE The provided AC Adapter features automatic voltage selection in the AC range from 110 V to 240 V INFO...

Page 15: ...dications in the viewfinder are clearly focused CAUTION When retracting the viewfinder take care not to pinch your fingers Perform steps 1 3 in Language Settings pg 14 To adjust the brightness of the viewfinder pull out the viewfinder fully and set PRIORITY to FINDER pg 32 1 Select DISPLAY press SET or 2 2 Select BRIGHT press SET or 2 3 Select the appropriate brightness press SET or 2 4 Press MENU...

Page 16: ...locks into place NOTES If you wait a few seconds and the cassette holder does not open close the cassette holder cover and try again If the cassette holder still does not open turn the camcorder off then on again If the tape does not load properly open the cassette holder cover fully and remove the cassette A few minutes later insert it again When the camcorder is suddenly moved from a cold place ...

Page 17: ...n initialized Initialize the memory card pg 28 Appears when the camcorder does not recognize the loaded memory card Remove the memory card once and insert it again Repeat these procedures until no indication appears If the indication still appears the memory card is corrupted You can record videos at 4 3 size and 16 9 size By default the camera is set to record videos at the 16 9 size 1 Set the Po...

Page 18: ...editing the tape To avoid this refer to Recording From The Middle Of A Tape pg 20 To record in LP Long Play mode pg 31 Tape Remaining Time Approximate tape remaining time appears on the display min means the camcorder is calculating the remaining time When the remaining time reaches 2 minutes the indication starts blinking The time required to calculate and display the remaining tape length and th...

Page 19: ...r in the most convenient direction It can rotate 270 90 downward 180 upward Interface Shooting The person you shoot can view himself herself in the LCD monitor and you can even shoot yourself while viewing your own image in the LCD monitor 1 Open the LCD monitor and tilt it upward to 180 so that it faces forward Then pull out the viewfinder fully 2 Point the lens toward the subject yourself when s...

Page 20: ...ing again after shooting a scene then opening closing the cassette holder cover NOTES The time code cannot be reset During fast forwarding and rewinding the time code indication does not move smoothly The time code is displayed only when TIME CODE is set to ON pg 32 Recording From The Middle Of A Tape 1 Play back a tape or use Blank Search pg 22 to find the spot at which you want to start recordin...

Page 21: ...ues for 5 minutes when power is supplied from a battery the camcorder shuts off automatically To turn the camcorder on again push back and pull out the viewfinder again or close and re open the LCD monitor When a cable is connected to the AV connector the sound is not heard from the speaker Appears when pictures recorded in the HDV format are detected The pictures in the HDV format cannot be playe...

Page 22: ...Perform steps 1 3 in Normal Playback pg 21 2 Press BLANK The BLANK SEARCH indication appears and the camcorder automatically starts reverse or forward search then stops at the spot which is about 3 seconds of tape before the beginning of the detected blank portion To cancel Blank Search press 7 or BLANK NOTES Before starting Blank Search if the current position is at a blank portion the camcorder ...

Page 23: ...so that the image may suit your TV 16 9 TV or 4 3 TV pg 32 33 To choose whether or not the following displays appear on the connected TV Date Time Set DATE TIME to ON or OFF pg 33 Time Code Set TIME CODE to ON or OFF pg 33 Indications other than date time and time code Set ON SCREEN to OFF LCD or LCD TV pg 33 NOTES It is recommended to use the AC Adapter as the power supply instead of the battery ...

Page 24: ...order shuts off automatically to save power To perform shooting again push back and pull out the viewfinder again or close and re open the LCD monitor Appears when you attempt to shoot digital still images when the write protection tab on the SD Memory Card is set to the LOCK position Appears if there is no memory card loaded when the SNAPSHOT Button is pressed Approximate Number of Storable Image...

Page 25: ...Press 6 to start Auto Playback If you press 1 during Auto Playback files are displayed in descending order If you press 2 during Auto Playback files are displayed in ascending order 3 To end Auto Playback press 7 You can view several different files stored in the memory card at a time This browsing capability makes it easy to locate a particular file you want 1 Perform steps 1 3 in Normal Playback...

Page 26: ...or 2 The PROTECT screen appears 5 Press 1 or 2 to select the desired file 6 Select EXECUTE press SET To cancel protection select RETURN Repeat steps 5 and 6 for all files you want to protect To protect all files stored in the memory card 4 Select PROT ALL press SET or 2 The PROTECT screen appears 5 Select EXECUTE press SET To cancel protection select RETURN NOTE If the mark appears the currently d...

Page 27: ...lect EXECUTE press SET To cancel deletion select RETURN NOTES Protected files pg 26 cannot be deleted To delete them remove protection first Once files are deleted they cannot be restored Check files before deleting This camcorder is compatible with the DPOF Digital Print Order Format standard in order to support future systems such as automatic printing Up to a maximum limit of 999 stored files i...

Page 28: ...OF screen appears 3 Select EXECUTE press SET To cancel selection select RETURN The number of prints is reset to 0 for all still images CAUTION While performing the above never disconnect power as this may cause the memory card to be corrupted NOTE When the image is printed from the printer a black bar appears at the bottom of the screen This is not a malfunction By recording with DIS de activated ...

Page 29: ...rs Video Recording Menu only 4 Select the desired function press SET or 2 The selected function menu appears Example FUNCTION menu 5 Select the desired selection press SET or 2 Example WIPE FADER menu 6 Select the desired setting press SET or 2 Selection is completed 7 Press MENU The Menu Screen closes Press 1 whenever you want to cancel or return to the previous menu screen Repeat the procedure i...

Page 30: ...l magnification 800X Allows you to use the Digital Zoom By digitally processing and magnifying images zooming is possible from 34X the optical zoom limit to a maximum of 800X digital magnification Available only when the VIDEO MEMORY Switch is set to VIDEO OFF Disables the function ON When the distance to the subject is less than 1 m 3 3 ft set TELE MACRO to ON You can shoot a subject as large as ...

Page 31: ...h is set to MEMORY VTR Available only when the VIDEO MEMORY Switch is set to VIDEO SP To record in the SP Standard Play mode LP Long Play more economical providing 1 5 times the recording time SP indicator does not appear on the screen NOTES If the recording mode is switched the playback picture will be blurred at the switching point During playback of a tape recorded on another camcorder blocks o...

Page 32: ...utter sound is recorded on the tape ON A melody sounds when any operation is performed It also activates the shutter sound effect pg 24 34 LCD The image is displayed on the LCD monitor when the viewfinder is pulled out while the LCD monitor is opened FINDER The image is displayed in the viewfinder when the viewfinder is pulled out while the LCD monitor is opened OFF Automatic demonstration will no...

Page 33: ... pressed during tape playback the playback image pauses and normal playback will resume after approximately 6 seconds The still image is not recorded ON Enables dubbing of images recorded on a tape to a memory card pg 39 STEREO Sound is output on both L and R channels in stereo SOUND L Sound from the L channel is output SOUND R Sound from the R channel is output DISPLAY Each setting except OFF in ...

Page 34: ...ECT to or pg 31 5 Press SNAPSHOT The PHOTO indication appears and a still image will be recorded for approx 5 seconds then the camcorder re enters the Record Standby mode You can perform Snapshot also during recording A still image will be recorded for approx 5 seconds then the normal recording resumes Snapshot is effective when the recording mode selection is set to both A or M If the image taken...

Page 35: ...are regularly repeated When the scene is affected by sunbeams or light reflecting off the surface of a body of water When shooting a scene with a high contrast background The following low contrast warnings appear blinking and Manual exposure control is recommended in the following situations When shooting using reverse lighting or when the background is too bright When shooting on a reflective na...

Page 36: ...Power Switch to REC 2 Set the recording mode to M pg 20 3 Press so that the Backlight Compensation indicator appears To cancel Backlight Compensation Press twice so that the indicator disappears NOTE Using Backlight Compensation may cause the light around the subject to become too bright and the subject to become white Selection of a spot metering area enables more precise exposure compensation 1 ...

Page 37: ...ng 1 Set the Power Switch to REC 2 Set the recording mode to M pg 20 3 Hold a sheet of plain white paper in front of the subject Adjust zoom or position yourself so that the white paper fills the screen 4 Select MWB in W BALANCE menu pg 30 then press and hold SET or 2 until begins blinking When the setting is completed stops blinking 5 Press SET or 2 to engage the setting 6 Press MENU The Menu Scr...

Page 38: ...00 This setting allows fast moving images to be captured one frame at a time for vivid stable slow motion playback The faster the shutter speed the darker the picture becomes Use the shutter function under good lighting conditions SNOW Compensates for subjects that may otherwise appear too dark when shooting in extremely bright surroundings such as in the snow SPOTLIGHT Compensates for subjects th...

Page 39: ...e point you want to dub press 6 again to engage Still Playback 8 To dub the image press SNAPSHOT The indication appears during dubbing Dubbing Still Images Recorded On A Tape To A Memory Card To use this camcorder as a player 1 Following the illustration pg 23 Connections To A TV Or VCR connect the camcorder and the VCR s input connectors 2 Perform steps 1 6 pg 23 3 At the point you want to start ...

Page 40: ...l playback image recorded on the tape is output from the DV IN OUT connector When using a DV cable be sure to use the optional JVC VC VDV204U or VC VDV206U DV cable To use this camcorder as a recorder 1 Make sure all units are turned off 2 Connect this camcorder to a video unit equipped with a DV output connector using a DV cable as shown in the illustration 3 Set the camcorder s Power Switch to P...

Page 41: ...e USB mode The date time information cannot be captured into the PC Refer to the instruction manuals of the PC and Software The still images can also be transferred to a PC with a DV connector equipped capture board The system may not work properly depending on the PC or capture board you are using If after connecting a DV cable to the camcoder and it doesn t work restart the camcoder Do not remov...

Page 42: ... so that it also appears in the frame pg 34 37 Charging is difficult in places subject to extremely high low temperatures To protect the battery it is recommended to charge it in places with a temperature of 10 C to 35 C 50 F to 95 F pg 44 The battery pack is not attached firmly Detach the battery pack once again and re attach it firmly pg 13 When shooting in the dark the unit becomes highly sensi...

Page 43: ...tached or when it is dark Appears when the memory card s memory is full and shooting is not possible Appears when the date time is not set pg 15 The built in clock battery has run out and the previously set date time has been erased Consult your nearest JVC dealer for replacement Error indications 01 02 or 06 Remedy Remove and reattach the power supply or battery Error indications 03 or 04 Remedy ...

Page 44: ... the battery pack over a long period time remove from charger or powered unit when not in use as some machines use current even when switched off NOTES It is normal for the battery pack to be warm after charging or after use Temperature Range Specifications Charging 10 C to 35 C 50 F to 95 F Operation 0 C to 40 C 32 F to 104 F Storage 20 C to 50 C 4 F to 122 F The lower the temperature the longer ...

Page 45: ...camcorder is not in use Avoid using the unit in places subject to excessive humidity or dust in places subject to soot or steam such as near a cooking stove in places subject to excessive shock or vibration near a television set near appliances generating strong magnetic or electric fields speakers broadcasting antennas etc in places subject to extremely high over 40 C or 104 F or extremely low un...

Page 46: ...ng Appears if condensation occurs When this indication is displayed wait more than 1 hour until condensation disappears CONDENSATION OPERATION PAUSED PLEASE WAIT Declaration of Conformity Model Number GR D770U Trade Name JVC Responsible party JVC AMERICAS CORP Address 1700 Valley Road Wayne N J 07470 Telephone Number 973 317 5000 This device complies with Part 15 of FCC Rules Operation is subject ...

Page 47: ...0 33 color LCD Speaker Monaural LED Light Effective distance 1 5 m 5 ft Format DV format SD mode Signal format NTSC standard Recording Playback format Video Digital component recording Audio PCM digital recording 32 kHz 4 channel 12 BIT 48 kHz 2 channel 16 BIT Cassette Mini DV cassette Tape speed SP 18 8 mm s LP 12 5 mm s Maximum recording time using 80 min cassette SP 80 min LP 120 min Storage me...

Page 48: ...ry Card 28 Interface Shooting 19 Iris Lock 36 J Journalistic Shooting 19 L Language 14 32 LCD Monitor and Viewfinder 8 15 LED Light 34 Loading A Cassette 16 Loading A Memory Card 17 M Manual Focus 35 Melody 32 Memory Card 17 45 Motor Drive Mode 34 N Narration 33 Night Alive 38 O On Screen 32 33 P Playback Sound 33 Power linked operation 8 Priority 32 Program AE 38 Protecting Files 26 Q Quick Revie...

Reviews: