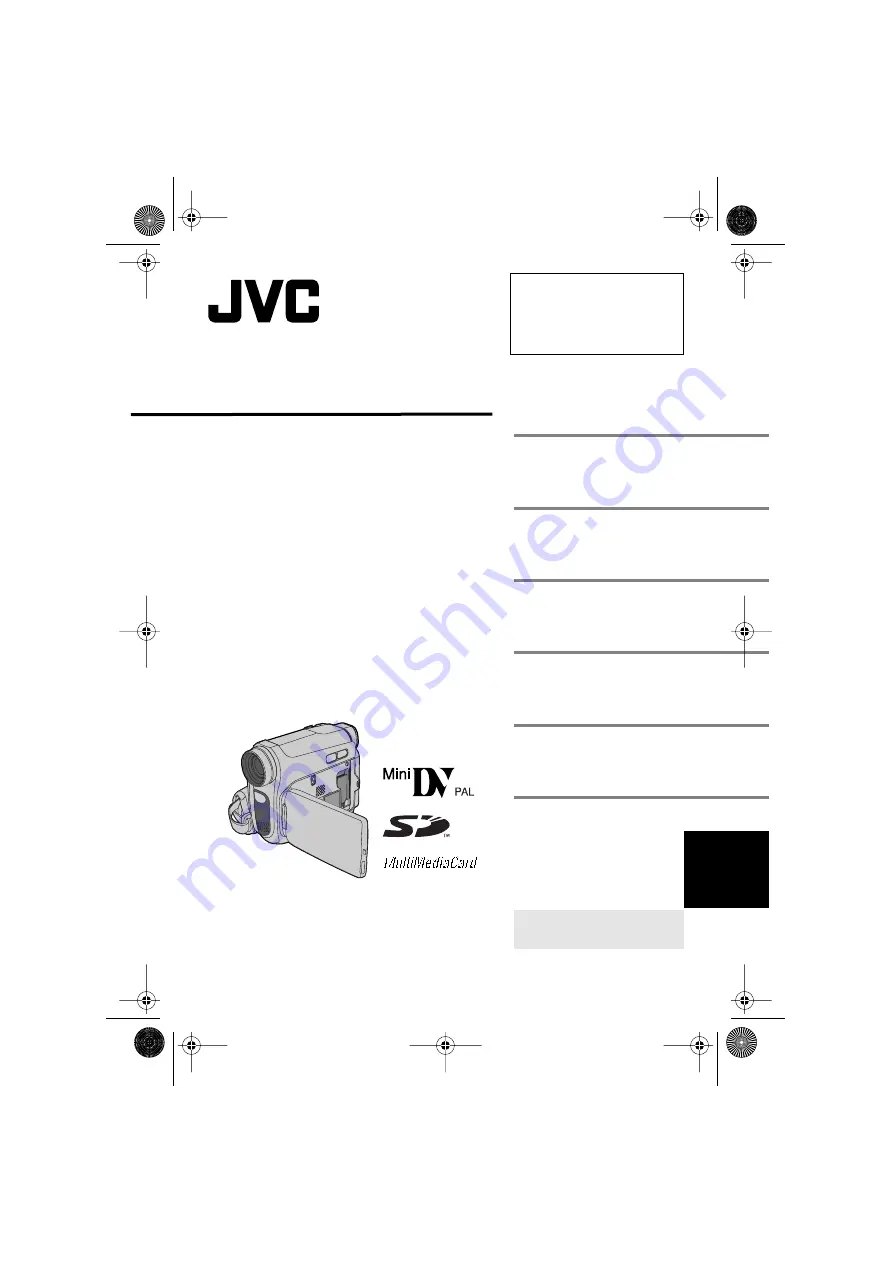
background image


ENGLISH


GR-D770AG


ENGLISH


LYT1691-001A


TERMS


Dear Customer,


Thank you for purchasing this digital 
video camera. Before use, please 
read the safety information and 
precautions contained in the pages 
3 – 5 to ensure safe use of this 
product.


INSTRUCTIONS


DIGITAL VIDEO CAMERA


GETTING STARTED


7


RECORDING & PLAYBACK


18


DIGITAL STILL CAMERA 
(D.S.C.) RECORDING & 
PLAYBACK


26


ADVANCED FEATURES


31


REFERENCES


46


BackCover


To deactivate the demonstration, 
set “DEMO MODE” to “OFF”. 
(


 pg. 31, 34) 


GR-D770AG_EN.book  Page 1  Tuesday, December 5, 2006  1:47 PM

Summary of Contents for GR-D770AG

Page 1: ... precautions contained in the pages 3 5 to ensure safe use of this product INSTRUCTIONS DIGITAL VIDEO CAMERA GETTING STARTED 7 RECORDING PLAYBACK 18 DIGITAL STILL CAMERA D S C RECORDING PLAYBACK 26 ADVANCED FEATURES 31 REFERENCES 46 BackCover To deactivate the demonstration set DEMO MODE to OFF pg 31 34 GR D770AG_EN book Page 1 Tuesday December 5 2006 1 47 PM ...

Page 2: ...ta Battery You can check the battery status by simply pressing the DATA button pg 14 Live Slow You can record and play back precious or hard to see moments at a slow speed The sound is recorded and played back in real time pg 36 Auto Button You can change the recording mode between manual setting to the standard mode setting of the camcorder by pressing the AUTO button pg 20 Dual Rec You can captu...

Page 3: ... memory cards marked or can be used with this unit SDHC Memory Card cannot be used with this camcorder Remember that this camcorder is not compatible with other digital video formats It is recommended that you use JVC brand cassette tapes Your camcorder is compatible with all brands of commercially available cassette tapes complying with the MiniDV standard but JVC brand cassette tapes are designe...

Page 4: ... device may present a fire or chemical burn hazard if mistreated Do not recharge disassemble heat above 100 C or incinerate Replace battery with Panasonic Matsushita Electric Sanyo Sony or Maxell CR2025 Danger of explosion or Risk of fire if the battery is incorrectly replaced Dispose of used battery promptly Keep away from children Do not disassemble and do not dispose of in fire NOTES The rating...

Page 5: ...n the heads during recording Use an optional cleaning cassette pg 3 Do not point the lens or the viewfinder directly into the sun This can cause eye injuries as well as lead to the malfunctioning of internal circuitry There is also a risk of fire or electric shock CAUTION The following notes concern possible physical damage to the camcorder and to the user When carrying be sure to always securely ...

Page 6: ...f Images 27 Auto Playback Of Images 27 Index Playback Of Files 27 Removing On Screen Display 27 ADDITIONAL FEATURES FOR D S C 28 Resetting The File Name 28 Protecting Files 28 Deleting Files 29 Setting Print Information DPOF Setting 29 Initialising A Memory Card 30 MENUS FOR DETAILED ADJUSTMENT 31 Changing The Menu Settings 31 Recording Menus 32 Playback Menus 35 FEATURES FOR RECORDING 36 LED Ligh...

Page 7: ...uipped with one or more core filter If a cable has only one core filter the end that is closest to the filter should be connected to the camcorder Make sure to use the provided cables for connections Do not use any other cables Regarding This Manual Operation To select 3 6 FOCUS Move the control lever up 4 7 Move the control lever down 2 LIGHT Move the control lever right 1 1 QUICK REVIEW Move the...

Page 8: ...corder on off by opening closing the LCD monitor or pulling out pushing in the viewfinder NOTES The image will not appear simultaneously on the LCD monitor and the viewfinder When the viewfinder is pulled out while the LCD monitor is opened you can select which one to use Set PRIORITY to the desired mode in SYSTEM Menu pg 34 Coloured bright spots may appear all over the LCD monitor or the viewfind...

Page 9: ...on and extensions thereof The logo is used for products compliant with the i LINK standard S Video Output Connector S pg 23 The connectors are located beneath the covers Audio Video Output Connector AV pg 23 42 DC Input Connector DC pg 13 Indicators äPOWER CHARGE Lamp pg 13 Other Parts ãLCD Monitor pg 8 åViewfinder pg 15 çCard Cover pg 17 éBattery Pack Mount pg 13 èShoulder Strap Eyelet pg 12 êGri...

Page 10: ...Light Indicator pg 36 4 Night Scope Indicator pg 40 Gain Up Mode pg 33 5Shutter Speed pg 41 6White Balance Indicator pg 39 7Selected Effect Indicator pg 41 8Selected Program AE Indicator pg 40 9Approximate Zoom Ratio pg 19 Zoom Indicator pg 19 Shooting Icon pg 26 Appears and blinks during shooting Card Icon pg 26 Appears during shooting Blinks in white when a memory card is not loaded Image Size P...

Page 11: ...Search 8 Pause 8 3 Forward Frame By Frame Playback Slow Motion 2 8 Reverse Frame By Frame Playback Slow Motion Audio Dubbing 8 Audio Dubbing Pause 7Date Time pg 35 8VOLUME Volume Level Indicator pg 21 9Time Code pg 35 During D S C Playback 1Battery Remaining Power Indicator 2Folder File Number 3Operation Mode Indicator 4Date Time 1 L 2 20 2 M V 1 I O X L 2 30 1 1 2 0 1 0 3 7 x3 6 B I T U 5 ME 2 1 ...

Page 12: ...der 1 Release the stoppers on both ends of the core filter 2 Run the cable through the core filter 3 Close the core filter until it clicks shut Open the pad and make grip adjustments Before making the adjustment remove any security tags that may be attached to the velcro 1 Peel off the pad and thread the end of the strap through the eyelet 2 Thread the strap through the buckle adjust its length an...

Page 13: ...ed the battery is worn out and needs to be replaced Please purchase a new one Since the AC Adapter processes electricity internally it becomes warm during use Be sure to use it only in well ventilated areas After 5 minutes have elapsed in Record Standby mode with the cassette inserted and no operation is performed the camcorder will automatically turn off its power supplied from the AC adapter In ...

Page 14: ...ding is in progress If COMMUNICATION ERROR appears instead of the battery status even though you tried to press DATA several times there may be a problem with your battery In such a case consult your nearest JVC dealer Using AC Power Perform step 4 5 in Charging The Battery Pack pg 13 NOTE The provided AC Adapter features automatic voltage selection in the AC range from 110 V to 240 V INFORMATION ...

Page 15: ...tions in the viewfinder are clearly focused CAUTION When retracting the viewfinder take care not to pinch your fingers Perform steps 1 3 in Language Settings pg 14 To adjust the brightness of the viewfinder pull out the viewfinder fully and set PRIORITY to FINDER pg 34 1 Select DISPLAY press SET or 2 2 Select BRIGHT press SET or 2 3 Select the appropriate brightness press SET or 2 4 Press MENU Pre...

Page 16: ...locks into place NOTES If you wait a few seconds and the cassette holder does not open close the cassette holder cover and try again If the cassette holder still does not open turn the camcorder off then on again If the tape does not load properly open the cassette holder cover fully and remove the cassette A few minutes later insert it again When the camcorder is suddenly moved from a cold place ...

Page 17: ...n initialised Initialise the memory card pg 30 Appears when the camcorder does not recognise the loaded memory card Remove the memory card once and insert it again Repeat these procedures until no indication appears If the indication still appears the memory card is corrupted You can record videos at 4 3 size and 16 9 size By default the camera is set to record videos at the 16 9 size 1 Set the Po...

Page 18: ...diting the tape To avoid this refer to Recording From The Middle Of A Tape pg 20 To record in LP Long Play mode pg 33 Tape Remaining Time Approximate tape remaining time appears on the display min means the camcorder is calculating the remaining time When the remaining time reaches 2 minutes the indication starts blinking The time required to calculate and display the remaining tape length and the...

Page 19: ... in the most convenient direction It can rotate 270 90 downward 180 upward Interface Shooting The person you shoot can view himself herself in the LCD monitor and you can even shoot yourself while viewing your own image in the LCD monitor 1 Open the LCD monitor and tilt it upward to 180 so that it faces forward Then pull out the viewfinder fully 2 Point the lens toward the subject yourself when se...

Page 20: ...ing again after shooting a scene then opening closing the cassette holder cover NOTES The time code cannot be reset During fast forwarding and rewinding the time code indication does not move smoothly The time code is displayed only when TIME CODE is set to ON pg 34 Recording From The Middle Of A Tape 1 Play back a tape or use Blank Search pg 22 to find the spot at which you want to start recordin...

Page 21: ...tinues for 5 minutes when power is supplied from a battery the camcorder shuts off automatically To turn the camcorder on again push back and pull out the viewfinder again or close and re open the LCD monitor When a cable is connected to the AV connector the sound is not heard from the speaker Appears when pictures recorded in the HDV format are detected The pictures in the HDV format cannot be pl...

Page 22: ...before the beginning of the detected blank portion To cancel Blank Search press 7 or BLANK NOTES Before starting Blank Search if the current position is at a blank portion the camcorder searches in the reverse direction If the current position is at a recorded portion the camcorder searches in the forward direction If the beginning or end of the tape is reached during Blank Search the camcorder st...

Page 23: ... VCR and the TV 5 Set the VCR to its AUX input mode and set the TV to its VIDEO mode 6 Start playback on the camcorder pg 21 Please set 16 9 OUTPUT of Playback Menus so that the image may suit your TV 16 9 TV or 4 3 TV pg 34 35 To choose whether or not the following displays appear on the connected TV Date Time Set DATE TIME to ON or OFF pg 34 35 Or press DISPLAY on the remote control to turn on o...

Page 24: ...r Switch is set to PLAY 2PAUSE Button Up Button pg 25 3SLOW Rewind Button pg 25 4REW Button Left Button pg 25 5INSERT Button pg 45 6SHIFT Button pg 25 7DISPLAY Button pg 23 42 8SLOW Forward Button pg 25 9PLAY Button FF Button Right Button pg 25 A DUB Button pg 45 STOP Button Down Button pg 25 EFFECT Button pg 25 EFFECT ON OFF Button pg 25 The following buttons are available when the camcorder s Po...

Page 25: ... playback of images 2 At the point you want to zoom in press the Zoom Button T To zoom out press the Zoom Button W 3 You can move the image on the screen around to find a particular portion of the picture While holding down SHIFT press Left Right Up and Down To end zoom press and hold W until magnification returns to normal Or press STOP 7 and then press PLAY 3 during video playback To end zoom du...

Page 26: ...ied from the battery pack the camcorder shuts off automatically to save power To perform shooting again push back and pull out the viewfinder again or close and re open the LCD monitor Appears when you attempt to shoot digital still images when the write protection tab on the SD Memory Card is set to the LOCK position Appears if there is no memory card loaded when the SNAPSHOT Button is pressed Ap...

Page 27: ...al Playback Of Images pg 27 2 Press 6 to start Auto Playback If you press 1 during Auto Playback files are displayed in descending order If you press 2 during Auto Playback files are displayed in ascending order 3 To end Auto Playback press 7 You can view several different files stored in the memory card at a time This browsing capability makes it easy to locate a particular file you want 1 Perfor...

Page 28: ...or 2 The PROTECT screen appears 5 Press 1 or 2 to select the desired file 6 Select EXECUTE press SET To cancel protection select RETURN Repeat steps 5 and 6 for all files you want to protect To protect all files stored in the memory card 4 Select PROT ALL press SET or 2 The PROTECT screen appears 5 Select EXECUTE press SET To cancel protection select RETURN NOTE If the mark appears the currently d...

Page 29: ...CUTE press SET To cancel deletion select RETURN NOTES Protected files pg 28 cannot be deleted To delete them remove protection first Once files are deleted they cannot be restored Check files before deleting This camcorder is compatible with the DPOF Digital Print Order Format standard in order to support future systems such as automatic printing Up to a maximum limit of 999 stored files in the me...

Page 30: ...en appears 3 Select EXECUTE press SET To cancel selection select RETURN The number of prints is reset to 0 for all still images CAUTION While performing the above never disconnect power as this may cause the memory card to be corrupted NOTE When the image is printed from the printer a black bar appears at the bottom of the screen This is not a malfunction By recording with DIS de activated pg 32 t...

Page 31: ...ars Video Recording Menu only 4 Select the desired function press SET or 2 The selected function menu appears Example FUNCTION menu 5 Select the desired selection press SET or 2 Example WIPE FADER menu 6 Select the desired setting press SET or 2 Selection is completed 7 Press MENU The Menu Screen closes Press 1 whenever you want to cancel or return to the previous menu screen Repeat the procedure ...

Page 32: ...m of 68X digital magnification 800X Allows you to use the Digital Zoom By digitally processing and magnifying images zooming is possible from 34X the optical zoom limit to a maximum of 800X digital magnification Available only when the VIDEO MEMORY Switch is set to VIDEO OFF Disables the function ON When the distance to the subject is less than 1 m set TELE MACRO to ON You can shoot a subject as l...

Page 33: ...bing pg 45 and Insert Editing pg 45 are possible on tapes recorded in the SP mode It is recommended that tapes recorded in the LP mode on this camcorder be played back on this camcorder If the recording mode is switched the playback picture will be blurred at the switching point During playback of a tape recorded on another camcorder blocks of noise may appear or there may be momentary pauses in t...

Page 34: ...recorded on the tape ON A melody sounds when any operation is performed It also activates the shutter sound effect pg 31 41 OFF Disables the remote control operations ON Enables the remote control operations LCD The image is displayed on the LCD monitor when the viewfinder is pulled out while the LCD monitor is opened FINDER The image is displayed in the viewfinder when the viewfinder is pulled ou...

Page 35: ...on is pressed during tape playback the playback image pauses and normal playback will resume after approximately 6 seconds The still image is not recorded ON Enables dubbing of images recorded on a tape to a memory card pg 42 STEREO Sound is output on both L and R channels in stereo SOUND L Sound from the L channel is output SOUND R Sound from the R channel is output DISPLAY Each setting except OF...

Page 36: ...nd then normal recording or playback resumes NOTES This feature is effective when the recording mode selection is set to both A or M Live Slow cannot be used when the 16 9 Wide mode is selected This feature lets you record still images that look like photographs onto a tape 1 Set the VIDEO MEMORY Switch to VIDEO 2 Set the Power Switch to REC 3 Set the recording mode to M pg 20 4 Set SNAP SLOW to S...

Page 37: ...are regularly repeated When the scene is affected by sunbeams or light reflecting off the surface of a body of water When shooting a scene with a high contrast background The following low contrast warnings appear blinking and Manual exposure control is recommended in the following situations When shooting using reverse lighting or when the background is too bright When shooting on a reflective na...

Page 38: ...Power Switch to REC 2 Set the recording mode to M pg 20 3 Press so that the Backlight Compensation indicator appears To cancel Backlight Compensation Press twice so that the indicator disappears NOTE Using Backlight Compensation may cause the light around the subject to become too bright and the subject to become white Selection of a spot metering area enables more precise exposure compensation 1 ...

Page 39: ...of lighting 1 Set the Power Switch to REC 2 Set the recording mode to M pg 20 3 Hold a sheet of plain white paper in front of the subject Adjust zoom or position yourself so that the white paper fills the screen 4 Select MWB in W BALANCE menu pg 32 then press and hold SET or 2 until begins blinking When the setting is completed stops blinking 5 Press SET or 2 to engage the setting 6 Press MENU The...

Page 40: ...ical streak may appear smear phenomenon Smear phenomenon tends to occur when SPORTS or any mode of SHUTTER 1 500 1 4000 is selected PROGRAM AE OFF Disables the function Factory preset SPORTS Variable Shutter Speed 1 250 1 4000 This setting allows fast moving images to be captured one frame at a time for vivid stable slow motion playback The faster the shutter speed the darker the picture becomes U...

Page 41: ...fixed at 1 120th of a second The flickering that occurs when shooting under a fluorescent light or mercury vapour lamp is reduced SHUTTER 1 500 SHUTTER 1 4000 Refer to PROGRAM AE SPORTS mode Not available for still image recording Still images can be dubbed from a tape to a memory card 1 Load a cassette pg 16 2 Load a memory card pg 17 3 Set the VIDEO MEMORY Switch to VIDEO 4 Set the Power Switch ...

Page 42: ...instruction manual 3 To stop dubbing stop recording on the VCR then stop playback on the camcorder NOTES It is recommended to use the AC Adapter as the power supply instead of the battery pack pg 13 To choose whether or not the following displays appear on the connected TV Date time Set DATE TIME to ON or OFF pg 34 35 Or press DISPLAY on the remote control to turn on off the date indication Time c...

Page 43: ...SHOT is pressed during playback only the original playback image recorded on the tape is output from the DV IN OUT connector When using a DV cable be sure to use the optional JVC VC VDV204U or VC VDV206U DV cable To use this camcorder as a recorder 1 Make sure all units are turned off 2 Connect this camcorder to a video unit equipped with a DV output connector using a DV cable as shown in the illu...

Page 44: ... time information cannot be captured into the PC Refer to the instruction manuals of the PC and Software The still images can also be transferred to a PC with a DV connector equipped capture board The system may not work properly depending on the PC or capture board you are using If after connecting a DV cable to the camcorder and it doesn t work restart the camcorder Do not remove memory card dur...

Page 45: ...TES Before performing the following steps make sure that TIME CODE for DISPLAY in both Recording and Playback Menus is set to ON pg 31 34 35 Insert Editing is not possible on a tape recorded in the LP mode or on a blank portion of a tape 1 Play back the tape locate the Edit Out point and press PAUSE 8 Confirm the time code at this point pg 20 2 Press REW 1 until the Edit In point is located then p...

Page 46: ...rotect the battery it is recommended to charge it in places with a temperature of 10 C to 35 C pg 48 The battery pack is not attached firmly Detach the battery pack once again and re attach it firmly pg 13 14 When shooting in the dark the unit becomes highly sensitive to light when GAIN UP is set to AUTO If you want the lighting to look more natural set GAIN UP to AGC or OFF pg 31 33 In places sub...

Page 47: ...on a tape recorded in the LP mode pg 45 Appears if INSERT on the remote control is pressed when the erase protection tab is set to SAVE pg 45 Appears if Insert Editing is attempted on a blank portion of a tape pg 45 Appears when the memory card s memory is full and shooting is not possible Appears when the date time is not set pg 15 The built in clock battery has run out and the previously set dat...

Page 48: ...to be warm after charging or after use Temperature Range Specifications Charging 10 C to 35 C Operation 0 C to 40 C Storage 20 C to 50 C The lower the temperature the longer recharging takes Charging times are for a fully discharged battery pack Cassettes To properly use and store your cassettes be sure to read the following cautions During use make sure the cassette bears the Mini DV mark be awar...

Page 49: ... disassemble or modify the unit short circuit the terminals of the battery pack Keep it away from metallic objects when not in use allow inflammables water or metallic objects to enter the unit remove the battery pack or disconnect the power supply while the power is on leave the battery pack attached when the camcorder is not in use Avoid using the unit in places subject to excessive humidity or ...

Page 50: ... from the center hole Do not use conventional disc cleaners or cleaning spray Do not bend the CD ROM or touch its mirror surface Do not store your CD ROM in a dusty hot or humid environment Keep it away from direct sunlight Serious malfunctioning About moisture condensation You have observed that pouring a cold liquid into a glass will cause drops of water to form on the glass outer surface This s...

Page 51: ...ignal format PAL standard Recording Playback format Video Digital component recording Audio PCM digital recording 32 kHz 4 channel 12 BIT 48 kHz 2 channel 16 BIT Cassette Mini DV cassette Tape speed SP 18 8 mm s LP 12 5 mm s Maximum recording time using 80 min cassette SP 80 min LP 120 min Storage media SD Memory Card MultiMediaCard Compression system JPEG compatible File size Still image 640 x 48...

Page 52: ... Journalistic Shooting 19 L Language 14 34 LCD Monitor and Viewfinder 15 LED Light 36 Live Slow 36 Loading A Cassette 16 Loading A Memory Card 17 M Manual Focus 37 Melody 34 Memory Card 17 49 Motor Drive Mode 36 N Narration 35 Night Scope 40 O On Screen 34 35 P Playback Sound 35 Playback Special Effects 25 Power Linked Operation 8 Priority 34 Program AE 40 Protecting Files 28 Q Quick Review 18 R R...

Reviews: