


VES-1012 Hardware Installation Guide
2-2
Hardware Installation
2.4.1 Attaching the Mounting Brackets to the VES-1012
Step 1.
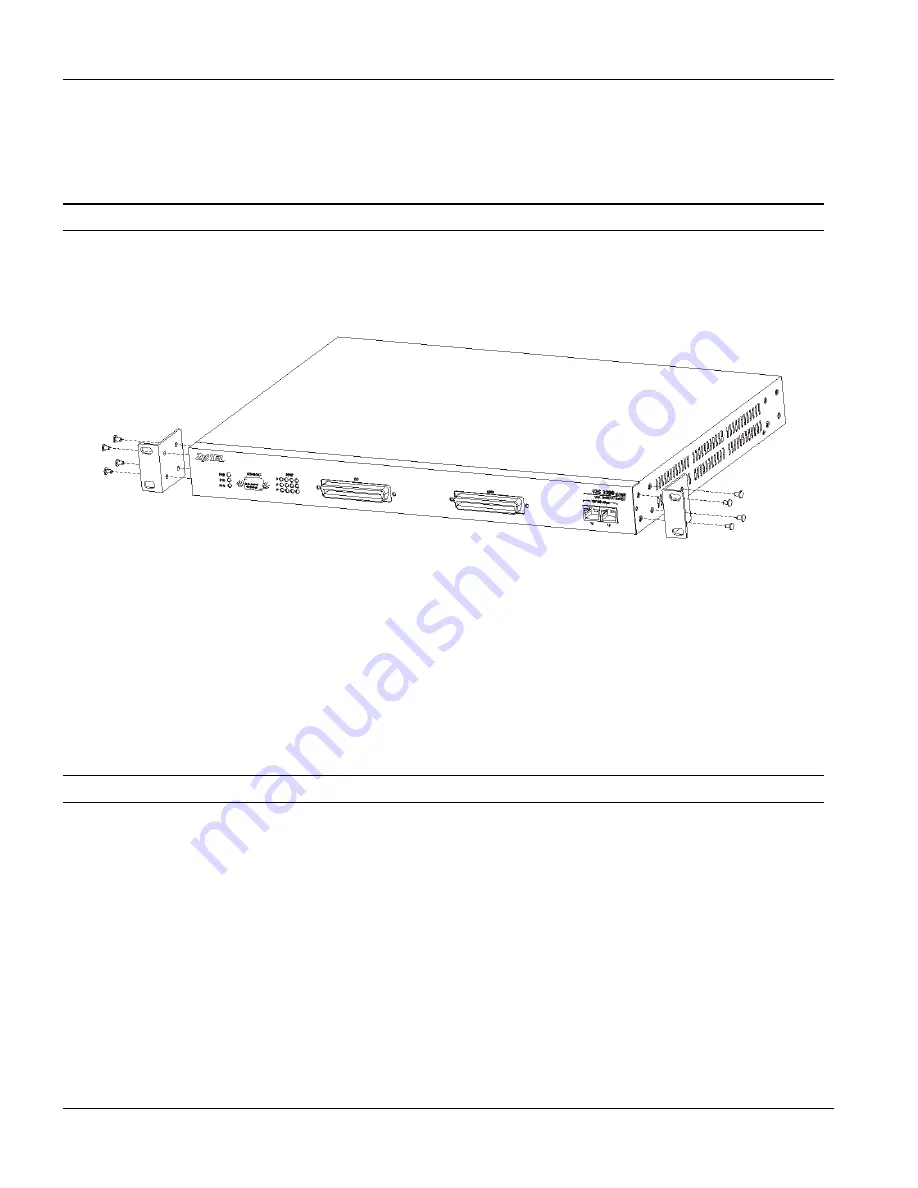
Position a mounting bracket on one side of the VES-1012, lining up the four screw holes on the bracket
with the screw holes on the side of the unit (see the figure shown next).
Failure to use the proper screws may damage the unit.
Step 2.
Using a #2 Philips screwdriver, install the M3 flat head screws that came with the brackets through the
mounting bracket holes into the VES-1012.
Step 3.
Repeat Step 1 and Step 2 to install the second mounting bracket on the other side of the unit.
Figure 2-1 Attaching the Mounting Brackets to the VES-1012
You may now mount the VES-1012 on a rack. Proceed to the next section.
2.4.2 Mounting the VES-1012 on a Rack
Step 1.
Position a mounting bracket (that is already attached to the VES-1012) on one side of the rack, lining up
the two screw holes on the bracket with the screw holes on the side of the rack (see the figure shown
next).
Failure to use the proper screws may damage the unit.
Summary of Contents for VES-1012 -
Page 1: ...VES 1012 VDSL Ethernet Switch January 2002 Version 3 30 Hardware Installation Guide...
Page 10: ......
Page 18: ......
Page 26: ......
Page 44: ......