


Chapter 8 WLAN
LTE3202-M430 User’s Guide
52
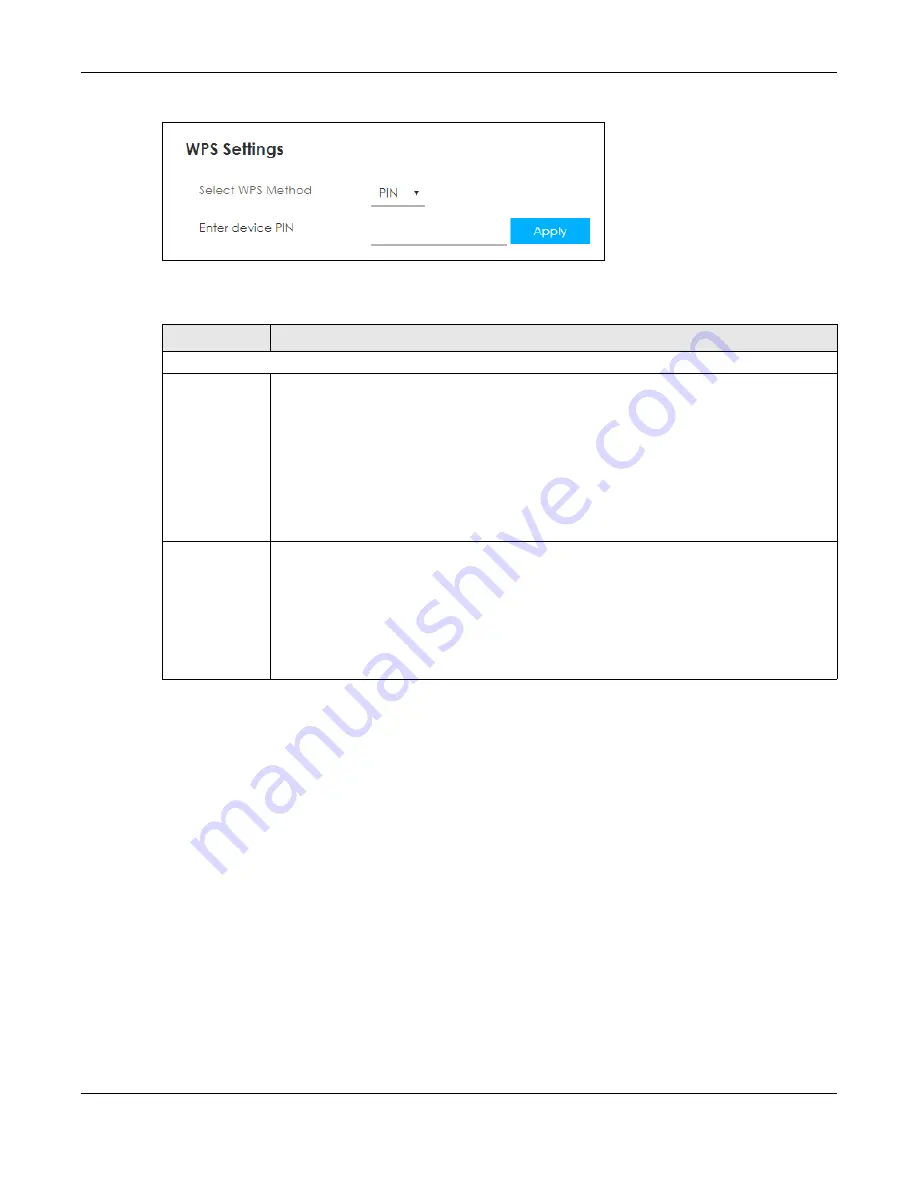
Figure 35
Configuration > WLAN > WPS: PIN Method
The following table describes the labels in this screen.
8.5 Technical Reference
This section discusses wireless LANs in depth.
8.5.1 Wireless Network Overview
Wireless networks consist of wireless clients, access points and bridges.
• A wireless client is a radio connected to a user’s computer.
• An access point is a radio with a wired connection to a network, which can connect with numerous
wireless clients and let them access the network.
• A bridge is a radio that relays communications between access points and wireless clients, extending
a network’s range.
Traditionally, a wireless network operates in one of two ways.
Table 23 Configuration > WLAN > WPS
LABEL
DESCRIPTION
WPS Settings
Select WPS
Method
• Select
PBC
to set up a WPS wireless network using Push Button Configuration (PBC).
If you select
PBC
, click
Activate
to add another WPS-enabled wireless device (within wireless
range of the LTE3202-M430) to your wireless network. You may either click
Activate
or press
physical button on the LTE3202-M430 rear panel.
Note: You must press the other wireless device’s WPS button within two minutes of
pressing this button.
• Select
PIN
to set up a WPS wireless network by entering the PIN of the client into the LTE3202-
M430.
Enter device
PIN
This field is available only when you set
Select WPS Method
to
PIN
.
Select this option and enter the PIN of the device that you are setting up a WPS connection with
and click
Apply
to authenticate and add the wireless device to your wireless network.
You can find the PIN either on the outside of the device, or by checking the device’s settings.
Note: You must also activate WPS on that device within two minutes to have it
present its PIN to the LTE3202-M430.
Summary of Contents for LTE3202-M430
Page 8: ...8 PART I User s Guide...
Page 21: ...21 PART II Technical Reference...