


User Manual
2.
Click on search.
3.
Your camera should show up on the list. Click on it.
4.
If the camera have DHCP ticked, go straight to Step 4.
5.
If DHCP is not ticked, Writer down the
IP address, Subnet Mask and Default Gateway, DNS.
and go
to Step 3
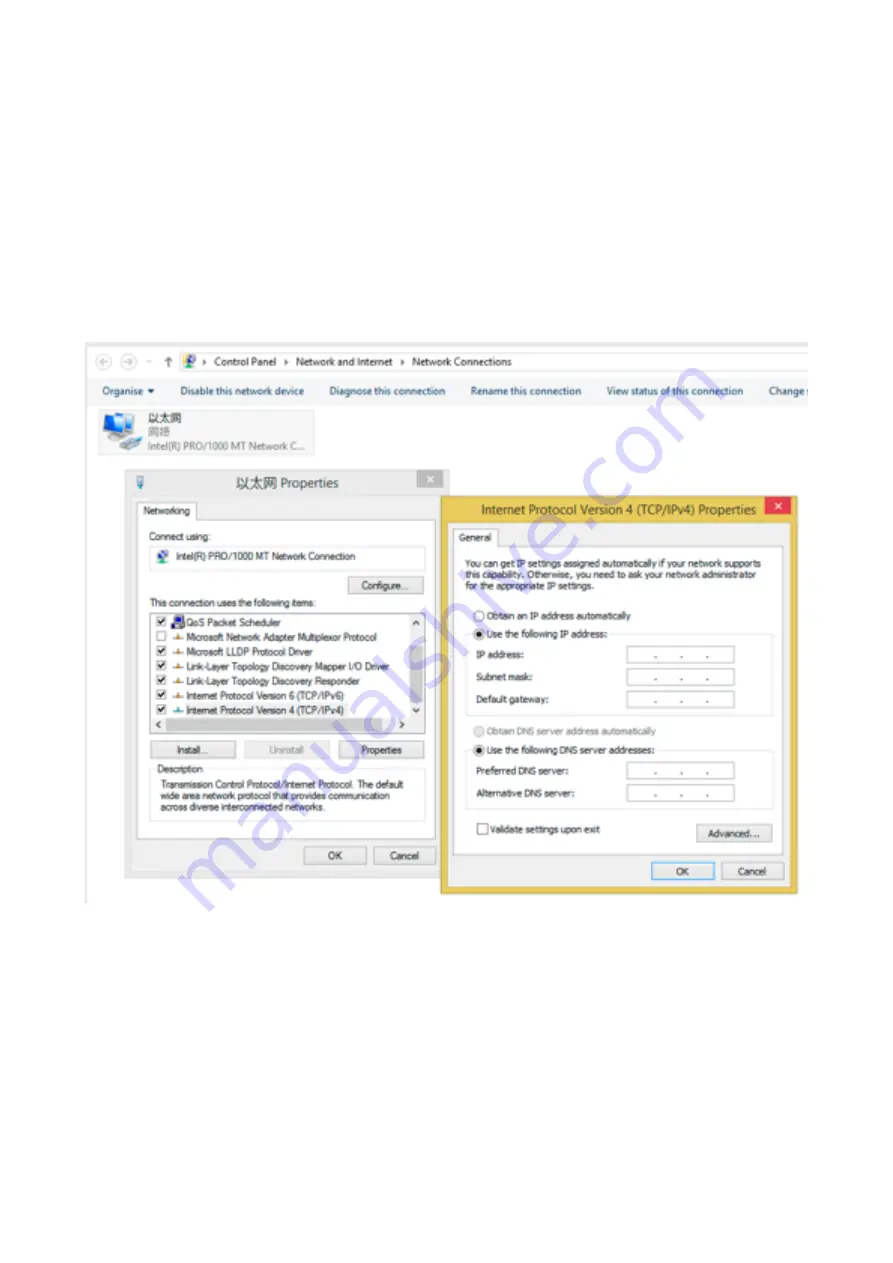
Step 3: Change Your Computer to the Same Network as Your Camera
1.
Now we need you to go to Control Panel > Network and Internet > Network Connections
2.
If your computer is connected by wireless or wired.
1.
If you computer is wireless, right click on the wireless connection and click on property.
2.
If your computer is wired. Right click on local Lan connection and click on property.
3.
A new window show come up, and a list should show up, click on Internet Protocol Version 4:
4.
Click on “Use the following IP address”, put in the same detail you find on Step 2,
Subnet Mask
and
Default Gateway
should be the same figure you find on Step 2, but
IP address
you need to change
the last digital to avoid conflict, for example, if your Step 2’s ip address is 192.168.1.168, you need to
change it to 192.168.1.200 or anything else).Click on the “Use the following DNS server address”.
Preferred DNS service you need to change it to be the same as default gateway. Alternative DNS server
just leave it blank.
5.
Click on OK and OK.
Step 4: Use the Search Tool to Modify the IP Address
1.
Use the search tool, click on search again.
2.
Click on the camera that comes on the search result.
3.
On the right hand side of the search tool, you need to amend the detail to match up with the result in
Step 1
Copyright: Domarsolutions Ltd
6


