background image

52

retrieved.

6.  The tablet will prompt you to move your photos, files and 

other data from the internal storage to the microSDXC card. 

Select 

Move now

 or 

Move later

 and tap 

NEXT

. Follow the on-

screen instructions to continue.

CAUTION: 

As part of the internal storage, the microSDXC 

card may have data on it that is necessary for some apps to 

function normally. Therefore, do not remove or replace the card 

randomly.

Moving data between the internal storage and the 

microSDXC card

With the microSDXC card as part of the internal storage, you 

can move your photos, files and other data between the internal 

storage and the card any time.

1.  From the home screen, tap 


> Settings > Storage

.

2. Tap 

Tablet

 in the Device storage section.

3.  Tap Migrate data.

4. Tap 

MOVE

.

NOTE:

 Whenever you move data between the internal storage 

and the microSDXC card, the destination is used to save new 

apps and personal data (such as photos and videos) and this 

CONNECTING TO NETWORKS AND DEVICES

Summary of Contents for AT&T PRIMETIME

Page 1: ...1 AT T PRIMETIME User Guide ...

Page 2: ...r written permission of ZTE Corporation The manual is published by ZTE Corporation We reserve the right to make modifications on print errors or update specifications without prior notice microSDXC is a trademark of SD 3C LLC The Bluetooth word mark and logos are registered trademarks owned by Bluetooth SIG Inc Manufactured under license from Dolby Laboratories Dolby Dolby Audio and the double D s...

Page 3: ...r the First Time 9 Locking Unlocking the Screen and Keys 10 Using the Touch Screen 11 Getting to Know Your Tablet 12 Key Functions 13 Getting to Know the Home Screen 14 Personalizing 16 Changing the System Language 16 Setting the Date and Time 16 Changing Ringtone and Notification Sound 17 Turning System Sounds On Off 17 Adjusting Volumes 17 Using Do Not Disturb Mode 18 Using the Weather Widget 19...

Page 4: ...24 Monitoring the Tablet Status 24 Managing Notifications 25 Managing Shortcuts and Widgets 28 Organizing With Folders 29 Rearranging the Primary Shortcuts 30 Entering Text 30 Editing Text 39 Opening and Switching Apps 40 Connecting to Networks and Devices 41 Connecting to Mobile Networks 41 Connecting to Wi Fi 42 Connecting to Bluetooth Devices 46 Connecting to Your Computer via USB 49 Using the ...

Page 5: ...acts 60 Using Options During a Call 60 Managing Multi party Calls 62 Adjusting Your Call Settings 63 Contacts 67 Checking Contact Details 67 Adding a New Contact 67 Setting Up Your Own Profile 68 Importing Exporting and Sharing Contacts 68 Working With Favorite Contacts 70 Working With Groups 70 Searching for a Contact 72 Editing Contacts 72 Accounts 74 Adding or Removing Accounts 74 ...

Page 6: ...leting an Email Account 79 Changing General Email Settings 79 Browser 80 Opening the Browser 80 Using Multiple Browser Tabs 80 Downloading Files 81 Changing Browser Settings 81 Camera 82 Capturing a Photo 82 Recording a Video 83 Using Manual Camera Mode 84 Using Other Camera Modes 85 Customizing Camera and Video Settings 85 Music 87 Copying Music Files to Your Phone 87 ...

Page 7: ...ng Videos 91 Managing Video Files 92 FM Radio 94 Scanning and Saving Channels 94 Listening to FM Radio 94 Editing a Saved Channel 95 Turning Off FM Radio 96 Sound Recorder 97 Recording a Voice Memo 97 Playing a Voice Memo 97 More Apps 98 Calculator 98 Clock 98 Downloads 99 File Manager 99 Google Apps 100 Settings 102 ...

Page 8: ...l Safety 115 FCC RF Exposure Information SAR 117 FCC Regulations 119 CTIA 120 Distraction 121 Product Handling 122 Electrical Safety 125 Radio Frequency Interference 125 Explosive Environments 128 Warranty 129 LIMITED WARRANTY 130 How to Get Warranty Service 131 Other Warranty Programs 131 Specifications 132 ...

Page 9: ... removing it see Connecting to Networks and Devices Using the microSDXC Card as Portable or Internal Storage WARNING To avoid damage to the tablet please only use a standard nano SIM card You can obtain a standard nano SIM card from your service provider 1 Open the nano SIM microSDXC card cover on the back of the tablet 2 Insert the nano SIM card into the nano SIM card slot or the microSDXC card n...

Page 10: ...ge the built in rechargeable battery in your device by yourself The battery can only be changed by ZTE or ZTE authorized service provider 1 Plug the USB Type C connector into the charging USB Type C jack on the left of your tablet 2 Connect the charger to a standard AC wall outlet If the tablet is on you ll see a charging icon such as or appear in the Status Bar 3 Disconnect the charger when the b...

Page 11: ...llites for your current location each query drains your battery Powering Your Tablet On Off Press and hold the Power Lock key to power on your tablet To turn it off press and hold the Power Lock key to open the options menu Tap Power off NOTE If the tablet freezes or takes too long to respond press and hold the Power Lock key for about 10 seconds to restart the tablet Setting Up Your Tablet for th...

Page 12: ...he keys press the Power Lock key NOTE To save battery power the tablet automatically turns off the screen after a certain period of time when you leave it idle You will still be able to receive notifications while the tablet screen is off Unlocking the Screen and Keys 1 Press the Power Lock key to turn the screen on 2 Press and hold a blank area of the screen NOTE If you have set an unlock pattern...

Page 13: ... vertically or horizontally across the screen Drag To drag press and hold your finger with some pressure before you start to move your finger While dragging do not release your finger until you have reached the target position Pinch In some apps such as Maps and Gallery you can zoom in and out by placing two fingers on the screen at once and pinching them together to zoom out or spreading them apa...

Page 14: ...et nano SIM microSDXC card cover Front camera Speaker Recent apps key Back key Home key Speaker Charging USB Type C jack Headset jack Proximity light sensor Power Lock key Volume key Quick Launch button Microphone Getting Started ...

Page 15: ...lication or screen Press to access TV Mode from the home screen Press and hold to access Google Search Back key Press to go to the previous screen Recent apps key Press to see recently used applications When in an app press and hold to split the screen Volume key Press or hold to turn the volume up or down Quick Launch button Press for quick access to TV Mode or any other selected app NOTE Not all...

Page 16: ...idgets and more Google search Widget Status and notification bar Shortcut Folder Primary shortcuts Extending the Home Screen The home screen extends beyond the screen width giving you a lot more space to add more shortcuts and widgets Simply swipe your finger on the screen to see the extended home screen panels You can add or remove home screen panels or adjust the order Getting Started ...

Page 17: ...e 2 Slide the home screen thumbnails left or right Tap on the top right corner of a thumbnail 3 Tap OK The items on the panel will also be removed NOTE Your tablet cannot have less than two home screens Adjusting the Order of a Home Screen Panel 1 Press and hold an empty area of the home screen and then tap Home 2 Slide left or right to view the home screen thumbnails 3 Press and hold a thumbnail ...

Page 18: ... Date time 2 Set the date time time zone and date time format To adjust the date and time automatically tap to toggle on Automatic date time To adjust the date and time manually tap to toggle off Automatic date time and tap Set date Set time to change the date and time To adjust the time zone automatically tap to toggle on Automatic time zone To adjust the time zone manually tap to toggle off Auto...

Page 19: ...e home screen tap Settings Sound Other sounds 2 Tap Screen locking sounds Charging sounds Touch sounds Vibrate on tap or Power up tone to toggle on and off Adjusting Volumes 1 From the home screen tap Settings Sound 2 Drag the sliders below Media volume Alarm volume Ring volume and Notification volume to adjust the volume for each type of audio NOTE You can adjust the media volume when a media app...

Page 20: ... 3 Set the detailed settings If you have selected Scheduled tap Days Start time and End time to specify the time periods during which Do not disturb mode is on Tap Disturb rules to choose whether you d like to allow certain notifications or not u Priority only Only notifications you have marked as priority are allowed u Alarms only Only alarms are allowed u Total silence No notifications are allow...

Page 21: ...irst power on your tablet after you purchase it or after performing a factory reset the weather widget will not automatically update if Use Google s location service to help apps and Improve location accuracy are turned off during set up Adding Cities 1 From the home screen tap the weather widget Manage city 2 Tap and enter the city name or tap an option from the Top cities list 3 Tap the city you...

Page 22: ... New Wallpapers You can set the wallpaper for the home screen and lock screen 1 Press and hold any blank area of a home screen 2 Tap Wallpapers 3 Tap Lock screen or Home screen 4 Swipe left or right on the wallpaper panel to select a wallpaper or tap PHOTOS or LIVE WALLPAPER to choose the image or animation you want to use as the wallpaper NOTE In addition from the home screen you can tap Settings...

Page 23: ...e screen 2 Tap Themes 3 Select the theme you like Setting the Home Screen Transition Effect 1 Press and hold any blank area of a home screen 2 Tap Home 3 Tap an effect and the tablet will demonstrate how it works Tap other effects until you find your favorite one Protecting Your Tablet With Screen Locks You can protect your tablet by creating a screen lock When enabled you need to swipe up on the ...

Page 24: ... to unlock the screen Tap PIN or Password to set a numeric PIN or a password that you must enter to unlock the screen 3 For Pattern PIN or Password lock select either Require pattern PIN password to start device or No thanks NOTE When this feature is enabled your tablet cannot receive calls messages or notifications including alarms until it starts up 4 For Pattern PIN or Password lock select how ...

Page 25: ...ore unpinning the screen switch on Ask for unlock pattern PIN password before unpinning Pinning a Screen 1 Ensure that screen pinning is turned on 2 Open the app you want to keep in view 3 Tap the Recent apps key 4 If there are many app tabs swipe up to find on the front most tab 5 Tap GOT IT Unpinning the Screen To unpin the screen and return to normal use press and hold the Back key If you have ...

Page 26: ...the right side Below are some of the icons you may see 4G LTE connected Battery less than 20 Airplane mode Vibration mode No signal Battery full Signal strength Battery charging No micro SIM card installed Bluetooth on Alarm set Connected to a Wi Fi network Silent mode Wi Fi in use Battery less than 15 GPS on Knowing the Basics ...

Page 27: ...nnected Sending data Song is playing Wired headset connected Opening Closing the Notification Panel Notifications report the arrival of new messages calendar events and alarms as well as ongoing events You can open the Notification Panel to view the details of notifications To open the Notification Panel swipe your finger down from the top of the screen To close the Notification Panel swipe your f...

Page 28: ...ave received press and hold a notification You can then tap Show notifications silently DONE to hide future notifications from this app or tap MORE SETTINGS to configure other notification options for this app NOTE If you turn off notifications for an app you may miss its important alerts and updates The notifications of some apps cannot be turned off Using Quick Settings The Quick Settings in the...

Page 29: ...Tap to turn on or off the airplane mode Data Tap to enable or disable data access over the mobile network Press and hold to get to the settings screen Auto rotate Portrait Tap to turn on or off the auto rotate screen feature Battery Saver Tap to turn on or off the battery saver Press and hold to get to the settings screen Do not disturb Priority only Alarms only Total silence Tap to access the Do ...

Page 30: ...he Accessibility menu NOTE In the Quick Settings screen tap at the top to get to the Settings menu tap to switch between owner and guests tap to change control switch position Managing Shortcuts and Widgets Adding Shortcuts and Widgets 1 From the home screen tap to view apps 2 Or to view widgets press and hold an empty area of the home screen and select Widgets 3 Swipe to browse the available apps...

Page 31: ...ld a widget on the home screen and then release it 2 An outline appears around the widget Drag the outline to resize the widget NOTE Not all widgets can be resized Organizing With Folders You can create folders on the home screen and add several shortcuts to a folder You can move or remove folders the same way as moving or removing shortcuts 1 Press and hold an icon on a home screen until appears ...

Page 32: ...s or folders in or out of the area to rearrange the area Entering Text You can enter text using the on screen keyboard Some apps open it automatically In others you open it by tapping where you want to type You can press the Back key to hide the on screen keyboard You can also enter text by speaking with the Google voice typing feature Changing Input Methods 1 When you use the on screen keyboard t...

Page 33: ...ers For example to enter È press and hold and the available accented letters and number 3 appear Then slide to choose È Tap to use uppercase Double tap to lock uppercase This key also changes to indicate the current case you are using for lowercase for uppercase and when locked in uppercase Tap to delete the text before the cursor Tap to select numbers and symbols You can then tap to find more Tap...

Page 34: ...ap Gesture typing Enable gesture typing if this feature is turned off 3 On the Google keyboard slide your finger from letter to letter to trace a word without lifting your finger until you reach the end of the word End of the word Start of the word NOTES Tap to type when you want to If you want to enter a single letter simply tap the key once Lift your finger at the end of the word A space is adde...

Page 35: ... methods 2 When you see the microphone image speak what you want to type 3 You can continue entering text to keep it or to delete it TIP Say comma period question mark exclamation mark or exclamation point to enter punctuation TouchPal Keyboard TouchPal Keyboard offers three layouts FULL PHONEPAD and T You can tap to select a layout or an input language You can also use Curve and Wave to speed up ...

Page 36: ...percase This key also changes to indicate the current case you are using for lowercase for uppercase and when locked in uppercase Word prediction Press and hold or and tap the prediction switch to turn on or off prediction Pre defined texts Tap to enter digits symbols and other pre defined texts You can tap the arrow keys to turn pages or tap to go back to the alphabetic keys Slide up on the space...

Page 37: ...ce input edit text change keyboard themes and more The PHONEPAD Layout The layout in this mode is similar to a phonepad Tap an alphabetic key repeatedly until the desired letter appears You can also press and hold the key and slide left or right to choose the letter or number you need If word prediction is enabled just tap the keys once and choose the right word Knowing the Basics ...

Page 38: ...ft or right to choose more letters and symbols If word prediction is enabled just tap the keys and choose the right word Curve Word Gesture Curve allows you to enter text by moving your finger on the screen from letter to letter to enter each word To enable and use Curve 1 On the TouchPal keyboard tap Settings Smart input and check Curve Word gesture Knowing the Basics ...

Page 39: ... you reach the end of the word Start of the word End of the word NOTES Curve is only available in the Full layout Tap when you want to If you want to enter a single letter go ahead and tap Lift your finger at the end of the word A space is added automatically when you begin to trace the next word Wave Sentence Gesture Wave allows you to enter words by dragging candidate words to the space key Know...

Page 40: ...Full layout 3 Tap or use Curve to enter the first word As the first word appears on the text field candidate words appear on the keyboard for you to choose from as the following word 4 Drag the correct candidate word to the space key to add the word to the text field If no candidate word is correct you can go on enter the words normally NOTE Wave is only available in the Full layout Knowing the Ba...

Page 41: ...d or double tap within the text The nearest word highlights with a tab at each end of the selection Drag the tabs to change the selection Cut or copy Select the text you want to manipulate Then tap CUT or COPY Replace text with the clipboard text Select the text you want to replace Then tap PASTE Share text Select the text you want to share tap SHARE and select a method Knowing the Basics ...

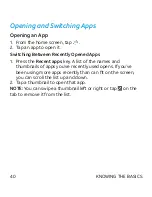
Page 42: ...ess the Recent apps key A list of the names and thumbnails of apps you ve recently used opens If you ve been using more apps recently than can fit on the screen you can scroll the list up and down 2 Tap a thumbnail to open that app NOTE You can swipe a thumbnail left or right or tap on the tab to remove it from the list Knowing the Basics ...

Page 43: ...ks International Data Roaming 2 Slide the Mobile Data switch to enable or disable roaming NOTE Data roaming may incur significant roaming charges Select Preferred Network Type 1 From the home screen tap Settings Mobile networks Preferred network type Setting Access Point Names You can use the default Access Point Names APNs to connect to the Internet To add a new APN you may need to contact your s...

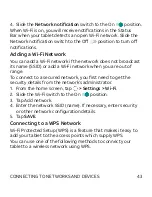
Page 44: ...g on the Wi Fi router and your surroundings Turning Wi Fi On and Connecting to a Wi Fi Network 1 From the home screen tap Settings Wi Fi 2 Slide the Wi Fi switch to the On position to turn on Wi Fi 3 Tap a network name to connect to it 4 If the network is secured enter the password and tap CONNECT NOTE Your tablet automatically connects to previously used Wi Fi networks when they are in range Gett...

Page 45: ...f range To connect to a secured network you first need to get the security details from the network s administrator 1 From the home screen tap Settings Wi Fi 2 Slide the Wi Fi switch to the On position 3 Tap Add network 4 Enter the network SSID name If necessary enter security or other network configuration details 5 Tap SAVE Connecting to a WPS Network Wi Fi Protected Setup WPS is a feature that ...

Page 46: ... into the access point s setup page After entering the PIN your tablet automatically finds the access point and configures the connection NOTE For detailed information about the WPS feature of the access point please refer to its documentation Forgetting a Wi Fi Network You can make your tablet forget the details of a Wi Fi network that you added for example if you don t want the tablet to connect...

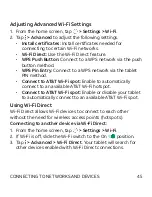
Page 47: ... Fi spot Enable to automatically connect to an available AT T Wi Fi hotspot Connect to AT T Wi Fi spot Enable or disable your tablet to automatically connect to an available AT T Wi Fi spot Using Wi Fi Direct Wi Fi Direct allows Wi Fi devices to connect to each other without the need for wireless access points hotspots Connecting to another device via Wi Fi Direct 1 From the home screen tap Settin...

Page 48: ...data type 3 Tap a device the tablet has connected with Connecting to Bluetooth Devices Bluetooth is a short range wireless communication technology Tablets or other devices with Bluetooth capabilities can exchange information wirelessly within a distance of about 32 feet 10 meters The Bluetooth devices must be paired before the communication is performed and you can stream to two Bluetooth devices...

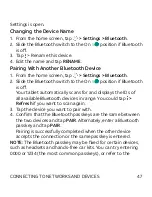
Page 49: ... displays the IDs of all available Bluetooth devices in range You could tap Refresh if you want to scan again 3 Tap the device you want to pair with 4 Confirm that the Bluetooth passkeys are the same between the two devices and tap PAIR Alternately enter a Bluetooth passkey and tap PAIR Pairing is successfully completed when the other device accepts the connection or the same passkey is entered NO...

Page 50: ...ropriate application and select the file or item you want to share 2 Select the option for sharing via Bluetooth The method may vary by application and data type 3 Tap a Bluetooth device the tablet has paired with or wait for search to discover new devices and tap one of them Receiving Data via Bluetooth 1 Turn Bluetooth on before trying to receive data via Bluetooth NOTE If the tablet has not bee...

Page 51: ...se files in internal storage or on a removable microSDXC card Connecting Your Tablet to a Computer via USB 1 Connect your tablet to the PC with a USB cable 2 Choose one of the following options Charge only Charge your tablet via USB Install driver Select this option when features are enabled for the first time or when they re unavailable Media device MTP Transfer media files on Windows or Mac NOTE...

Page 52: ...hen you re finished Using the microSDXC Card as Portable or Internal Storage You can use your microSDXC card as portable storage for photos media and other files so that you don t lose them or you can format the card for use as internal storage Setting Up the microSDXC Card as Portable Storage When you install a microSDXC card that has not been used on your tablet before the tablet will mount the ...

Page 53: ...ASE FORMAT CAUTION The formatting procedure erases all the data on the microSDXC card after which the files CANNOT be retrieved Setting Up the microSDXC Card as Internal Storage If your microSDXC card is new or doesn t have content you want to keep you can format the card and use it as part of the internal storage If you move the microSDXC card to another device it must be formatted before it can ...

Page 54: ...ve or replace the card randomly Moving data between the internal storage and the microSDXC card With the microSDXC card as part of the internal storage you can move your photos files and other data between the internal storage and the card any time 1 From the home screen tap Settings Storage 2 Tap Tablet in the Device storage section 3 Tap Migrate data 4 Tap MOVE NOTE Whenever you move data betwee...

Page 55: ...the microSDXC card after which files CANNOT be retrieved Connecting to Virtual Private Networks Virtual private networks VPNs allow you to connect to the resources inside a secured local network VPNs are commonly deployed by corporations schools and other institutions to let people access local network resources when not on campus or when connected to a wireless network Depending on the type of VP...

Page 56: ...VE The VPN is added to the list on the VPN screen Connecting to a VPN 1 From the home screen tap Settings More VPN 2 Tap the VPN that you want to connect to 3 When prompted enter any requested credentials and then tap CONNECT Modifying a VPN 1 From the home screen tap Settings More VPN 2 Tap beside the VPN that you want to modify 3 Tap a field to edit the information 4 Tap SAVE Connecting to Netwo...

Page 57: ...ve TV Mode and tap 4 Tap 5 If you are prompted log in to your account Turning TV Mode On Off 1 From the home screen tap Settings TV mode 2 Tap to enable or disable it NOTE You can also open the Notification Panel and tap TV MODE to turn on or off Starting TV Mode You can use one of the following methods to launch the TV Mode Swipe right from the home screen Press and hold from the lock screen Pres...

Page 58: ...also download your favorite video apps from the Play Store And then switch between different apps 1 Swipe down with two fingers from the top of the screen and tap TV Mode 2 Tap the video app you need or 1 From the home screen tap Settings TV mode 2 Tap Other available apps and select the video app you need ...

Page 59: ...th the on screen keypad Tap to delete incorrect digits 4 Tap below the keypad to dial You can also tap at the top of the Phone app screen and enter the phone number or contact name you want to call Tap the matching contact or number to place the call NOTES To make an international call press and hold the 0 Key to enter the plus symbol Next enter the country code followed by the city area code and ...

Page 60: ...ive video calls See Phone Calls Adjusting Your Call Settings Turning Video Call On or Off Placing a Video Call 1 From the home screen tap 2 Enter the phone number with the on screen keypad Tap to delete incorrect digits 3 Tap to place the call End a Call During a call tap on the screen Answering or Rejecting Calls When you receive a phone call the Incoming Call screen opens displaying the Caller I...

Page 61: ...r tap to answer the video call Rejecting a Call When you receive a voice or video call tap to reject the call Working With the Call Log The call history is a list of all the calls you ve placed received or missed It provides a convenient way to redial a number return a call or add a number to your Contacts To open the call history tap the Home key Placing a Call From the Call History 1 Open the ca...

Page 62: ...ew contact tap Create contact Delete Call History 1 Open the call history 2 Press and hold a number in the call log 3 Tap Delete all calls from this number Calling Your Contacts 1 From the home screen tap to display your contacts 2 Tap a contact and then tap or beside a contact to make a call Using Options During a Call During a call you will see a number of on screen options Tap an option to sele...

Page 63: ...r off Tap to show your image Tap to add video to this call Tap to end the current call Video call Tap to make another call separately from the first call which is put on hold Tap to end the current call Tap to hide show your image or switch to voice call Tap to hold the current call Tap to mute or unmute your microphone Tap to switch between front and back camera WARNING Because of higher volume l...

Page 64: ...rent Calls When you re on a call your tablet screen informs you that another call is coming in and displays the caller ID To respond to an incoming call while you re on a voice call Tap to answer the call This puts the first caller on hold and answers the second call Tap to answer the call This ends the first call and answers the second call Tap to answer the voice call as voice call Tap to reject...

Page 65: ...ople you called hangs up during your call you and the remaining caller stay connected If you initiated the call and are the first to hang up all callers are disconnected To end the conference call tap Adjusting Your Call Settings Setting Your Device Name You can edit device name displayed in the My Device menu 1 From the home screen tap My Devices 2 Tap and edit the device name 3 Tap Save Changing...

Page 66: ...er your number is displayed when someone receives your outgoing call 1 From the home screen tap Caller ID 2 Tap an available option Network Default Hide Number Show Number Forwarding Incoming Calls Call forwarding feature allows you to forward your incoming calls to another phone number Enabling forwarding incoming calls 1 From the home screen tap Call Forwarding 2 Tap an available option Always f...

Page 67: ... Personalizing Adjusting Volumes set Do not disturb options see Personalizing Using Do Not Disturb Mode set up ringtone and notification sound see Personalizing Changing Ringtone and Notification Sound select system sounds see Personalizing Turning System Sounds On Off Setting Call Waiting This option allows you to get notified of incoming calls during a call 1 From the home screen tap 2 Tap the C...

Page 68: ...anging the NumberSync Settings 1 From the home screen tap NumberSync Setting 2 In the Accounts section tap the account category and then the account Make the changes and tap the Back key when you re finished Checking NumberSync Information You can check the NumberSync important information 1 From the home screen tap About NumberSync 2 Swipe up or down to check the information Phone Calls ...

Page 69: ...ew all your contacts 3 Tap a contact to view its details NOTE If you have a lot of contacts stored you ll see a slider on the right side of the screen Drag the slider to the letter initial you need Adding a New Contact 1 From the home screen tap Contacts CONTACTS 2 Tap to add a new contact 3 Enter the contact name phone numbers and email addresses Tap More Fields to enter other information If you ...

Page 70: ...d Sharing Contacts You can import export contacts from to your nano SIM or microSDXC card This is especially useful when you need to transfer contacts between different devices You can also quickly share contacts using Bluetooth Save to Drive Email Gmail or Wi Fi Direct Importing Contacts From the nano SIM Card 1 From the home screen tap Contacts CONTACTS 2 Tap Import Export Import from SIM card 3...

Page 71: ... SIM Card 1 From the home screen tap Contacts CONTACTS 2 Tap Import Export Export to SIM card 3 Tap the contacts you want to export and then tap Exporting Contacts to the microSDXC Card or Tablet Storage 1 From the home screen tap Contacts CONTACTS 2 Tap Import Export Export to storage 3 The tablet will prompt you with the name of the vCard file Tap OK to create the file Sharing Contacts 1 From th...

Page 72: ...vorites 1 From the home screen tap Contacts CONTACTS 2 Tap a contact and then tap at the top of the screen Removing a Contact From Favorites 1 From the home screen tap Contacts FAVORITES 2 Tap a favorite contact and then tap Working With Groups Viewing Your Contact Groups 1 From the home screen tap Contacts GROUPS 2 Scroll through the list to view the preset groups and any groups you have created ...

Page 73: ...acts you wish to be the group members 6 Tap 7 Tap to save the group Deleting a Group 1 From the home screen tap Contacts GROUPS 2 Tap a group and then tap Delete group 3 Tap OK Editing a Group 1 From the home screen tap Contacts GROUPS 2 Tap a group Edit group 3 Tap the group name to edit it or tap the field below MEMBER to add more members NOTE To remove group members tap a group and then tap Mul...

Page 74: ...NTACTS 2 Tap a contact and then tap 3 Edit the contact and tap Deleting Several Contacts 1 From the home screen tap Contacts CONTACTS 2 Tap Multi Select 3 Tap to select the contacts you want to remove and then tap 4 Tap OK to confirm Linking Contacts As your tablet synchronizes with multiple online accounts you may see duplicate entries for the same contact You can merge all the separate informati...

Page 75: ...he first and the second contact is no longer displayed in the CONTACTS list You can repeat these steps to join another contact to the main contact Unlinking Contact Information If contact information from different sources was joined in error you can separate the information back into individual contacts on your tablet 1 From the home screen tap Contacts CONTACTS 2 Tap a contact you want to separa...

Page 76: ...count Most accounts require a user name and password but the details may vary You may also need to obtain some information from IT support or your system administrator When the account is successfully added it is displayed in the Accounts section in the Settings menu Removing an Account Removing an account will delete it and all information associated with it from your tablet such as emails and co...

Page 77: ...anges you make to information on your tablet or on the web are automatically synced with each other When automatic sync is turned off you need to sync manually to collect emails updates or other recent information Syncing Manually 1 From the home screen tap Settings Accounts 2 In the Accounts section tap the account category and then the account you want to sync 3 Tap Sync now Or tap the types of ...

Page 78: ... settings screen appears showing a list of information the account can sync 3 When auto sync is enabled check or uncheck items as you need Checked types of information on the tablet and the web will be kept in sync when auto sync is turned on When auto sync is disabled tap an item in the list to sync that type of information between the tablet and the web Accounts ...

Page 79: ...anually by tapping Manual setup or if automatic setup fails 3 Follow the on screen instructions to finish setup Your tablet will show the inbox of the email account and start to download email messages Writing and Sending an Email 1 Open your email Inbox and tap NOTE If you have more than one email account added on the tablet tap the sender line to select the account you want to use for sending th...

Page 80: ... You can also manually check for new emails by dragging down on the message list Responding to an Email You can reply to or forward a message that you receive You can also delete messages and manage them in other ways Replying to or Forwarding an Email 1 Open the email you want to reply to or forward from the Inbox 2 Choose one of the following u To reply to the sender tap u To reply to the sender...

Page 81: ...older You can also delete a batch of emails While reading a message tap While in a message list for instance the Inbox tap the sender image before the message and then tap Deleting an Email Account 1 Open Email app 2 Tap Settings and tap the account you want to remove 3 Tap Remove account from this device OK to confirm All email messages in the account will be deleted Changing General Email Settin...

Page 82: ...mple in an email or a text message 1 From the home screen tap 2 Tap the address box at the top of the web page 3 Enter the address URL of a web page Or enter terms you want to search for 4 Tap a URL or search suggestion or tap on the keyboard to open the web page or search results You can also tap to search by voice Using Multiple Browser Tabs You can open several web pages at the same time one pa...

Page 83: ...les Press and hold an image or a link to a file or to another web page In the menu that opens tap Save link or Save image The downloaded files are saved to your tablet or the memory card You can view or open them in the Downloads app Changing Browser Settings You can configure a number of Browser settings to customize the way you browse the web including several that you can use to control your pr...

Page 84: ...o the tablet s internal storage Capturing a Photo 1 From the home screen tap 2 Aim the camera at the subject and make any necessary adjustments AUTO camera mode is used by default 3 Tap the area on the screen where you want the camera to focus or let the camera autofocus on the center of the image 4 Tap Camera ...

Page 85: ...elect CREATIVE to use panorama HDR special effect smile detection or interval capture modes only available for the rear facing camera 7 Start video recording NOTE You can pinch or spread your fingers on the screen or press the Volume key to zoom in or zoom out before taking a picture Recording a Video 1 From the home screen tap 2 Aim the camera at the subject and make any necessary adjustments You...

Page 86: ...just more camera options for your photo such as ISO white balance exposure etc 1 From the home screen tap 2 Tap MANUAL 3 Aim the camera at the subject and you can make the following adjustments Drag the white circle to any area on the screen that you want to focus on Drag the green square to any area on the screen where you want the camera to meter exposure so as to adjust the photo brightness Tap...

Page 87: ...y warm cool sepia fisheye or other special effects to the photo HDR Turn on the HDR feature PANORAMA Capture panorama pictures SMILE Capture pictures automatically when a smile is detected INTERVAL Capture pictures according to the time interval you choose 0 to 60 seconds Customizing Camera and Video Settings Before capturing a photo or video you can tap to open the following camera setting option...

Page 88: ...EO Video quality Set the quality for your video Time lapse Set the time interval between each frame when recording videos using the rear facing camera Focus lock when recording Select whether to lock the focus point on the center of the screen when recording videos using the rear facing camera Geo tagging Select whether to store the GPS location in your captured videos Storage location Tap Save lo...

Page 89: ... computer with a USB cable 2 Tap Media device MTP or USB mass storage as the connection mode See Connecting to Networks and Devices Connecting to Your Computer via USB Connect Your Tablet to a Computer via USB 3 Copy the music file from the PC and paste it to the tablet storage or microSDHC card Download From the Internet You can download music files when browsing web pages See Browser Downloading...

Page 90: ...favorites Tap Playlists to view all music playlists you have created Tap Artists Albums to browse music files on your tablet organized by the artist or album name Tap Folders to find music files through the folders they are stored in NOTES If an audio file is being played its name and player controls are displayed at the bottom of the screen Tap the area to open the playback screen Playing Music T...

Page 91: ...g album and artist information 2 Tap to return to the music library 3 Album artwork if available Slide left right to switch to the next previous song in the playlist 4 Check the track information 5 Turn shuffle on or off Music ...

Page 92: ...reate playlists to organize your music files into sets of songs so that you can play the songs you like in the order you prefer Tap next to a song and select Add to playlist to add it to a playlist or create a new playlist Tap next to a playlist in the Playlists screen of the music library and select Rename or Delete to rename or delete the playlist Tap a playlist to view its content You can tap R...

Page 93: ...deo library Swipe up or down to find the video you want You can also tap to search for video files or tap View by or Sort by to change the display mode or sort the list Playing and Controlling Videos Tap a video in the video library to play it Tap the screen to show the playback controls You can control the video and audio or carry out other operations Video Player ...

Page 94: ...enshot 7 Hide video playback controls and lock the tap screen 8 Share trim or delete the video or configure player settings 9 Open the Dolby Audio app and customize sound options NOTES Slide horizontally on the video to rewind or fast forward Slide vertically on the right or left part of the screen to adjust volume or brightness respectively Managing Video Files Deleting Videos 1 In the video libr...

Page 95: ...ew video name and tap OK Trimming a Video 1 Tap a video to start playing it 2 Tap Trim 3 Drag the two tabs on the progress bar to select the portion you want to keep You can tap to preview the selected portion 4 Once the preview ends tap The trimmed video is saved as a new video file Viewing Details of a Video 1 Tap next to a video you want to view the details of 2 Tap Details 3 Check the file tit...

Page 96: ... the home screen tap FM Radio 2 Tap Scan OK Your tablet scans for all available channels and saves them to the All channels list NOTE When you open the FM Radio app for the first time it will automatically scan for channels and show the All channels list You can also tap All channels to view the list Listening to FM Radio 1 From the home screen tap FM Radio while the headset is connected 2 Tap All...

Page 97: ...channels have been added to the favorites list slide up to view all favorite channels You can save up to 16 channels to favorites Tap to listen to FM Radio through the tablet speaker Editing a Saved Channel 1 Open the FM Radio app and tap All channels to display the list of saved channels 2 Press and hold a channel and select Rename or Delete or tap the star to the right of a channel to add it to ...

Page 98: ...ain screen tap Sleep Timer and select the time you want to turn off the radio A countdown clock will appear and the radio will be turned off when the clock reaches 0 00 Turning Off Immediately From the FM Radio main screen tap the switch at the top of the screen FM Radio ...

Page 99: ...rding Tap to pause and to continue recording 4 Tap to stop recording The memo is automatically saved Playing a Voice Memo Playing a Memo You Just Recorded Tap at the bottom of the screen Playing any Saved Memo 1 Tap at the top right of the screen to see all recordings 2 Tap the title of a memo to play it NOTE You can also tap to delete share rename tag trim check file information or set it as your...

Page 100: ...ers Setting a New Alarm 1 Open the Clock app and tap 2 Tap a default alarm to configure it or tap at the bottom of the screen to create a new alarm 3 Set up the alarm options such as time alarm days snooze alarm ringtone and label 4 Tap Save to save and exit NOTES To enable or disable existing alarms directly tap On or Off on the right side of each alarm Tap to configure alarm settings including r...

Page 101: ...e files you have downloaded using apps such as Email From the home screen tap Downloads Tap a file to open it with the appropriate application Press and hold a file to delete or share it File Manager Quickly access all of your images videos audio clips and other files on your internal storage and the microSDXC card From the home screen tap File Manager You can find the file you need by category in...

Page 102: ...r deletion sharing copying moving or compression Tap Exit to exit the File Manager app Google Apps Open the Google apps to use Google services Some apps are put in the Google folder on the home screen NOTE Some content or Google services may not be available in your region Chrome Use the Chrome app to browse the Internet and get your bookmarks browsing history and more synced with your Google acco...

Page 103: ...Manage photos on the tablet and on your Google account Play Movies TV Purchase download and watch the latest and your favorite movies and TV shows Play Music Play music on the tablet and on your Google account Play Store Buy and download apps games and other content from the Google Play Store Sheets Create edit and collaborate with others on spreadsheets from your tablet Slides Create edit and col...

Page 104: ...en Wi Fi is on tap Advanced Wi Fi Direct in the Wi Fi menu to share data between two devices via Wi Fi directly see Connecting to Networks and Devices Connecting to Wi Fi Using Wi Fi Direct Bluetooth Turn Bluetooth on or off and configure your Bluetooth connections see Connecting to Networks and Devices Connecting to Bluetooth Devices Mobile networks Control mobile data use and data roaming see Co...

Page 105: ...pots Data usage on recognized mobile hotspots will be restricted to avoid high mobile data bills Airplane mode In the Settings app tap More Airplane mode to turn Airplane mode on or off When Airplane mode is on Wi Fi and cellular connections are turned off VPN In the Settings app tap More VPN to set up and connect to virtual private networks see Connecting to Networks and Devices Connecting to Vir...

Page 106: ...he brightness of the display Adaptive brightness Automatically adjust screen brightness Night Light Night Light tints your screen amber This makes it easier to look at your screen or read in dim light and may help you fall asleep more easily Wallpaper Select a background image for the home screen and the lock screen Lock screen and settings Set the shortcut on the lock screen Sleep Set the length ...

Page 107: ...f notifications Tap an app to control its notifications You may turn off its notifications allow it to sound in Do not disturb mode allow it display notifications as a pop up for quick view or hide content in lock screen The available options are dependent on the app NOTE The notifications of some apps cannot be turned off Content hiding is only available if you have set a pattern a PIN or a passw...

Page 108: ...the time cycle you set and restrict background data for the app Permissions Check or change the app permissions Notifications Manage the app notifications in the notification panel and the lock screen You can set the priority sensitivity and more Open by default Check the app s supported links and set whether to open the links in the app and clear the app s defaults Battery Check the battery use d...

Page 109: ...ernal SD card is accessible from your computer SanDisk SD card The external SD card storage options let you view the microSDXC card s size and available space unmount the card for safe removal from the tablet and format erase the card see Connecting to Networks and Devices Connecting to Your Computer via USB Using the microSDXC Card as Portable or Internal Storage Battery View remaining battery po...

Page 110: ...unts of your tablet You can share your tablet with other people by creating additional user accounts Each user with a separate account has his her own storage space wallpaper screen lock and so on Users can also adjust device settings like Wi Fi that affect everyone and update apps for all other users By default a Guest account is available for anyone who needs to use your tablet temporarily You c...

Page 111: ...curacy Get accurate location using GPS Wi Fi Bluetooth or mobile networks Battery saving Use Wi Fi Bluetooth or mobile networks to get your approximate location This will drain less power from your battery than using GPS in High accuracy mode Device only Use GPS to pinpoint your location Security Screen lock Lock the screen with long press pattern PIN or password see Personalizing Protecting Your ...

Page 112: ...ter the wrong SIM PIN more times than allowed your nano SIM card will be locked and you cannot access the mobile network Contact your operator for a PIN Unlock Key PUK to restore the nano SIM card Make passwords visible Display passwords as you enter them Device administrators View or deactivate apps you have authorized to be device administrators Unknown sources Permit installation of apps from s...

Page 113: ...cting Your Tablet With Screen Pinning Apps with usage access Turn on or off some apps access to your tablet usage information Accounts Manage your accounts and synchronization Tap Accounts to sign in to or create accounts on your tablet Tap an account type to see that type of accounts you have added and adjust the account s settings Google Manage settings for Google apps and services that are inst...

Page 114: ...yboard on screen while a physical keyboard accessory is active u Keyboard shortcuts helper Display available shortcuts Text to speech output u Preferred engine Select the speech synthesis engine you want to use or change its settings u Speech rate Select how quickly you want the synthesizer to speak u Pitch Adjust the tone of spoken text u Reset speech rate Reset the speed at which the text is spo...

Page 115: ...ry status Back up my data Back up app data Wi Fi passwords and other settings to Google servers after you sign in to your Google account Backup account Back up data to a Gmail address Automatic restore Restore previously backed up settings and data when you reinstall an app Factory data reset Reset your tablet to factory default settings You can also erase the data on the tablet storage and memory...

Page 116: ...ins on your tablet such as using Color inversion and TalkBack for low vision users Printing Configure Cloud printing service options manage print jobs and more AT T Software Update Check for available software updates for your device About Tablet View tablet status legal information and other information You can also tap Additional system updates Storage card updates to install updates from update...

Page 117: ...arts may cause choking Your device can produce a loud sound To prevent possible hearing damage do not listen at high volume levels for long periods Avoid contact with anything magnetic Keep away from pacemakers and other electronic medical devices Turn off when asked to in hospitals and medical facilities Turn off when told to in aircrafts and airports Health and Safety Information ...

Page 118: ...ght or flashing light Don t dispose of your device in fire Avoid extreme temperatures Avoid contact with liquids Keep your device dry Do not attempt to disassemble your device Only use approved accessories Don t rely on your tablet as a primary device for emergency communications Health and Safety Information ...

Page 119: ... actual SAR level of the device while operating can be well below the maximum value This is because the tablet is designed to operate at multiple power levels so as to use only the power required to reach the network In general the closer you are to a wireless base station antenna the lower the power output The exposure standard for wireless devices employing a unit of measurement is known as the ...

Page 120: ...itions they all meet the government requirements SAR compliance for body worn operation is based on a separation distance of 0 mm between the unit and the human body Carry this device at least 0 mm away from your body to ensure RF exposure level compliant or lower to the reported level To support body worn operation choose the belt clips or holsters which do not contain metallic components to main...

Page 121: ... radio frequency energy and if not installed and used in accordance with the instructions may cause harmful interference to radio communications However there is no guarantee that interference will not occur in a particular installation If this equipment does cause harmful interference to radio or television reception which can be determined by turning the equipment off and on the user is encourag...

Page 122: ...arging system that has been qualified with the system per CTIA Certification Requirements for Battery System Compliance to IEEE 1725 Use of an unqualified battery or charger may present a risk of fire explosion leakage or other hazard Do not short circuit a battery or allow metallic conductive objects to contact battery terminals Replace the battery only with another battery that has been qualifie...

Page 123: ...go or products that have completed the USB IF compliance program Distraction Driving Full attention must be given to driving at all times in order to reduce the risk of an accident Using a wireless device while driving even with a hands free kit can cause distraction and lead to an accident You must comply with local laws and regulations restricting the use of wireless devices while driving Operat...

Page 124: ...ace Do not expose your device or its accessories to open flames or lit tobacco products Do not expose your device or its accessories to liquid moisture or high humidity Do not drop throw or try to bend your device or its accessories Do not use harsh chemicals cleaning solvents or aerosols to clean the device or its accessories Do not paint your device or its accessories Do not attempt to disassemb...

Page 125: ...harp edges that may cause an injury or may become detached and create a choking hazard Demagnetization To avoid the risk of demagnetization do not allow electronic devices or magnetic media close to your device for a long time Electrostatic Discharge ESD Do not tap the nano SIM card s metal connectors Antenna Do not tap the antenna unnecessarily Air Bags Do not place the device in the area over an...

Page 126: ...s To minimize the risk of Repetitive Strain Injury RSI when texting or playing games with your device Do not grip the device too tightly Press the keys lightly Use the special features that are designed to minimize the times of pressing buttons such as Message Templates and Predictive Text Take lots of breaks to stretch and relax Loud Noise This device is capable of producing loud noises which may...

Page 127: ...ty and Damaged Products Do not attempt to disassemble the device or its accessories Only qualified personnel can service or repair the device or its accessories If your device or its accessories has been submerged in water punctured or subjected to a severe fall do not use it until you have taken it to be checked at an authorized service center Radio Frequency Interference General Statement on Int...

Page 128: ...he level of interference will depend on the type of hearing device and the distance from the interference source increasing the separation between them may reduce the interference You may also consult your hearing aid manufacturer to discuss alternatives Medical Devices Please consult your doctor and the device manufacturer to determine if operation of your device may interfere with the operation ...

Page 129: ...e aircraft If your device offers a flight mode this must be enabled prior to boarding an aircraft Interference in Cars Please note that because of possible interference to electronic equipment some vehicle manufacturers forbid the use of mobile devices in their vehicles unless a hands free kit with an external antenna is included in the installation Health and Safety Information ...

Page 130: ...e atmospheres include fueling areas below decks on boats fuel or chemical transfer or storage facilities and areas where the air contains chemicals or particles such as grain dust or metal powders Blasting Caps and Areas Power off your mobile device or wireless device when in a blasting area or in areas posted with power off two way radios or electronic devices notices to avoid interfering with bl...

Page 131: ...is limited warranty is not transferable to any third party including but not limited to any subsequent purchaser or owner of the Product This limited warranty is applicable only to end users in the United States 1 This product is warranted for 12 twelve months from date of purchase 2 For warranty service information please call ZTE service number 877 817 1759 toll free The manufacturer s website h...

Page 132: ...e If the serial number or mobile accessory date code has been removed erased defaced altered or are illegible in any way subject to sole judgment of ZTE LIMITED WARRANTY TO THE EXTENT PERMITTED BY APPLICABLE LAW THIS LIMITED WARRANTY IS YOUR SOLE AND EXCLUSIVE REMEDY AGAINST ZTE AND ZTE S SOLE AND EXCLUSIVE LIABILITY IN RESPECT OF DEFECTS IN PRODUCT HOWEVER THIS LIMITED WARRANTY SHALL NOT EXCLUDE ...

Page 133: ... MATERIAL DESIGN AND WORKMANSHIP How to Get Warranty Service To obtain warranty service please call 877 817 1759 Please have the following information available when you send the device in for repair A valid Proof of Purchase Return address Daytime phone number or fax number Model number IMEI number Complete description of the problem Transportation prepaid Other Warranty Programs You may have oth...

Page 134: ...29 B30 B7 B1 CA B2 4 B12 B2 4 B29 B2 4 B5 Dimensions H W D 254mm 162 9mm 8 7mm Weight 525g Display 10 1 TFT LCD Full Lamination 1920x1200 FHD Camera 5MP AF rear 5MP FF front Video capture 1080p video Memory 2GB RAM 32GB ROM Battery 9070mAh Features Dual speaker Dolby DS1 Soft phone FM Continuous idle time 1438 48 hours Charge time 4 35 hours Specifications ...

Page 135: ...133 ...

Page 136: ...134 ...

Reviews: