


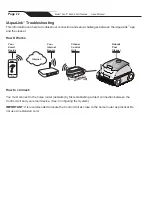
Common iAquaLink
™
Troubleshooting
Remember, if you get a new Wi-Fi Router, reset the defaults of your current Wi-Fi Router or simply change
your Wi-Fi network password, you will have to re-establish the connection between your cleaner and the
router. (See:
Configure the System
.)
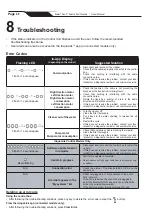
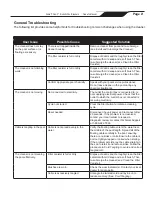
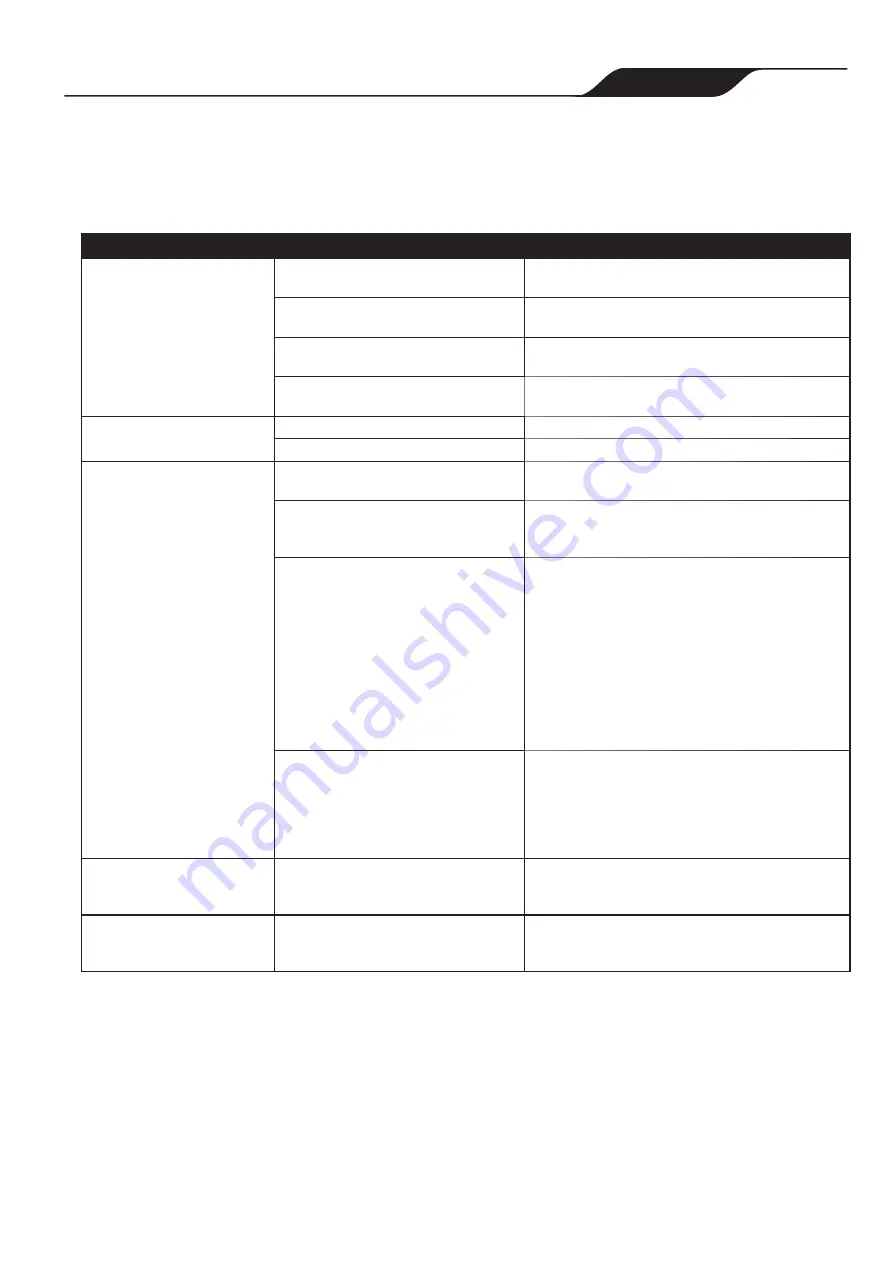
User Issue
Possible Cause
Suggested Solution
All lights are off
Bright sunlight
Shield the lights to block sunlight and re-check if
the lights are lit.
Control box is unplugged.
Plug the control box in. (See:
Connect to a Power
Source
).
Power outage.
Verify that the breaker is on and electricity is
being supplied to the outlet.
Lost internet connection.
Check internet connection - Network may be
down.
Wi-Fi is off
Router is off.
Turn router on.
Router password was changed.
Reset router with new password.
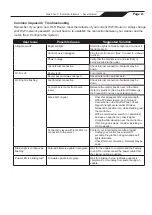
Wi-Fi light is flashing
Lost internet connection
Check internet connection - Network may be
down.
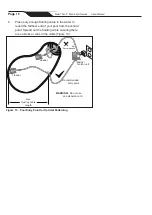
Control box is too far from home
router
Relocate the control box as near to the home
router as practical. (See:
Install and Submerge
the Cleaner
) Do not use an extension cord.
Weak Wi-Fi signal
• Check for adequate Wi-Fi signal strength.
• With a Windows laptop, go to Network
Connections in the Control Panel. Check
Signal Strength meter under Wireless
Network Connection icon while standing near
the control box.
• With a smart device, search for, download,
and use an app that can check signal
strength while standing near the control box.
If Wi-Fi signal is weak, consider installing a
Wi-Fi extender.
Connectivity issue with local Wi-Fi or
connection to the server
Contact your local internet service provider.
• Unplug your control box and wait 10
seconds. Plug in the box again and see if
lights illuminate.
• Check Internet connection - Network may be
down.
Status light is continuously
flashing
Antenna firmware update in progress. Wait for the update to complete and the flashing
to end. Do not disconnect the power cable from
the cleaner during an update.
Power LED is blinking fast
Firmware update in progress
Wait for blinking to stop, indicating update is
complete. Do not unplug from power during an
update.
Page
23
Zodiac
®
Duo-X
™
Robotic Pool Cleaners
|
Owner's Manual


