16
Channel
DVR
Quick
Manual
9
dome,
with
the
4
options
of
1200,
2400,
4800
and
9600
DATA
BIT
:
with
the
options
of
5,
6,
7
and
8,
8
by
default
STOP
BIT
:
with
the
options
of
1
and
2,
1
by
default
VERIFY:
with
the
5
options
of
None/Odd/Even/Mark/Space,
None
by
default
ADDRESS
:
Complete
the
PTZ
code
of
the
corresponding
channel.
Just
set
“protocol”,
“baud
rate”
and
“address
code”
in
order
to
set
the
PTZ.
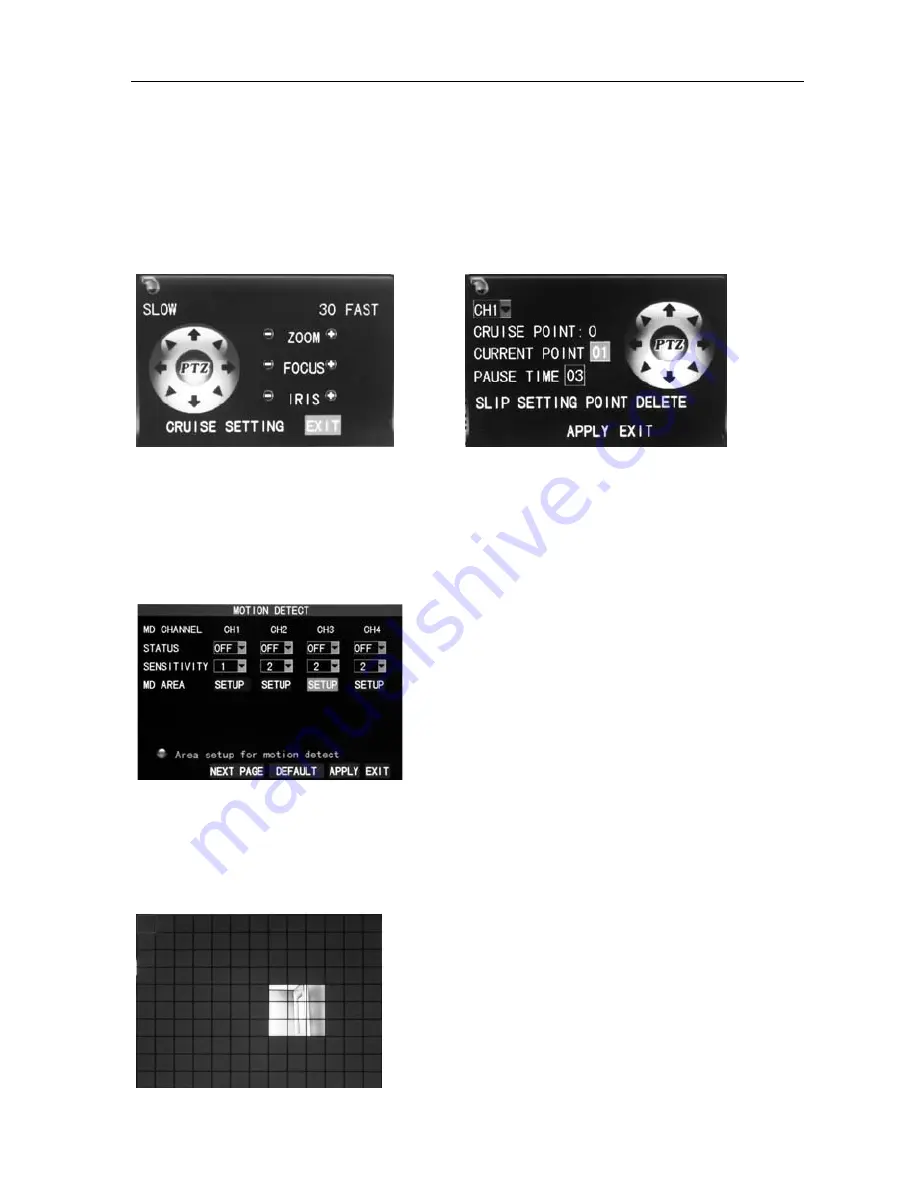
Click
"PTZ
control"
in
the
main
interface,
the
following
screen
will
pop
up
(left
picture):
Operate
the
PTZ
with
mouse
through
the
keypad
on
the
interface.
Set
the
cruise
point
in
the
cruise
setup,
as
shown
on
the
right
picture
above.
2.7
Motion
Detection
Enter
the
Motion
Detection
screen
from
“Main
Menu”
→
“Advanced”
to
“Motion
Detection”,
as
shown
below:
STATUS
:
Each
channel
has
a
corresponding
switch.
Select
“On”
or
“Off”.
SENSITIVITY
:
Each
channel
has
a
corresponding
sensitivity
setting,
with
the
4
levels
of
1,
2,
3
and
4,
in
which
4
is
the
highest.
Select
sensitivity
for
confirmation.
MD
AREA:
Each
channel
has
a
corresponding
motion
detection
area
setting.
Move
the
cursor
to
“Setup”
of
the
corresponding
channel,
and
press
“Enter”
to
enter
the
motion
area
setup
screen
of
this
channel,
where
a
red
block
indicates
motion
detection
is
activated
for
this
area
and
a
transparent
block
indicates
motion
detection
is
not
activated,
as
shown
below.
Motion
detection
setup
procedures:
A.
Turn
“On”
the
corresponding
channel
in
the
“Channel
Switch”
option;
B.
Set
the
sensitivity
level
as
necessary,
usually
set
at
3
or
4;
C.
Set
the
motion
area
of
the
corresponding
channel
in
the
“Area
Setup”
option;
D.
In
the
“Recording
Mode”
screen,
set
the
corresponding
channel
to
“On”
in
the
“Channel”
option;


