


OP200 Quick Start Guide
17
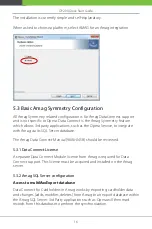
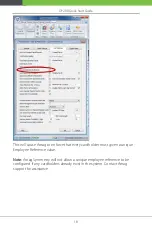
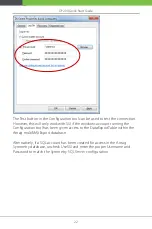
The administrator must choose and configure credentials (ether a Windows
account or a SQL Server username and password) to use for the 3rd Party Data
Connect applications to connect to the Amag multiMAXExport database and
have read and write authority to the DataExportTable table within that
database. This must be configured within the Amag SQL Server database
using a tool such as SQL Server Management Studio. Contact Amag support
for assistance. As part of the ZK Opera Service configuration, these credentials
will be made known to Opera to use.
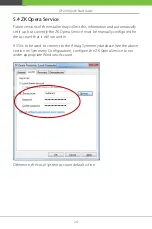
Note that Amag support has indicated that the 3rd Party Data Connect
application is responsible for deleting rows from the DataExportTable once
they are processed so that the table does not grow unbounded. Thus, the ZK
Opera Service does this. Note, however, that this implies that only a single 3rd
Party Data Connect application can integrate with a given Amag system for
cardholder export.
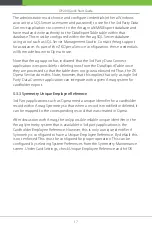
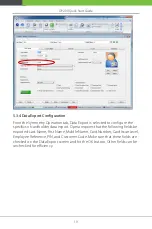
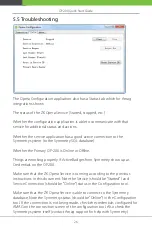
5.3.3 Symmetry Unique Employee Reference
3rd Party applications such as Opera need a unique identifier for a cardholder
record within Amag Symmetry so that when a record is modified or deleted, it
can be mapped to the corresponding record that was created in Opera.
After discussion with Amag, the only possible reliable unique identifier in the
Amag Symmetry system that is available to 3rd party applications is the
Cardholder Employee Reference. However, this is only a unique identifier if
Symmetry is configured to have a Unique Employee Reference. By default this
is not enforced. This must be configured for proper operation. This can be
configured by selecting System Preferences from the Symmetry Maintenance
screen. Under Card Settings, check Unique Employee Reference and hit OK.
Summary of Contents for OP-200
Page 1: ...OP200 Quick Start Guide 1 QUICK START GUIDE Applicable Model OP 200 Version 1 2 Date May 2019 ...
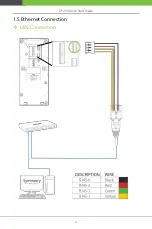
Page 9: ...OP200 Quick Start Guide 6 1 5 Ethernet Connection LAN Connection ...
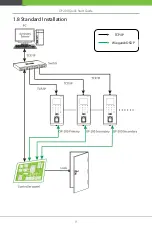
Page 12: ...OP200 Quick Start Guide 9 1 8 Standard Installation TCP IP Wiegand OSDP ...
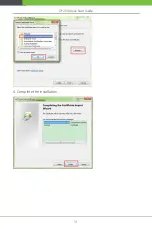
Page 34: ...OP200 Quick Start Guide 31 4 Complete the installation ...
Page 36: ...OP200 Quick Start Guide 33 2 Display the certificate settings 3 Add the server exception ...
Page 41: ...OP200 Quick Start Guide 38 ...
Page 48: ...OP200 Quick Start Guide 45 ...
Page 49: ...OP200 Quick Start Guide 46 The following figure shows enroll fingerprint successfully ...


