background image

22 


5.3


Metrological self-check  


Inclinometers ZET 7154 have a function of metrological self-check. 

A reference signal is applied to the sensing element of the inclinometer in order to imitate the 

change of tilt angle at a particular value.  

The  deviation  of  the  measured  value  from  the  reference  one  is  used  to  evaluate  the 

metrological reliability of the inclinometer.  

In the case of regular metrological self-check of the inclinometers (at least once per 12 month) 

it is possible to increase the calibration interval in 5 times.  

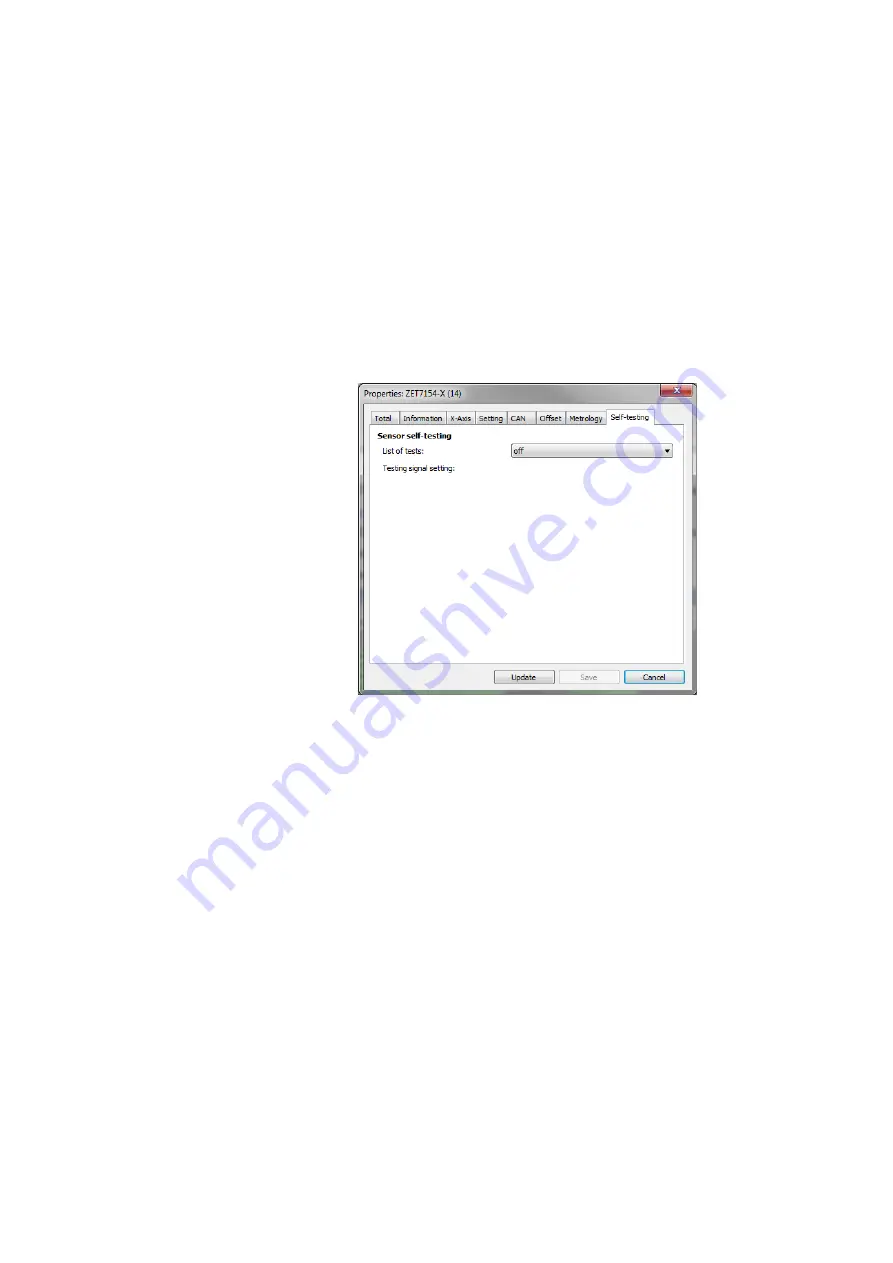
The tab “Testing” (

Figure 5.3

) is used for metrological self-check performance.  


Figure 5.3 “Testing” tab 


Self-check procedure: sequence: 

1.


Mount the inclinometer at a horizontal surface.   

2.


Enter the measured value in the Tabs “Axis X” and “Axis Y” (initial readings).  

3.


Enter the tab “Testing”, select “Measurement” in the list of tests and save the measurement 

results.  

4.


Check the current measured value in the tabs “Axis X” and “Axis Y”. The new readings 

should more than the initial readings by 17-30 degrees – in this case, the metrological self-check 

shall be considered to be passed.  

5.


To disable the self-check mode, select the “off” option in the list of tests in the “Testing” 

tab, or switch-off the power supply of the inclinometer. 

Summary of Contents for ZET 7054

Page 1: ...DIGITAL INCLINOMETER ZET 7054 ZET 7154 USER MANUAL LLC ETMS...

Page 2: ...ntacts labelling 9 2 4 Digital inclinometers mounting 10 2 5 Establishing measuring network connection diagram 11 3 PARAMETERS CONFIGURATION PREPARATION 12 3 1 Connection of digital inclinometers 12 3...

Page 3: ...ng installation start up and pre starting procedure can be conducted by the User or by a representative of the organization performing technical maintenance of the equipment as per provisions of the A...

Page 4: ...tilt angle of industrial residential and municipal facilities The inclinometers can be easily installed on the controlled facility without the need to connect any external primary transducers 1 3 Ope...

Page 5: ...acitance transducer Data refresh rate Hz 1 Data interface RS 485 CAN 2 0 Power supply voltage V 9 24 Consumed power W 0 5 Protections class Industrial version Explosion proof version IP65 IP67 Dimensi...

Page 6: ...Delivery scope of ZET 7x54 Item Quantity 1 Tiltmeter ZET 7 54 1 pc 2 Adjusting plate for ZET 7 54 1 pc 3 Plug for the cable FQ14 4TJ 7 2 pcs 4 CD with ZETLAB SENSOR software 1 pc 5 Product certificate...

Page 7: ...digital inclinometer industrial version General dimensions and mounting dimensions of inclinometer industrial version are specified in Figure 2 2 Figure 2 2 Mounting dimensions of digital inclinomete...

Page 8: ...rnal view of explosion proof product version of the inclinometer is shown in Figure 2 3 Figure 2 3 External view of explosion proof product version of the inclinometer Mounting dimensions of the incli...

Page 9: ...4 V 2 RS 485 line B or DATA CAN 2 0 line H 3 RS 485 line A or DATA CAN 2 0 line L 4 GND Figure 2 5 Contacts labelling for connection to measuring network Connectors FQ14 4ZK S are intended for connect...

Page 10: ...te has four holes with 5 5 mm diameter for mounting on the controlled surface Figure 2 6 Mounting of ZET7x54 with the use of adjustment plate The selected range of tilt angle measurements for measurin...

Page 11: ...connected to the PC by means of interface converter Table 3 1 Figure 2 7 displays the measuring network based on digital transducers ZET 7154 Figure 2 7 Variants of establishing measuring lines with...

Page 12: ...rogram Device manager Configuration of digital transducers is conducted in the program Device manager available in the Service menu of ZETLAB control panel Figure3 1 Figure 3 1 ZETLAB panel The left s...

Page 13: ...Please note that it is necessary to set unique address for every device in the measuring network in the section Address node from 2 up to 63 of the Information tab In order to secure normal operation...

Page 14: ...splays the measured value of the channel at the moment of tab activation Refresh rate Hz Depends on the value selected for the parameter Conversion frequency of the Sensor tab Measurement unit Corresp...

Page 15: ...15 Figure 4 1 shows an example of the tab Axis Figure 4 1 The tab Axis X...

Page 16: ...Exponential moving average order No 256 Number of averaged counts Exponential moving average Yes 0 001 1 Ratio for EMA filter which is calculated by the formula DMAt EMAt 1 DMAt 1 The more is the valu...

Page 17: ...17 Figure 4 2 shows an example of Settings tab Figure 4 2 Settings tab...

Page 18: ...tatus Yes off on If the Offset option is disabled the values by X and Y axes are set to zero The offset value is displayed in the field Displacement by axis of the Settings tab As the Offset function...

Page 19: ...you can visually control the stabilization process with the use of the program multichannel oscilloscope from the scope of ZETLab software Then select the option On and save the settings again The dig...

Page 20: ...nometers 5 1 Checksum control The Metrology tab contains digital ID of the software The field Digital ID should have the value 81964459B471A73B777AD09E1FD45773 Figure 5 1 shows an example of Metrology...

Page 21: ...hronization quality while inclinometers ZET 7054 have only the function of data quality control Figure 5 2 shows an example of the program Synchronization control Figure 5 2 Example of the program Syn...

Page 22: ...5 times The tab Testing Figure 5 3 is used for metrological self check performance Figure 5 3 Testing tab Self check procedure sequence 1 Mount the inclinometer at a horizontal surface 2 Enter the me...

Reviews: