17
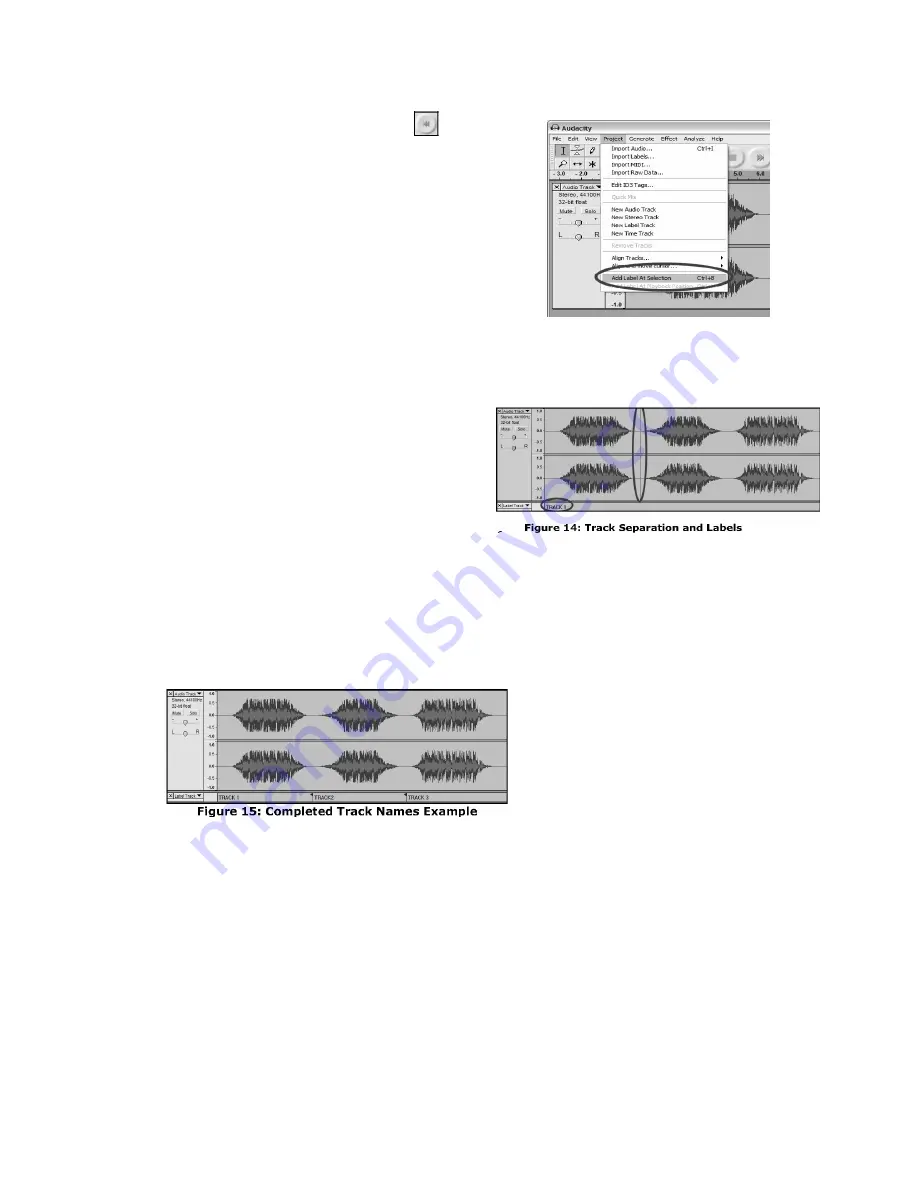
Manually Dividing Your Album:
1.
Press the
Skip to Start
button
to move to the
beginning of the recording
2.
Select the
Project
menu and then select
Add
Label At Selection
. This will set the starting point
of the first track.
3.
Type in the name of the first track, the text will
show at the label marker. (See 14)
4.
Select the space between tracks (where there is
no audio) by clicking once. (vertical circle below)
5.
You will see a line where you clicked.
6.
Then repeat Step 4: Add Label At Selection.
7.
Note: you can add or edit any track name (circled).
8.
Repeat this process for adding labels for
all tracks. You may need to zoom in to
select the tracks and track separation. You
may also want to hear the part of the track
before you add a label for the track. Use
the space bar to easily start and stop
playback.
Note: the label is placed at the START of the track. For example, in 15, TRACK 1 is
labeled at the beginning of audio recording. Track 2 is the label between the first and third
track. You can also edit track names after they have been exported from Audacity.
In this three-track example, the final break up is shown in Figure 15


